Azure Basic Configuration
Get started by configuring the basic parameters required to deploy Sparrow Community Edition on Azure.
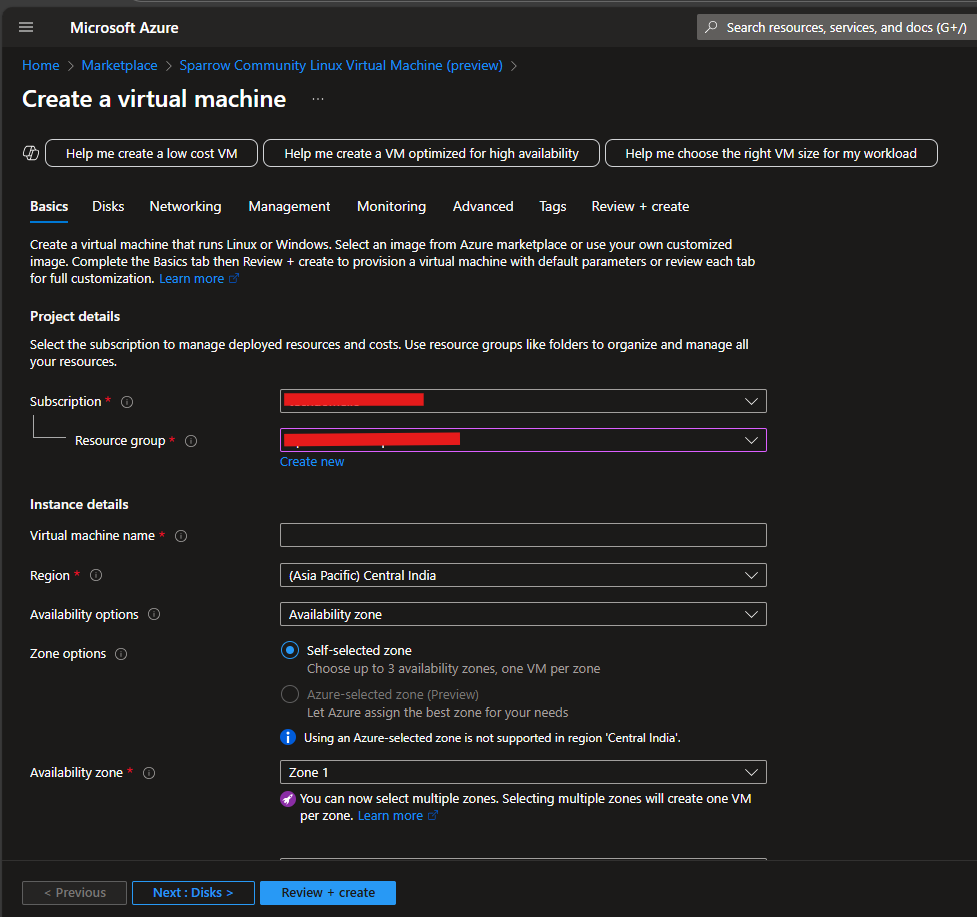
Step 1: Select Your Subscription
- Choose the Azure subscription where you'd like to deploy Sparrow.
tip
If you have multiple subscriptions, pick the one with sufficient resource quotas.
Step 2: Resource Group
- Select an existing Resource Group
- Or click Create new to organize related resources together
tip
Use something like sparrow-rg for clarity.
Step 3: Virtual Machine Name
- Enter a name for your VM, e.g.,
SparrowVM.
info
VM names must be unique within the resource group.
Step 4: Choose a Region
Pick an Azure Region close to your users for best performance.
- For example:
East US,West Europe, orSoutheast Asia.
Shown below is the reference of configuration corresponding to the steps mentioned above
Step 5: Confirm Image
Ensure the image selected is:
- Sparrow Community Edition
(Pre-configured and published by Techdome Solutions)
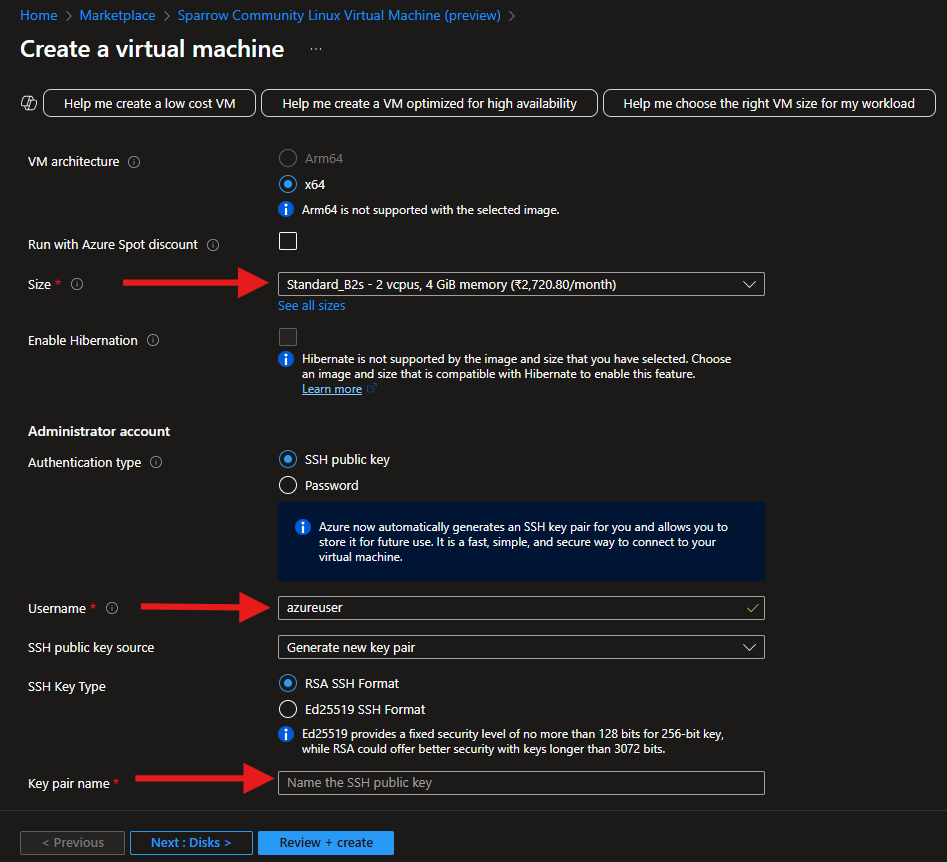
Step 6: Select a VM Size
Choose a VM size based on your usage needs.
- Recommended:
Standard_B2s - For higher workloads: consider
Standard_D2s_v3or higher
note
You can scale the VM later from the Azure portal.
Step 7: Configure Authentication
Choose how you want to access the VM:
- SSH Public Key (Recommended for security)
- Password (Only if required)
Shown below is the reference of configuration corresponding to the steps mentioned above