Rest API
A REST API is an application programming interface that confirms to the constraints of REST architectural style and allows for interaction with RESTful web services. An API is a set of definitions and protocols for building and integrating application software. It’s sometimes referred to as a contract between an information provider and an information user—establishing the content required from the consumer (the call) and the content required by the producer (the response).
In other words, if you want to interact with a computer or system to retrieve information or perform a function, an API helps you communicate what you want to that system so it can understand and fulfill the request. You can think of an API as a mediator between the users or clients and the resources or web services they want to get.
Add New API Request
In Sparrow, you can add an API request as defined in the collection section or by clicking the + icon beside the tab or beside the filter icon.
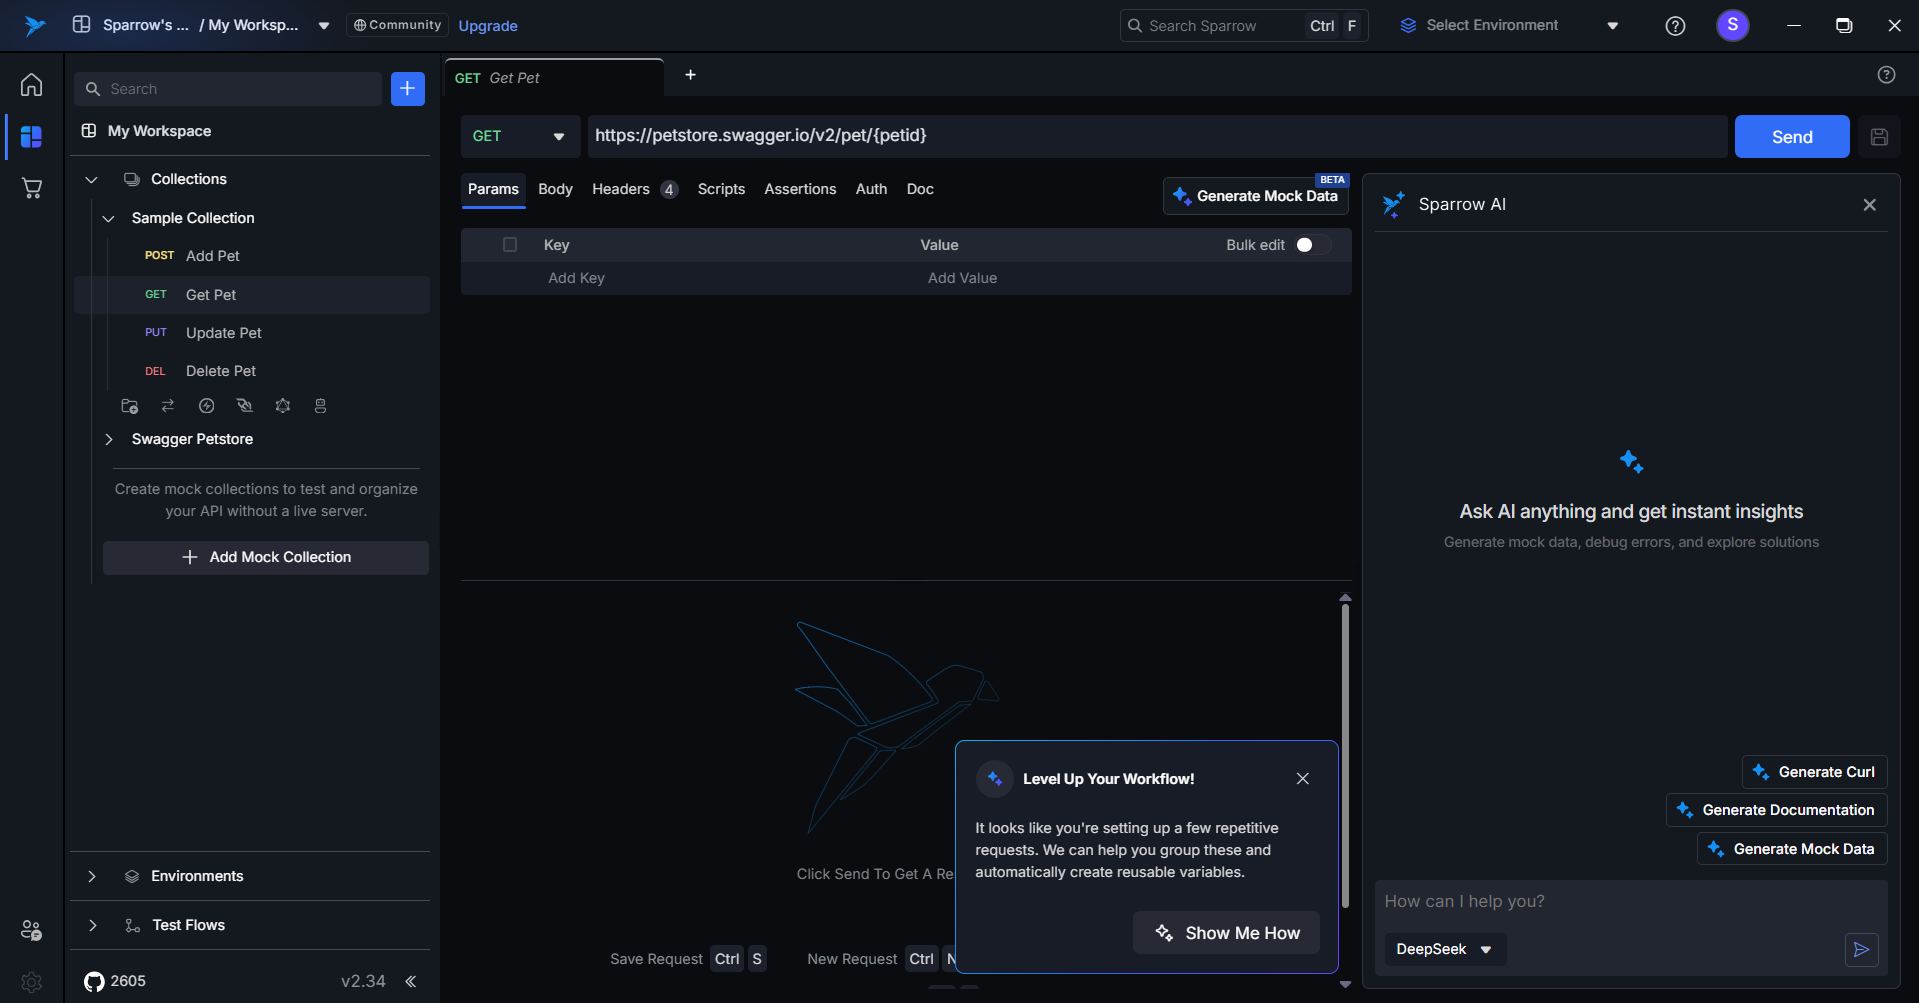
A new API request would be created with the request type as GET request. You can rename the API request by using the right-click options against the API request created.
API Request Elements
A REST API can be of different types – GET, POST, PUT, DELETE, PATCH, and so on. You can select the type of request from the dropdown options provided.
Beside the type of the API request, a text box is provided to enter the endpoint of the API. Once you have selected the request type and provided the endpoint of the API, hit the send button to send the request and get the response.
You can change the type of view of the API request into Horizontal or Vertical view. You can change the view as per your convenience.

Parameters
Parameters refer to the values that you include in your API requests to customize and modify the behavior of those requests. Parameters are crucial for interacting with APIs because they allow you to send specific information to the server, retrieve specific data, or execute certain actions.
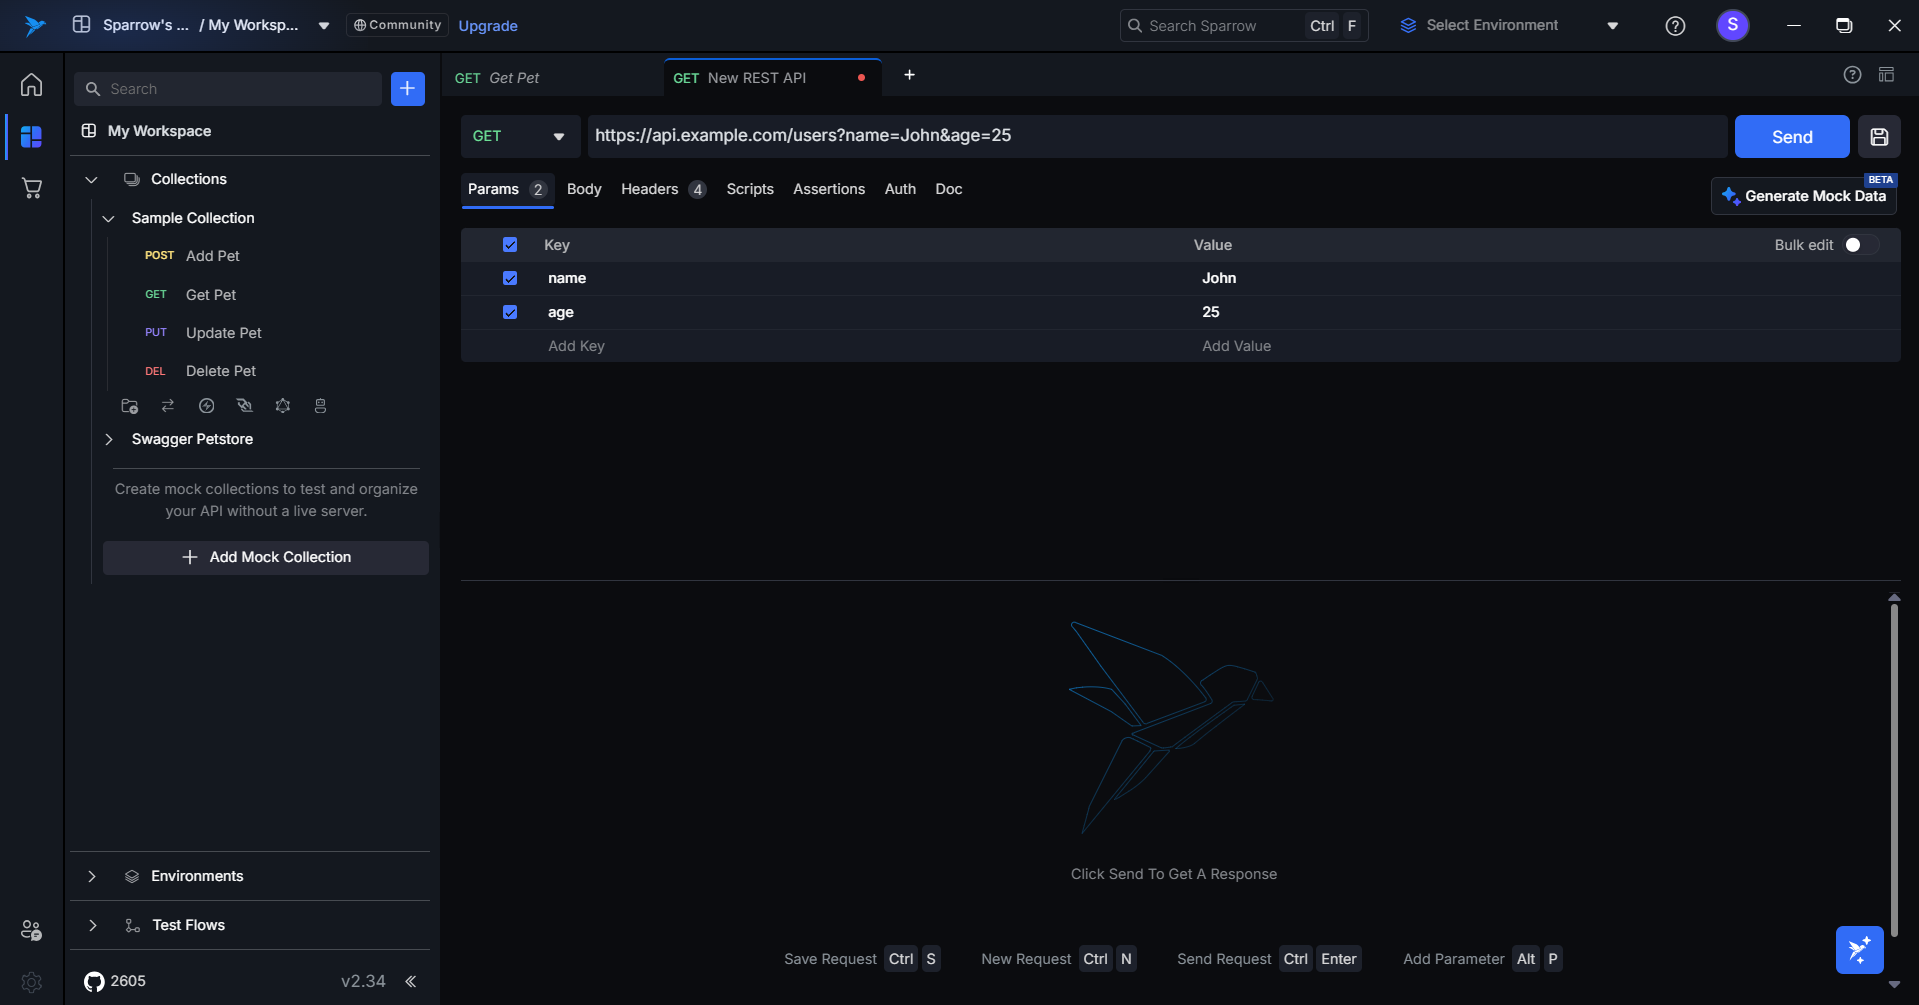
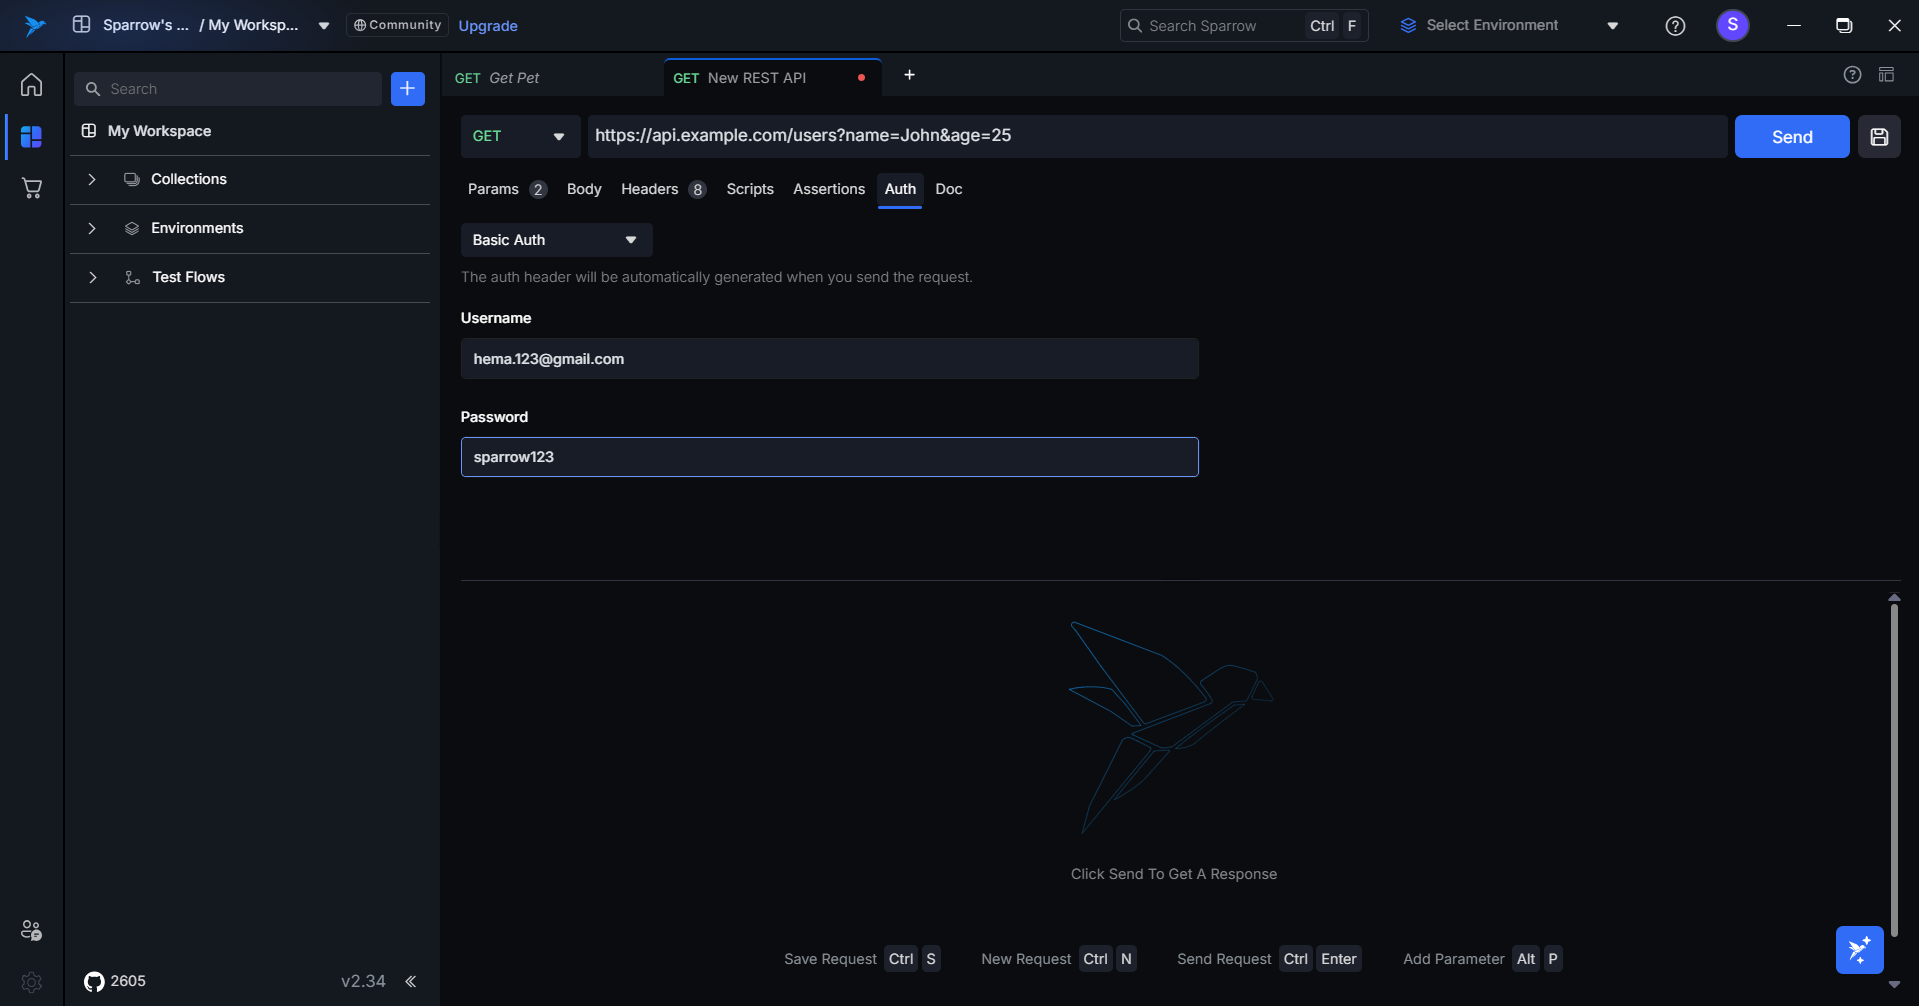
There are different types of parameters, and their usage depends on the API you are working with. The most common parameter used in API requests are query parameters. These are key-value pairs appended to the end of the URL in a GET request. They are used to filter, sort, or modify the response data. For example, in the URL https://api.example.com/users?name=John&age=25, "name" and "age" are query parameters.
-
To provide the parameters, just enter the parameter key and the value. Once you enter the key of the first pair, a second row is created automatically for the second key-value pair entry if needed.
-
The parameters entered are appended to the API requests automatically. Suppose if you have entered many parameters but do not want to send a few parameters as part of the API request, then you can uncheck the checkbox or delete the parameter by clicking the delete icon provided against each parameter.
-
Use the Bulk Edit option to add or edit multiple parameters simultaneously by toggling the bulk edit button. After making the necessary changes, toggle the switch again, and all data will be presented in a key-value format. This feature streamlines the process of updating multiple entries efficiently.
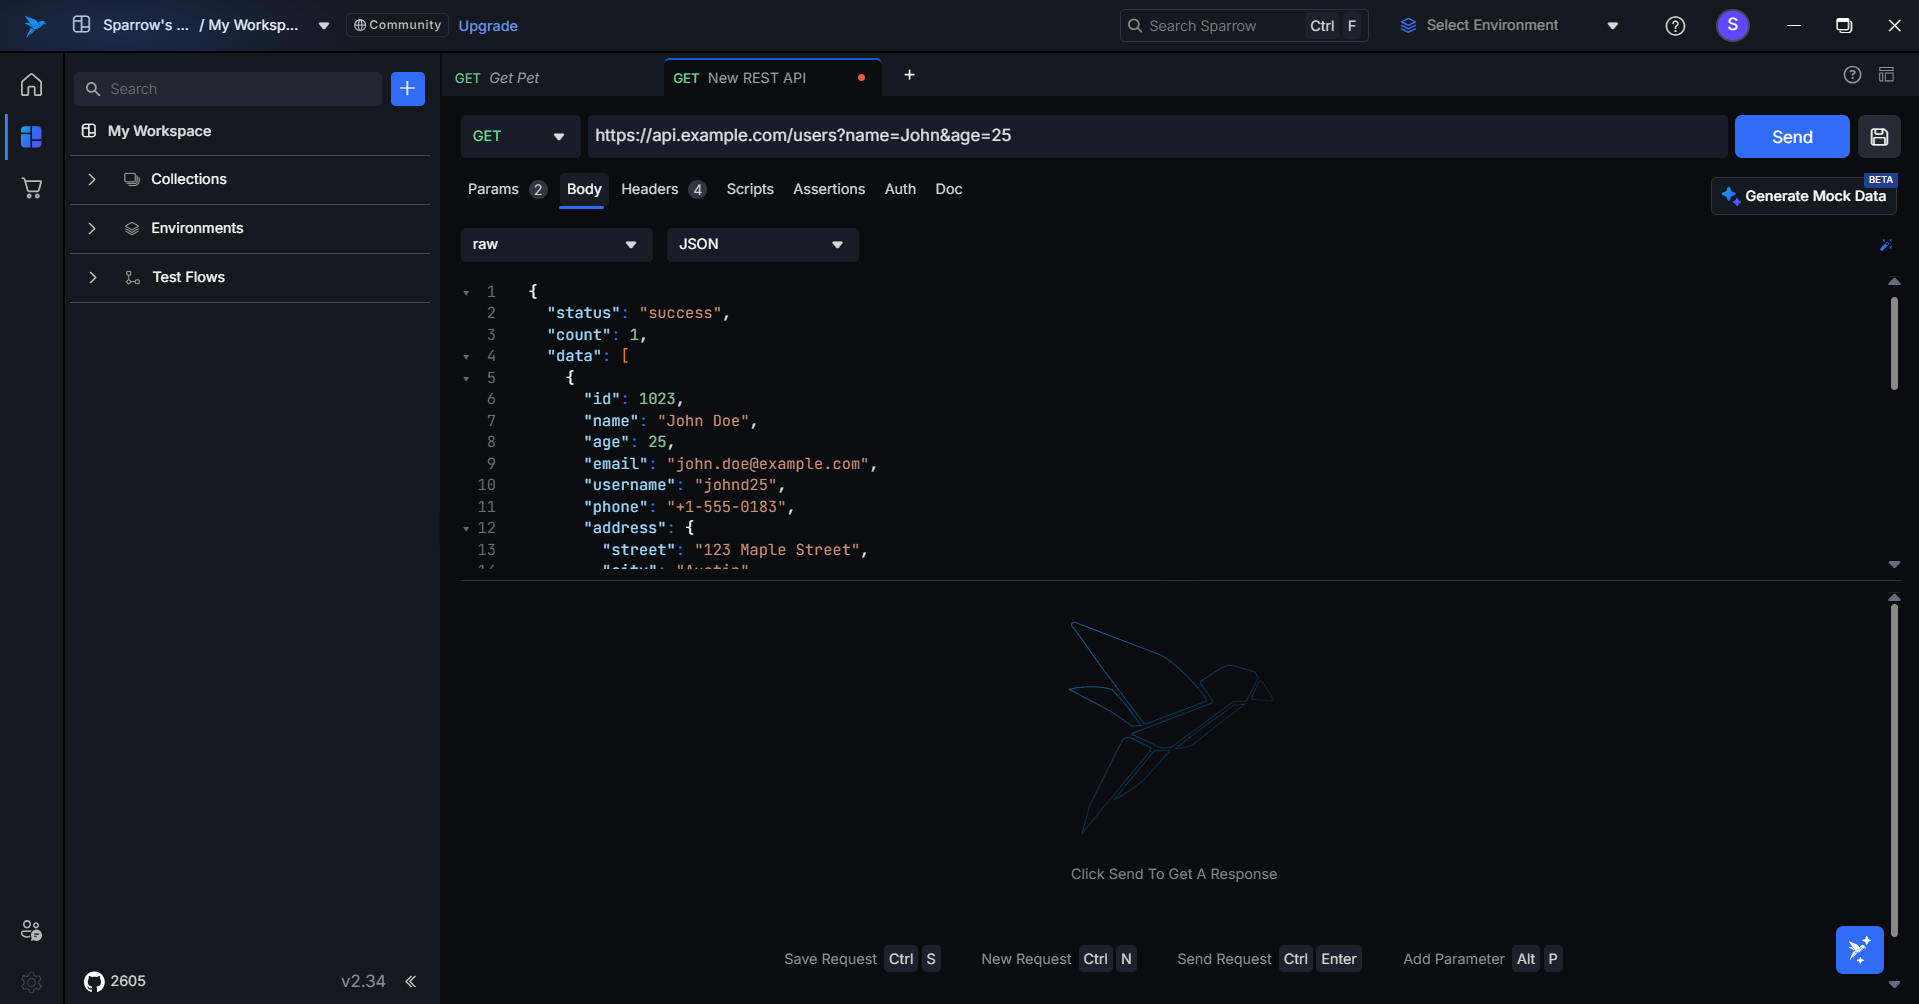
Request Body
Request body refers to the data that you include with a request, typically in the form of payload, when making HTTP requests that require additional information beyond the URL, headers, and so on. The request body is commonly used in HTTP methods such as POST, PUT, and PATCH to send data to the server.
The content of the request body is determined by the type of data the server expects and the content type specified in the request headers. Common formats for request bodies include JSON, XML, form data, and others. The structure and content of the request body depend on the API endpoint you are interacting with.
The request body is a critical part of many API interactions, as it allows you to send and receive data in a structured format.
- For the request body, select the data types from the dropdown.
- Once you select the data type from the dropdown, provide the request body in the space provided.
Headers
Request headers in Sparrow, as in any HTTP request, are key-value pairs included in the header section of the request. These headers provide additional information about the request or the client making the request. Headers play a crucial role in communication between the client (Sparrow) and the server. In Sparrow, you can easily set and manage these headers for each request.
-
To provide the headers, just enter the header key and the value. Once you enter the key of the first pair, a second row is created automatically for the second key-value pair entry if needed.
-
Suppose if you have entered many header key-value pairs, but do not want to send a few headers as part of the API request, then you can uncheck the checkbox or delete the headers by clicking the delete icon provided against each header.
-
In addition to the above, you can also see the section dedicated to auto-generated headers. These are the headers generated automatically and would be passed automatically. However, you have the liberty to check or uncheck the auto-generated headers which are not mandatory.
-
Use the Bulk Edit option to add or edit multiple headers simultaneously by toggling the bulk edit button. After making the necessary changes, toggle the switch again, and all data will be presented in a key-value format. This feature streamlines the process of updating multiple entries efficiently.

Each request in your collection can have its own set of headers, allowing you to customize the information sent to the server with each request.
Authorization
Authorization refers to the process of providing credentials or tokens to authenticate and verify the identity of the client making an API request. Authorization is essential when interacting with secure APIs that require authentication to ensure that only authorized users or applications can access protected resources. Sparrow provides various methods for handling authorization, making it convenient for users to interact with authenticated APIs.
Here are some common methods of authorization in Sparrow:
- Basic Auth: This method involves sending a username and password as part of the request headers. The credentials are typically encoded in Base64 format. In Sparrow, you can enable Basic Auth for a request by entering the username and password in the request settings.
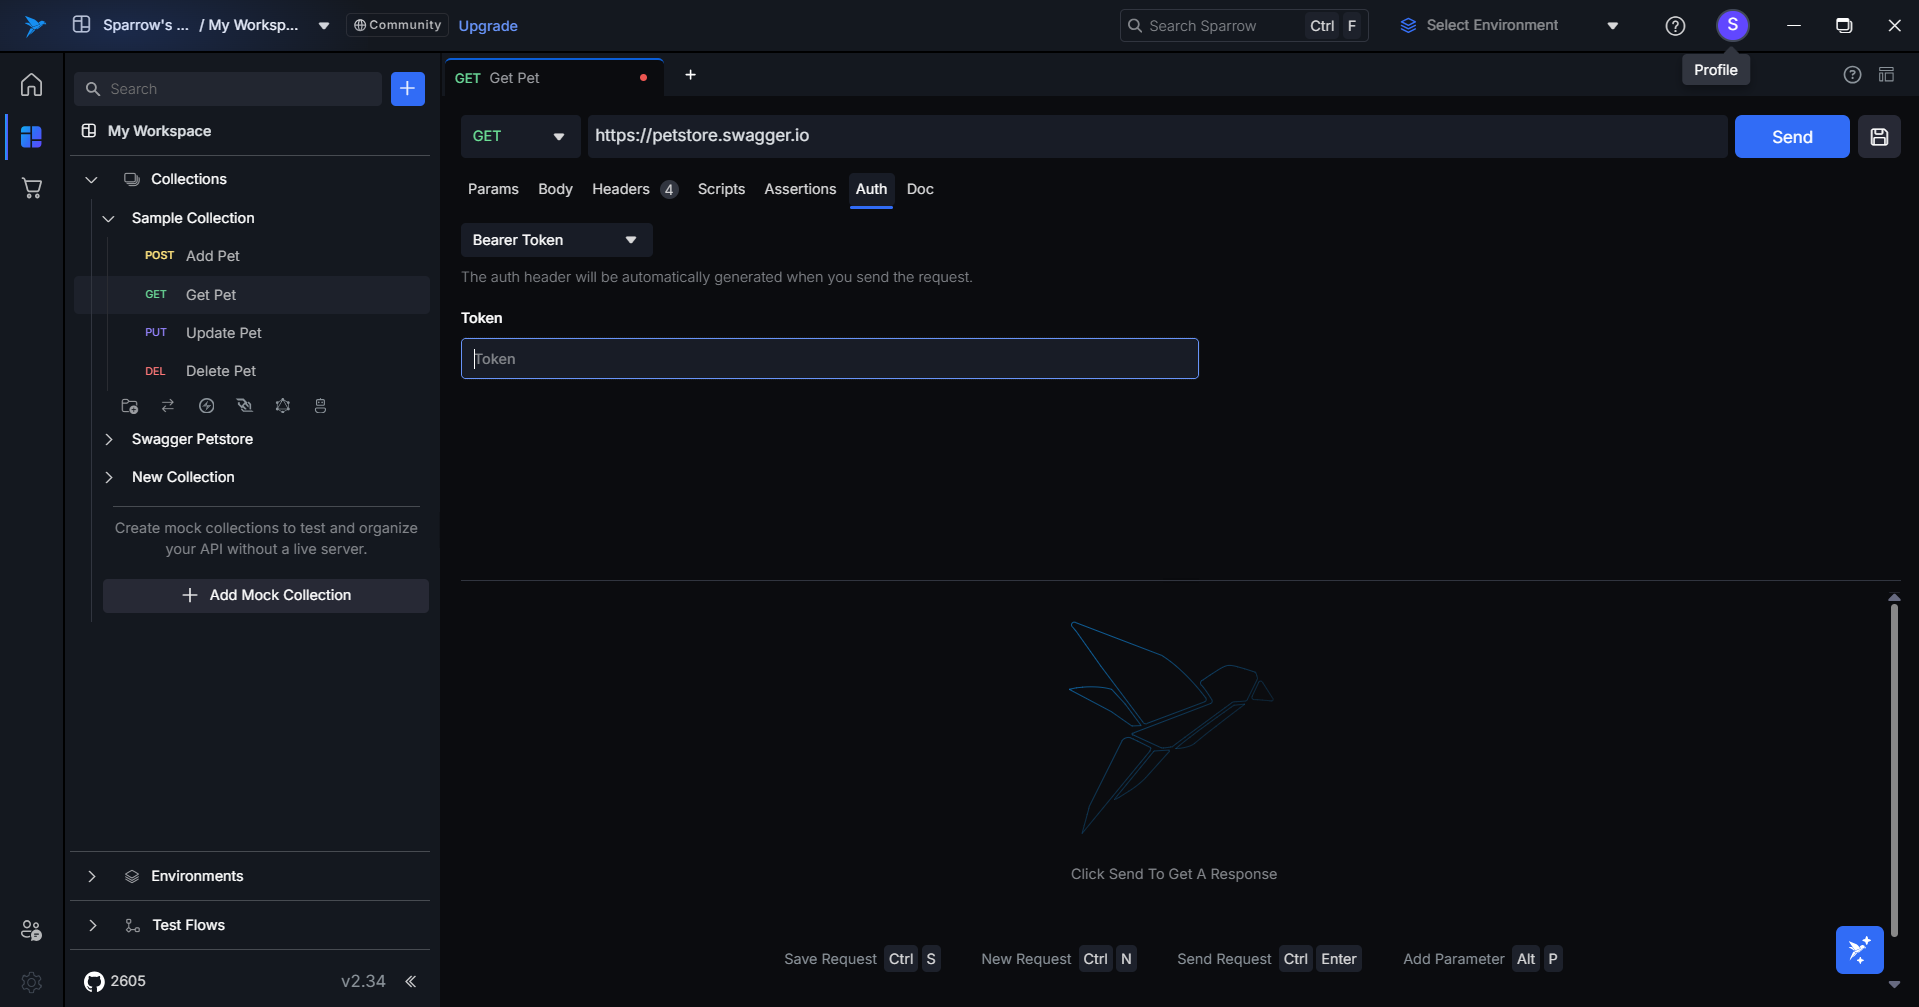
- Bearer Token: Bearer token authorization involves including a token in the "Authorization" header of the request. This token is often obtained through a separate authentication process, such as OAuth 2.0. In Sparrow, you can set the type of authorization to "Bearer Token" and provide the token value.
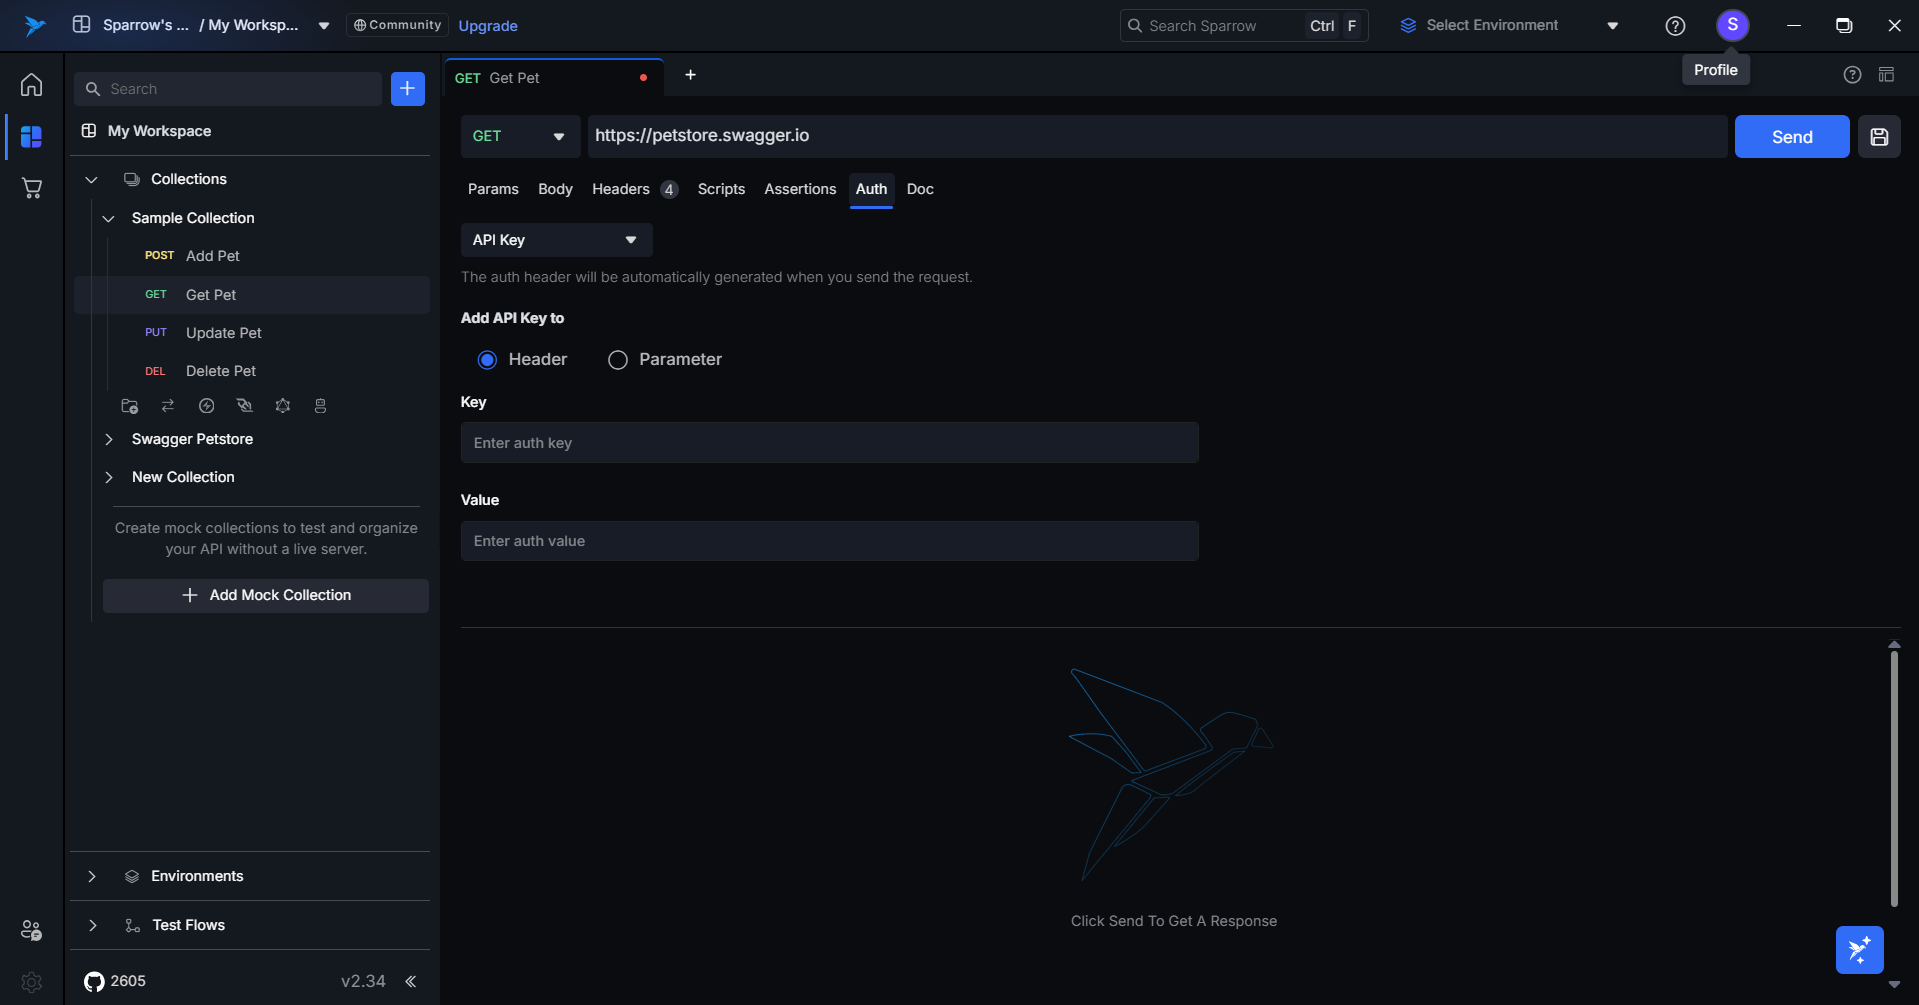
- API Key: Some APIs require an API key for authentication. In Sparrow, you can include the API key in the request headers by specifying the key name and value. API keys are often provided by the API provider upon registration.
Assertions
The Assertions is that no need of write the script while we are creating a tests for a request, use UI we can set test with condition they can pass.
- Script: Users can write custom test scripts using JavaScript. To ensure compatibility, specific prefix syntax must be followed. The platform also offers AI-assisted generation of JavaScript test cases, streamlining the process. Additionally, a library of common snippets is available for direct use in the script panel, allowing users to execute tests immediately after receiving a response.
Assertions: No Code
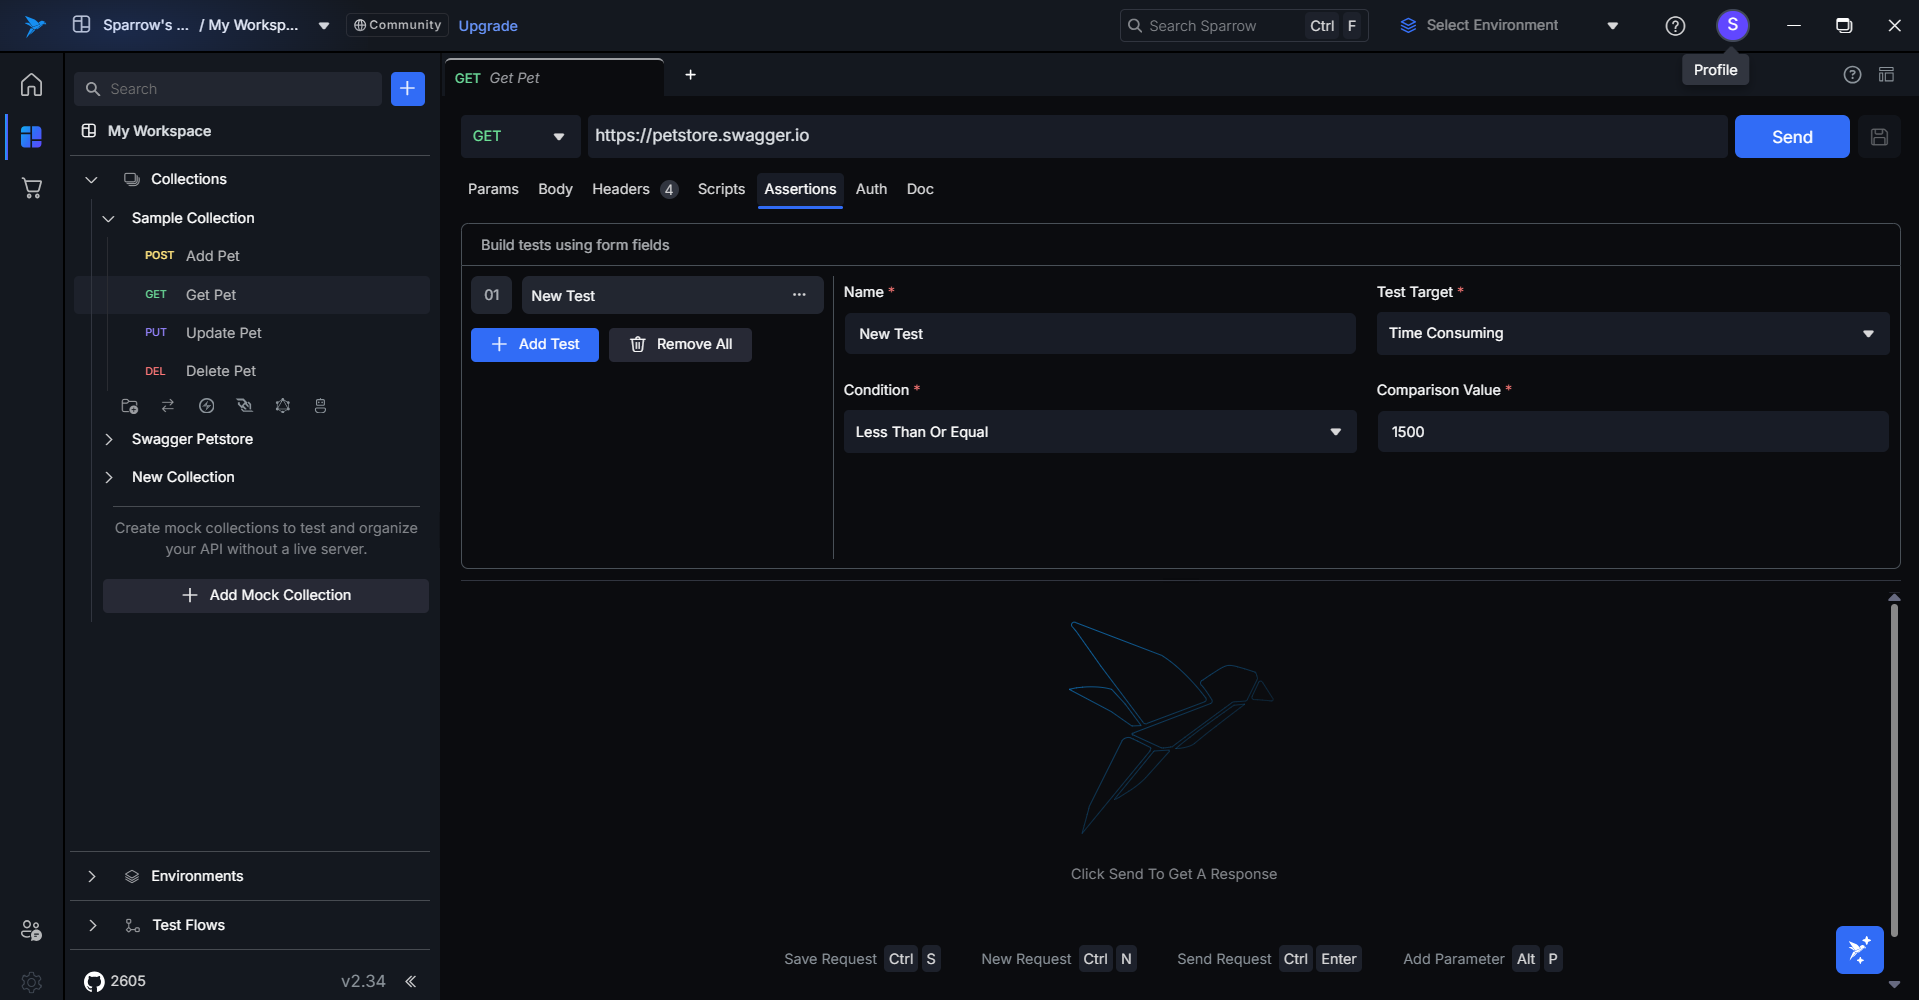
Step-by-Step Guide: Integrating Tests Using the Assertions (No-Code Approach)
- Open the REST Tab: Navigate to any REST tab, click on the Assertons section
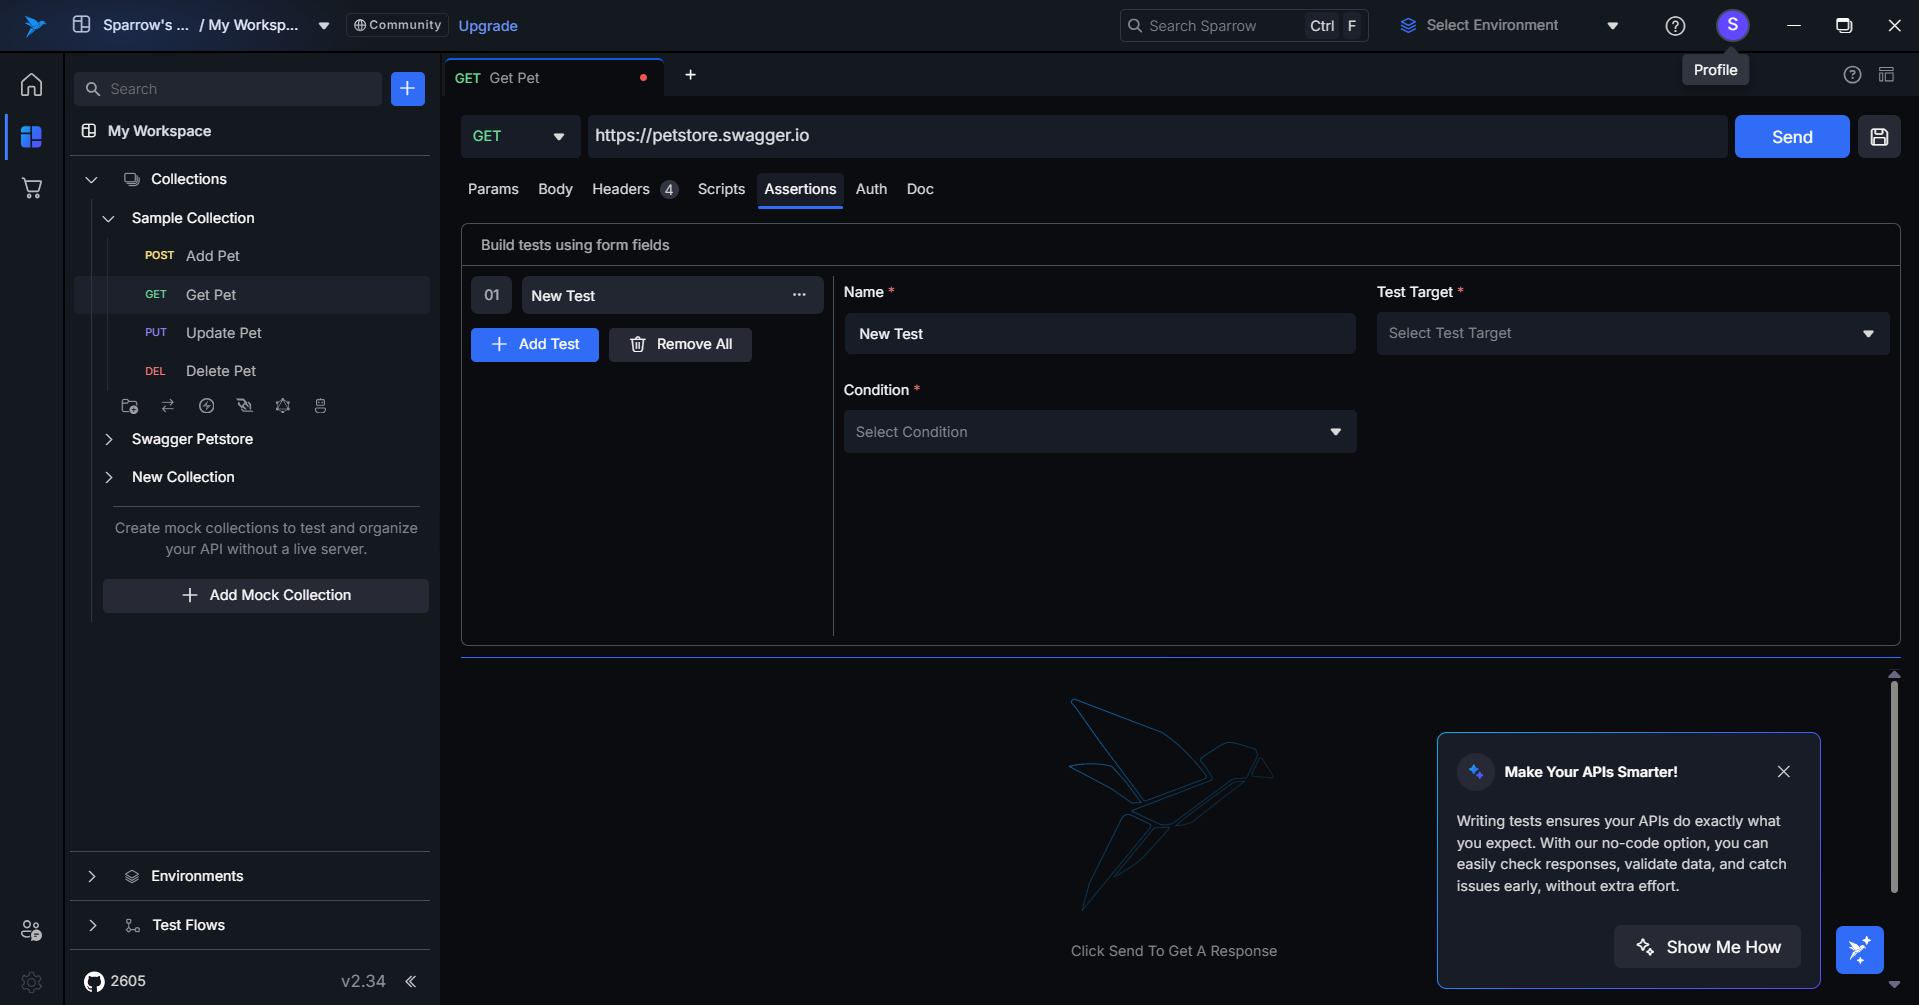
- Configure the Test Case: On the right-hand side panel:
- Name: Provide a meaningful name for your test case.
- Test Target: Choose the source from which the value will be extracted (e.g., response headers, response JSON).
- Condition: Select the condition type to apply (e.g., equals, contains, greater than).
- Comparison Value: Define how the extracted value should be compared against the expected result.
 3. Use Predefined Templates:
A variety of predefined test case templates are available. Select one based on your specific testing needs.
3. Use Predefined Templates:
A variety of predefined test case templates are available. Select one based on your specific testing needs.
- Run the API Request: Once all test parameters are set, run the API request. The Response Tests section will display the results, showing how many test cases passed or failed.
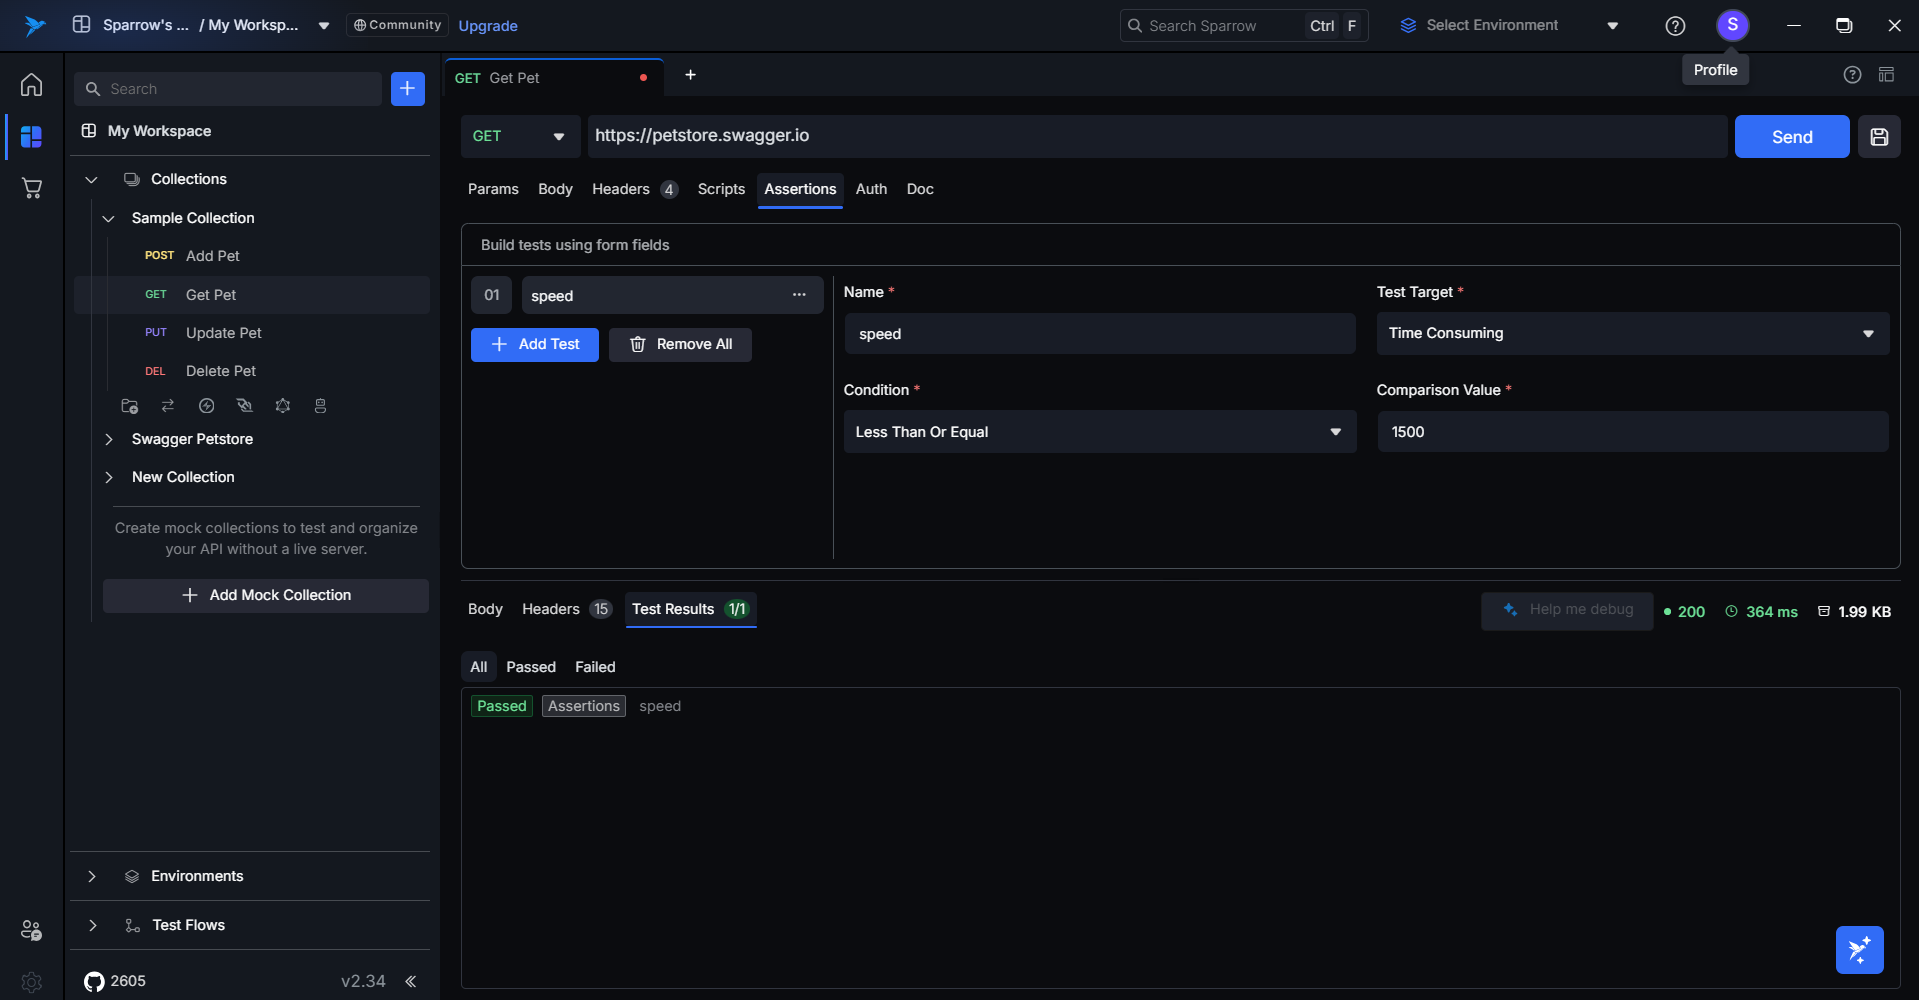
- Save the Request: To retain your no-code test cases for future use, make sure to save the request. Saved tests can be reused or modified as needed.

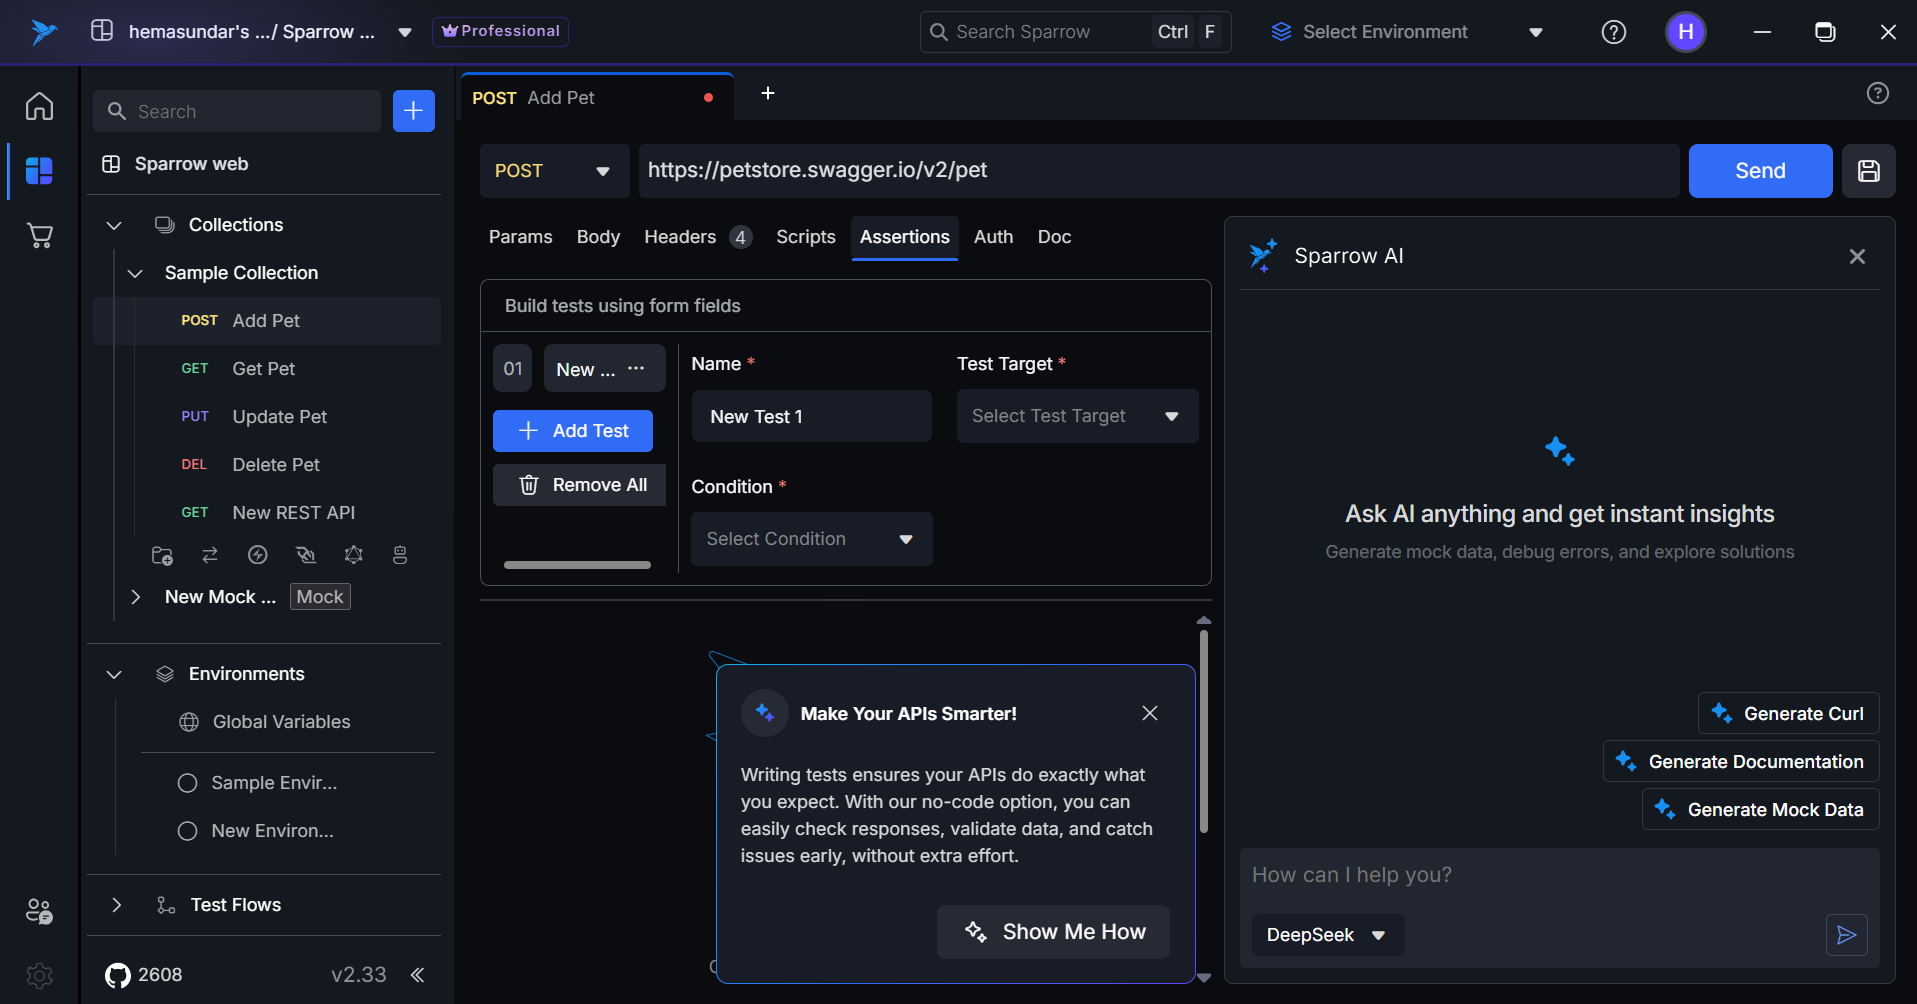
To explore and understand the no-code test case feature, you can use the Tour Guide option available in the application.
Just click the "Show me how" card to launch a step-by-step walkthrough and get familiar with the workflow.
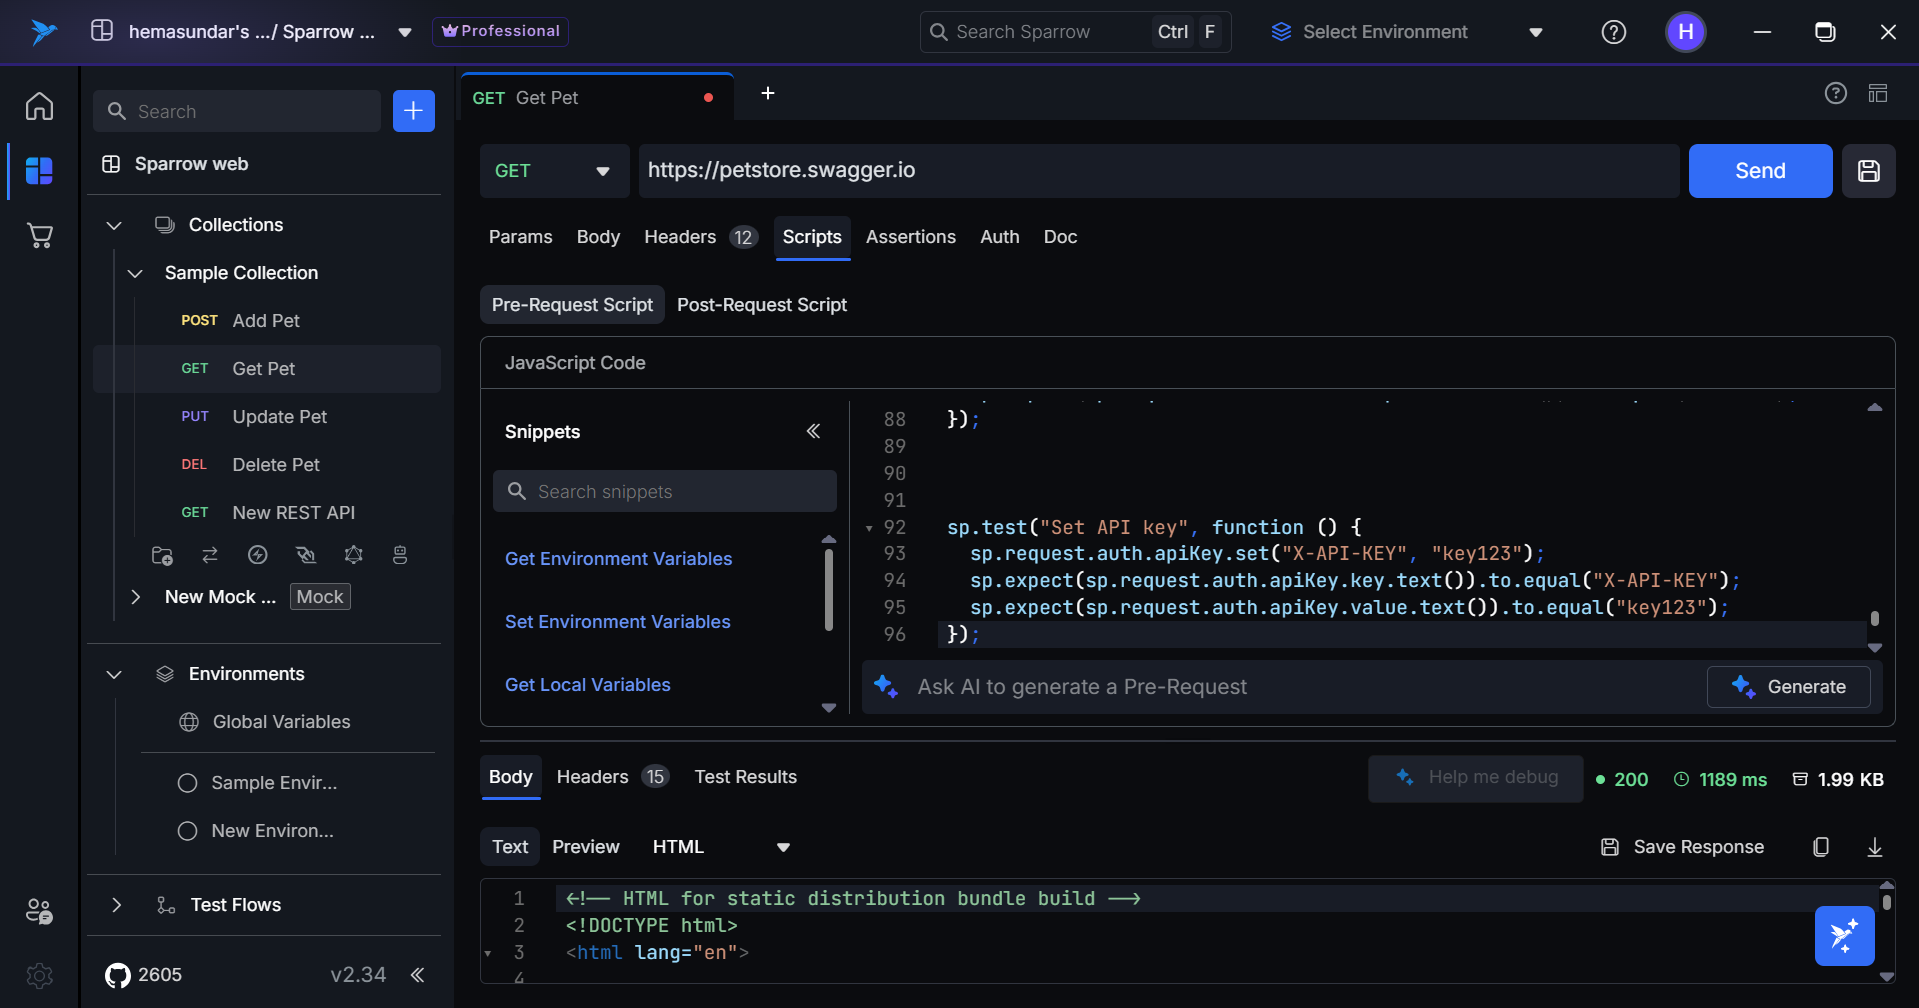
Scripts
The Scripts feature provides a simple way to write and execute API response validation test cases using a lightweight assertion syntax. This comprehensive testing environment enables developers to validate API responses through an intuitive three-panel interface with real-time feedback.
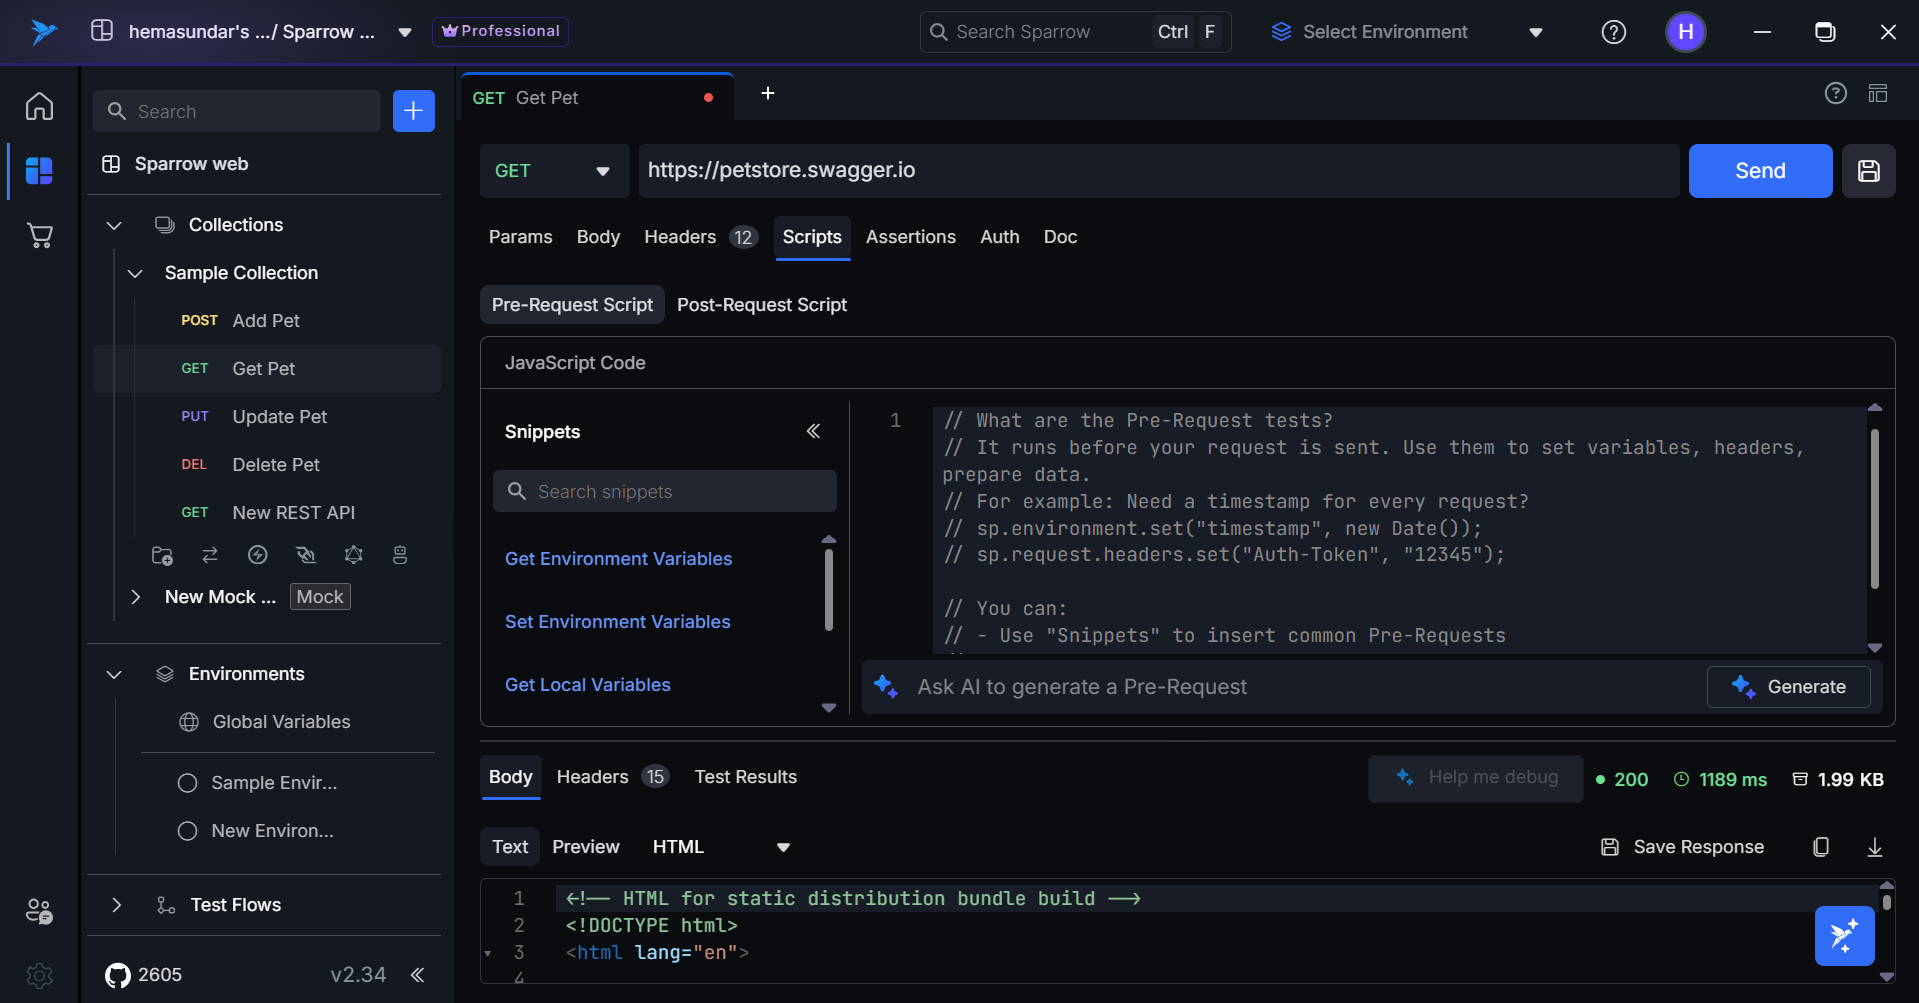
The Scripts interface is divided into two primary sections, based on when the code is executed during the request lifecycle:
- Pre-Request Script (Runs before the request is sent).
- Post-Request Script(Runs after the response is received).
Overview
Script is designed to streamline API testing by providing:
- Interactive Testing Environment: Three-panel interface for efficient workflow
- Common Snippets Library: Pre-built templates for rapid test development
- JavaScript Test Editor: Full-featured editor with syntax highlighting
- Real-time Results: Immediate feedback with detailed pass/fail analytics
- Comprehensive Validation: Support for all types of API response testing
- Interactive Tour Guide: Explore the feature with step-by-step guided tour to understand all functionalities
- AI-Powered Test Generation: Generate test cases automatically using AI based on custom prompts and requirements
Interface Layout
Left Panel - Common Snippets
- Browse categorized test templates and code snippets
- Search functionality to quickly find relevant patterns
- One-click insertion into the editor
- Accelerates test writing with ready-to-use examples
Right Panel - JavaScript Editor
- Primary workspace for writing and editing test scripts
- Syntax highlighting and code completion
- Real-time validation and error detection
- Multi-line editing with proper indentation
Bottom Panel - Test Results Dashboard
- Pass/Fail Summary: Total count of passed vs failed test cases
- Individual Test Status: Detailed status for each test with descriptive names
- Error Details: Comprehensive error messages for debugging failed tests
- Execution Metrics: Performance data including response times
Step-by-Step Guide
Step 1: Getting Started Choose your preferred way to start:
Option A: Interactive Tour Guide
- Click the Tour Guide button to launch the interactive walkthrough
- Follow step-by-step instructions that highlight each panel and feature
- Learn through hands-on examples as the tour demonstrates real test scenarios
- Complete the guided tutorial to understand all available functionalities
Option B: Manual Exploration
- Browse Snippets: Use the left panel to explore common test patterns
- Write Tests: Compose your validation logic in the right panel editor
- Execute Tests: Run your test suite against the API response
- Analyze Results: Review detailed feedback in the bottom panel
Option C: AI-Assisted Test Generation
- Click the AI Generate button in the editor toolbar
- Describe your testing requirements in natural language (e.g., "Test user authentication API with validation for JWT tokens")
- Review AI-generated test cases that match your specific needs
- Customize and run the generated tests as needed
Pre-Request Script
Post-Request Script
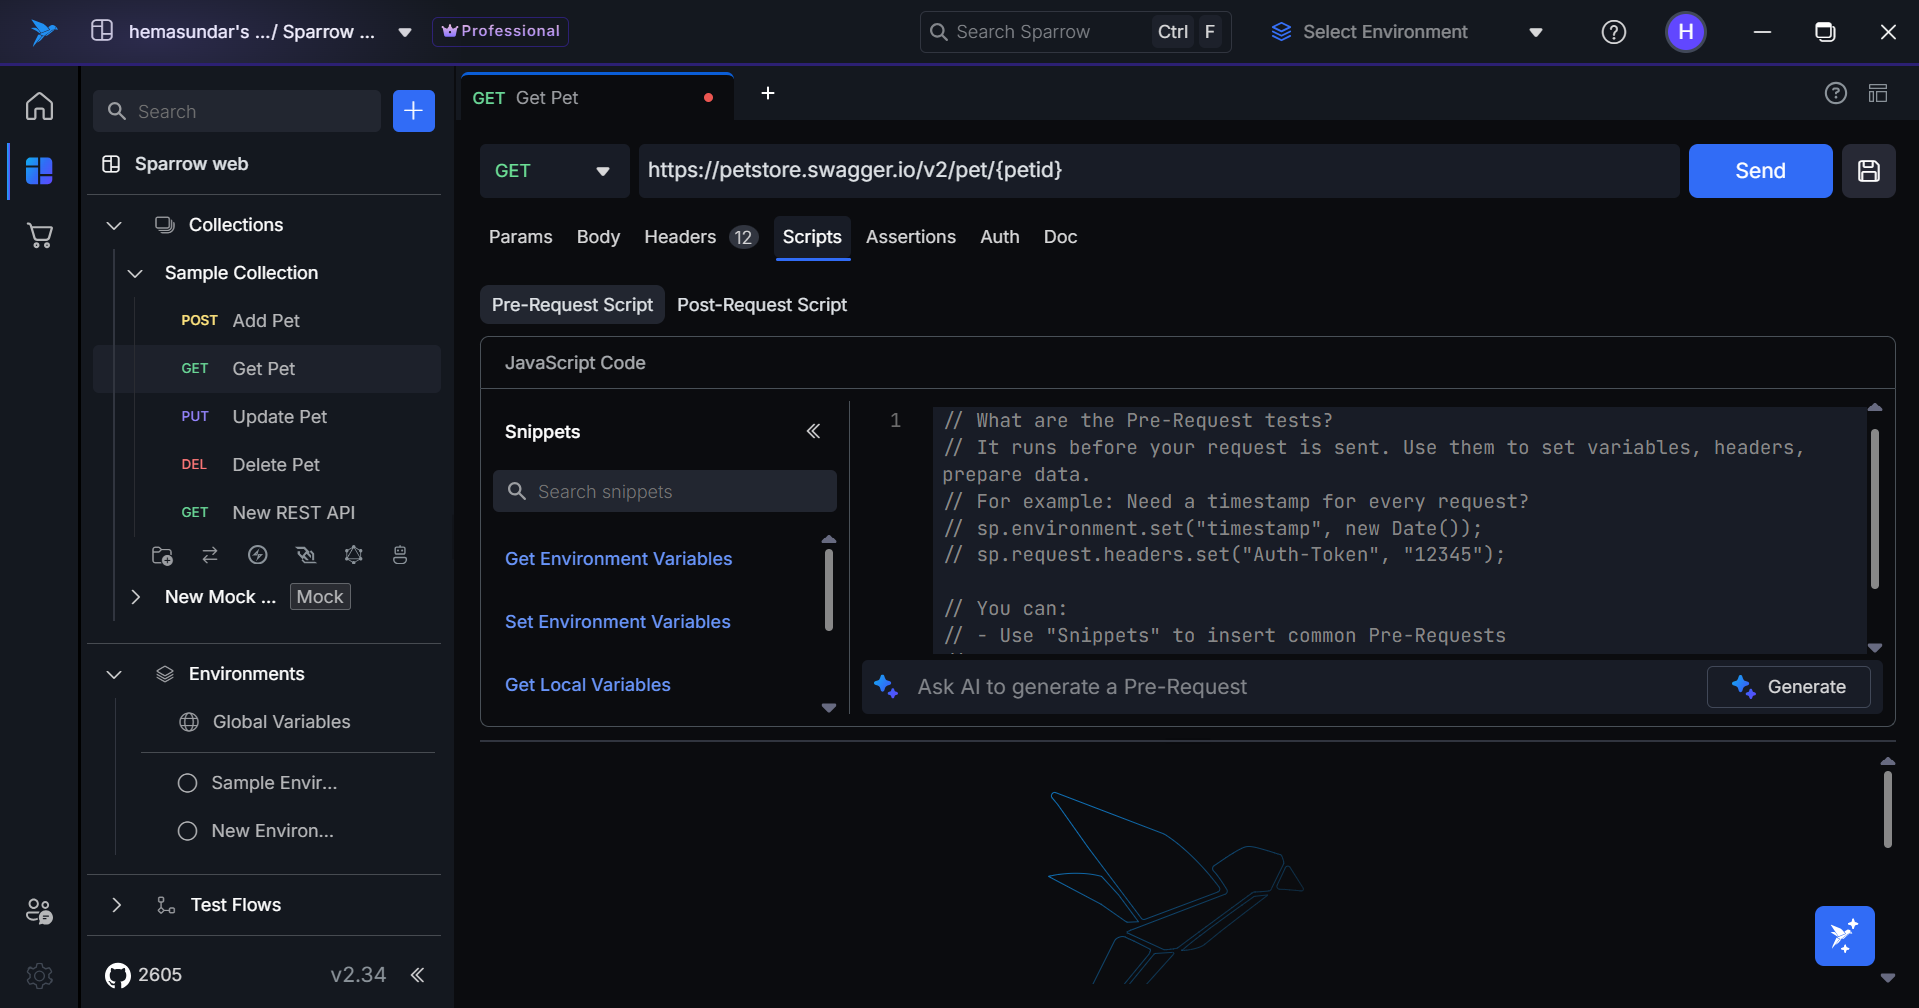 Step 2: Writing Your First Test
Start with the basic test structure:
sp.test("Test description", function () {
    sp.expect(actualValue).to.<assertion>(expectedValue);
});
Example:
sp.test("Status code should be 200", function () {
  sp.expect(sp.response.statusCode).to.equal(200);
});
Step 3: Using the Snippets Library & AI Generation Using Common Snippets:
- Search for snippets using keywords like "status", "json", "headers"
- Click on relevant snippets to automatically insert them into the editor
- Customize the code to match your specific API requirements
- Combine multiple snippets to build comprehensive test suites
Using AI Test Generation:
- Access the AI feature by clicking the "Generate with AI" button
- Write descriptive prompts such as:
- "Create tests for a user registration API that validates email format and password strength"
- "Generate test cases for e-commerce product API including price validation and inventory checks"
- "Write tests for authentication endpoint with token expiration and refresh logic"
- Review and modify the AI-generated test cases
- Run the generated tests and refine as needed
Example AI Prompts:
- "Test REST API that returns user profiles with nested address objects"
- "Validate payment processing API with error handling for invalid card numbers"
- "Create performance tests for search API with response time under 200ms"
Step 4: Building Test Suites
Create multiple test cases to validate different aspects:
Pre-Request Script
sp.test("Check if petstore API is accessible", function () {
  sp.expect(sp.request.url.text()).to.equal("https://petstore.swagger.io/v2/swagger.json");
});

sp.environment.set("timestamp", new Date());

sp.test("Validate request method is GET", function () {
  sp.expect(sp.request.method.text()).to.equal("GET");
});
Post-request script
// Status validation
sp.test("API returns successful response", function () {
  sp.expect(sp.response.statusCode).to.equal(200);
});

// Performance testing
sp.test("Response time is acceptable", function () {
  sp.expect(sp.response.time).to.be.lessThan(500);
});

// Data validation
sp.test("Response contains required data", function () {
  let data = sp.response.body.json();
  sp.expect(data).to.have.all.keys("id", "name", "email");
});
Step 5: Executing and Monitoring Tests
- Click Run to execute your complete test suite
- Monitor real-time execution as tests run
- View immediate results in the bottom panel
- Identify issues quickly with detailed error messages
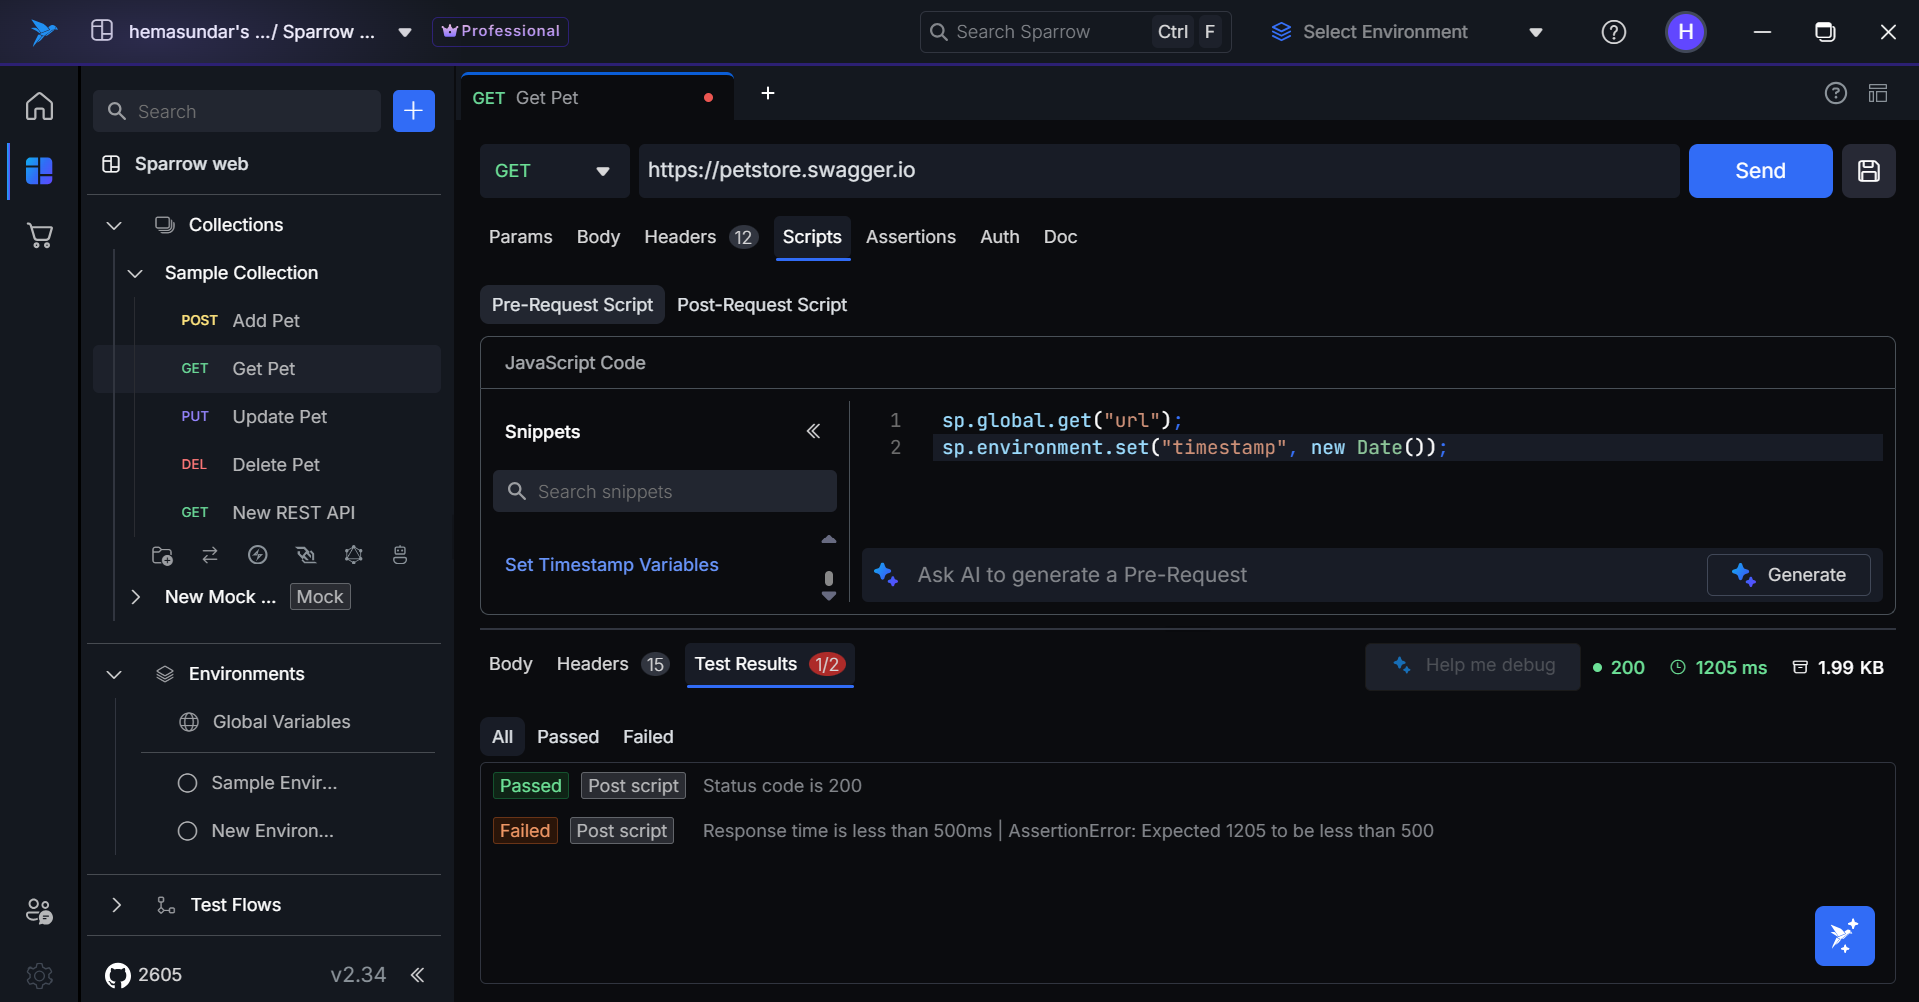
Step 6: Interpreting Results
- Green indicators: Tests that passed successfully
- Red indicators: Tests that failed with specific error details
- Summary statistics: Overall pass/fail ratio and execution time
- Debug information: Actual vs expected values for troubleshooting
sp Object
Core Testing Functions
sp.test(description, testFunction)
Defines a test case with a human-readable description.
Syntax:
sp.test("Test description", function () {
  // Test logic here
});
Usage:
sp.test("User ID should be a positive number", function () {
  let user = sp.response.body.json();
  sp.expect(user.id).to.be.greaterThan(0);
});
sp.expect(actualValue)
Creates an expectation object for making assertions.
Syntax:
sp.expect(actualValue).to.<assertion>(expectedValue);
Usage:
sp.expect(sp.response.statusCode).to.equal(200);
sp.expect(sp.response.body.text()).to.contain("success");
Response Access Properties
sp.response.statusCode
HTTP status code from the API response.
Usage:
sp.test("Status code validation", function () {
  sp.expect(sp.response.statusCode).to.equal(200);
  sp.expect(sp.response.statusCode).to.be.within(200, 299);
});
sp.response.body.text()
Raw response body as a string.
Usage:
sp.test("Response body validation", function () {
  let bodyText = sp.response.body.text();
  sp.expect(bodyText).to.be.notEmpty();
  sp.expect(bodyText).to.contain("user");
});
sp.response.body.json()
Parsed JSON response as a JavaScript object.
Usage:
sp.test("JSON response structure", function () {
  let jsonData = sp.response.body.json();
  sp.expect(jsonData.id).to.be.a("number");
  sp.expect(jsonData.name).to.exist();
});
sp.response.headers
Response headers as an object.
Usage:
sp.test("Header validation", function () {
  sp.expect(sp.response.headers["Content-Type"]).to.contain("json");
  sp.expect(sp.response.headers["Cache-Control"]).to.exist();
});
sp.response.size
Response size in bytes.
Usage:
sp.test("Response size check", function () {
  sp.expect(sp.response.size).to.be.greaterThan(0);
  sp.expect(sp.response.size).to.be.lessThan(5000);
});
sp.response.time
Response time in milliseconds.
Usage:
sp.test("Performance validation", function () {
  sp.expect(sp.response.time).to.be.lessThan(1000);
});
Utility Functions
sp.xmlToJSON(xmlString)
Converts XML string to JSON object for easier validation.
Usage:
sp.test("XML response parsing", function () {
  const xml = sp.response.body.text();
  const json = sp.xmlToJSON(xml);
  sp.expect(json?.root?.city).to.equal("San Jose");
});
Assertion Methods
Equality Assertions
to.equal(expected)
Validates strict equality.
sp.expect(sp.response.statusCode).to.equal(200);
sp.expect(jsonData.name).to.equal("John Doe");
to.notEqual(expected)
Validates strict inequality.
sp.expect(sp.response.statusCode).to.notEqual(404);
sp.expect(jsonData.status).to.notEqual("error");
Existence Assertions
to.exist()
Validates that value is not null or undefined.
sp.expect(jsonData.id).to.exist();
sp.expect(sp.response.headers["Authorization"]).to.exist();
to.notExist()
Validates that value is null or undefined.
sp.expect(jsonData.error).to.notExist();
sp.expect(jsonData.temporaryField).to.notExist();
Type and Boolean Assertions
to.be.a(type)
Validates the data type.
sp.expect(jsonData.id).to.be.a("number");
sp.expect(jsonData.name).to.be.a("string");
sp.expect(jsonData.items).to.be.a("array");
sp.expect(jsonData.profile).to.be.a("object");
to.be.true() / to.be.false()
Validates boolean values.
sp.expect(jsonData.isActive).to.be.true();
sp.expect(jsonData.isDeleted).to.be.false();
Range Assertions
to.be.within(min, max)
Validates value is within specified range (inclusive).
sp.expect(sp.response.statusCode).to.be.within(200, 299);
sp.expect(jsonData.age).to.be.within(18, 120);
to.be.lessThan(value)
Validates value is less than specified number.
sp.expect(sp.response.time).to.be.lessThan(500);
sp.expect(jsonData.price).to.be.lessThan(100.0);
to.be.greaterThan(value)
Validates value is greater than specified number.
sp.expect(jsonData.id).to.be.greaterThan(0);
sp.expect(sp.response.size).to.be.greaterThan(100);
Empty Assertions
to.be.empty()
Validates that strings, arrays, or objects are empty.
sp.expect(jsonData.errors).to.be.empty();
sp.expect(jsonData.optionalArray).to.be.empty();
to.be.notEmpty()
Validates that strings, arrays, or objects are not empty.
sp.expect(sp.response.body.text()).to.be.notEmpty();
sp.expect(jsonData.results).to.be.notEmpty();
Containment Assertions
to.contain(substring)
Validates that string contains specified substring.
sp.expect(sp.response.headers["Content-Type"]).to.contain("json");
sp.expect(jsonData.email).to.contain("@");
sp.expect(jsonData.description).to.contain("success");
to.notContain(substring)
Validates that string does not contain specified substring.
sp.expect(sp.response.body.text()).to.notContain("error");
sp.expect(jsonData.message).to.notContain("failed");
to.beInList(array)
Validates that value exists in the specified array.
sp.expect(jsonData.status).to.beInList(["active", "inactive", "pending"]);
sp.expect(jsonData.role).to.beInList(["admin", "user", "moderator"]);
to.notBeInList(array)
Validates that value does not exist in the specified array.
sp.expect(jsonData.status).to.notBeInList(["banned", "suspended"]);
sp.expect(jsonData.role).to.notBeInList(["guest", "deleted"]);
Object Structure Assertions
to.have.all.keys(...keys)
Validates that object contains all specified keys.
sp.expect(jsonData).to.have.all.keys("id", "name", "email");
sp.expect(jsonData.user).to.have.all.keys("firstName", "lastName", "age");
Example Test Cases
Basic API Validation
// Status code validation
sp.test("Status code is 200", function () {
  sp.expect(sp.response.statusCode).to.equal(200);
});

// Response time validation
sp.test("Response time is less than 500ms", function () {
  sp.expect(sp.response.time).to.be.lessThan(500);
});

// Response body validation
sp.test("Response body is not empty", function () {
  sp.expect(sp.response.body.text()).to.be.notEmpty();
});
Header Validation
// Content-Type validation
sp.test("Content-Type contains json", function () {
  sp.expect(sp.response.headers["Content-Type"]).to.contain("json");
});

// Security header validation
sp.test("CORS header is present", function () {
  sp.expect(sp.response.headers["Access-Control-Allow-Origin"]).to.exist();
});
JSON Response Validation
// JSON structure validation
sp.test("Response JSON has required keys", function () {
  let jsonData = sp.response.body.json();
  sp.expect(jsonData).to.have.all.keys("id", "userId", "title", "completed");
});

// Data type validation
sp.test("User ID is a number", function () {
  let jsonData = sp.response.body.json();
  sp.expect(jsonData.userId).to.be.a("number");
});

// Value range validation
sp.test("User ID is positive", function () {
  let jsonData = sp.response.body.json();
  sp.expect(jsonData.userId).to.be.greaterThan(0);
});
XML Response Validation
// XML to JSON conversion
sp.test("City name should be San Jose", function () {
  const xml = sp.response.body.text();
  const json = sp.xmlToJSON(xml);
  sp.expect(json?.root?.city).to.equal("San Jose");
});
Advanced Validation Patterns
// Multiple assertions in one test
sp.test("User profile is valid", function () {
  let user = sp.response.body.json();

  // Structure validation
  sp.expect(user).to.have.all.keys("id", "profile", "settings");

  // Profile validation
  sp.expect(user.profile.email).to.contain("@");
  sp.expect(user.profile.role).to.beInList(["admin", "user", "moderator"]);

  // Settings validation
  sp.expect(user.settings.notifications).to.be.a("boolean");
});

// Conditional validation
sp.test("Optional fields are handled correctly", function () {
  let data = sp.response.body.json();

  if (data.optionalField) {
    sp.expect(data.optionalField).to.be.a("string");
    sp.expect(data.optionalField).to.be.notEmpty();
  }
});
This documentation provides a complete reference for using the Test Script feature effectively, from basic setup to advanced validation patterns.
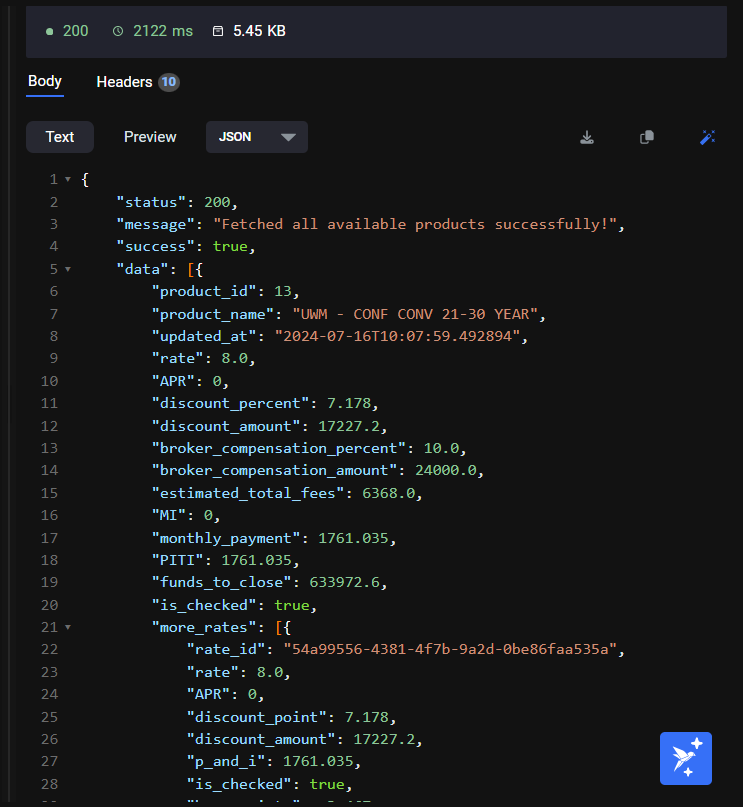
Response Body
Response body refers to the data sent back by the server because of an API request. When you make an HTTP request using Sparrow, the server processes the request and sends a response, which typically includes information or data in the response body. The response body is crucial for understanding the outcome of the request and extracting the relevant data returned by the server.
To view the response body in Sparrow:
After making a request, the response body is displayed in the "Body" tab at the bottom of the request pane. You can switch between different views, such as "Pretty" for formatted JSON or "Raw" for the raw, unformatted response.
Understanding the response body is crucial for API testing and development, as it allows you to verify that the server has provided the expected data and helps troubleshoot any issues with the API request.
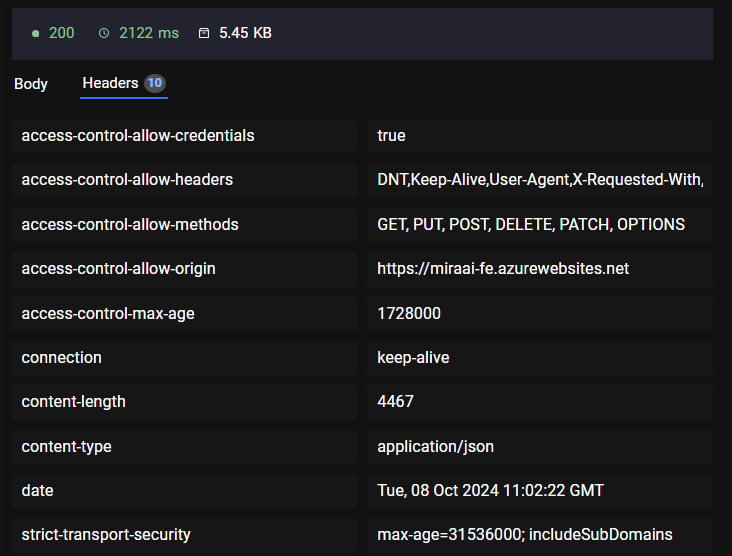
Response Headers
In addition to the response body, the server sends headers containing metadata about the response. These headers may include information about the content type, encoding, and other details.
Beautify, Copy & Download Response
Once the response is received from the server, the user can copy the response generated, with the help of the copy icon provided in the response section.
In addition to this, a user can download the response in any format, using the download icon.
The user can format the response using the Beautify button provided in the response section.

Save Request
Suppose if you would want to save the API request, then you will have to click on the Save Request button provided in the API request screen.
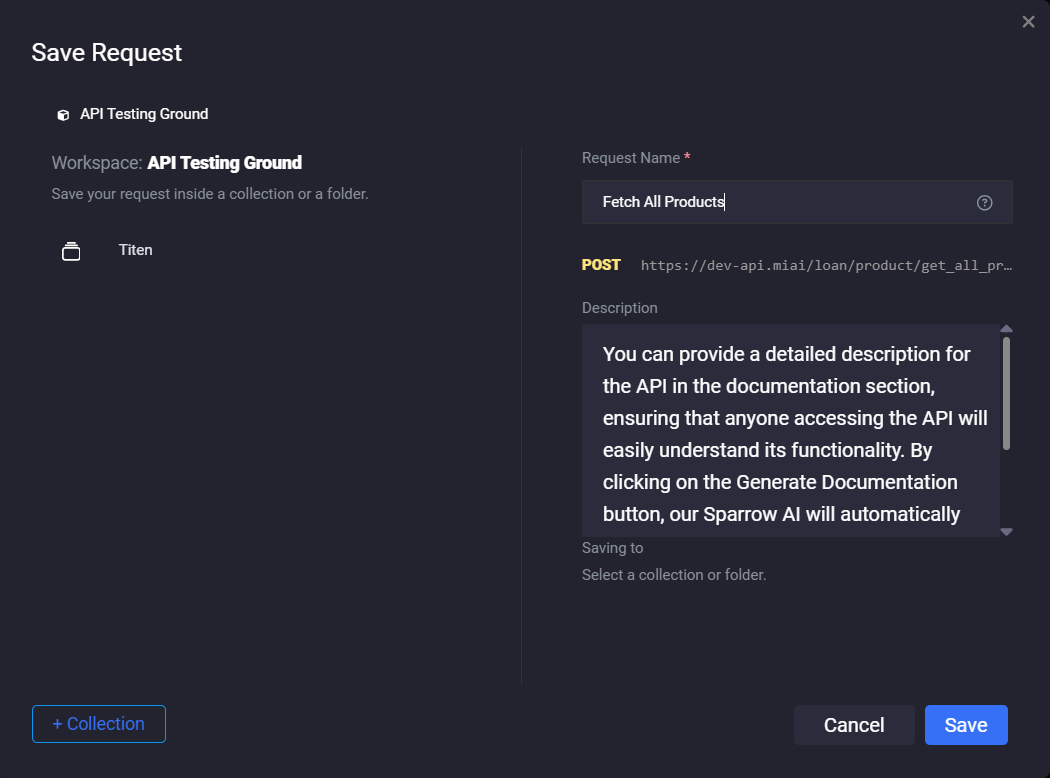
- Once you click Save Request, a popup opens which would provide an avenue to the user to save the API request with the request name. Provide the request name in the text field provided.
-
You can see the description of the API as well which would be optional in nature. If you provided the description in the documentation section, then the same would be visible in this section.
-
You can save the request into an existing collection which would be displayed on the screen by just clicking the collection OR you can create a new collection by clicking the + Collection button available at the bottom of the screen.
-
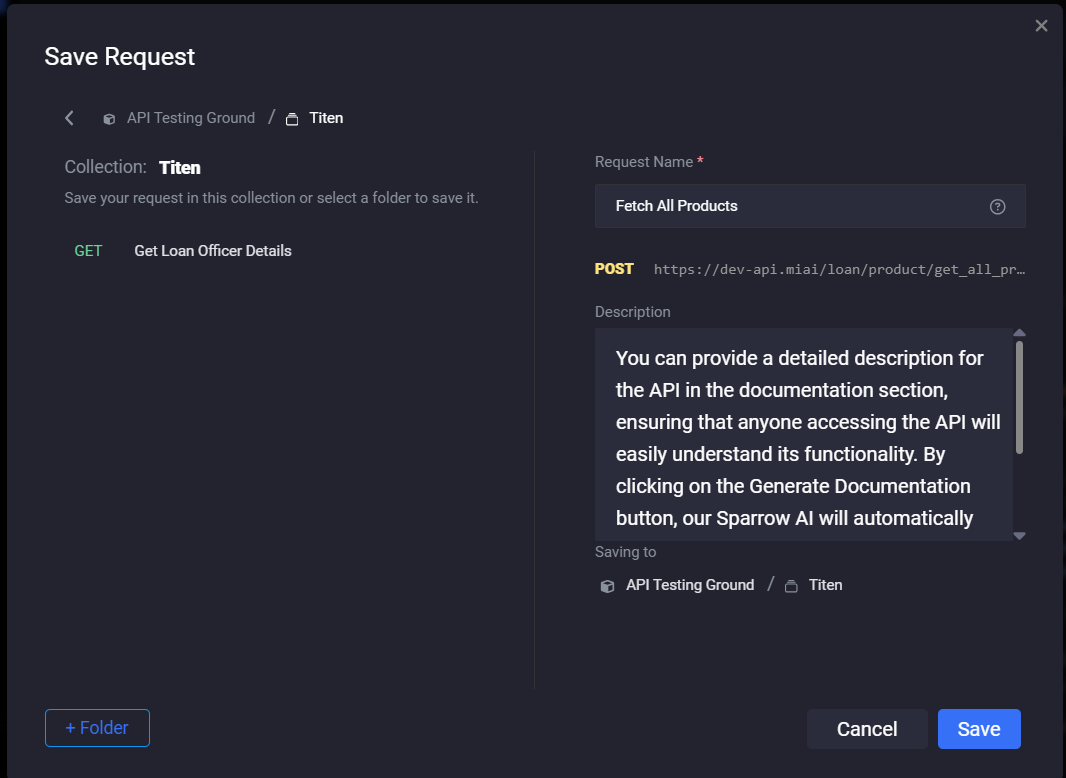
Once you have selected/added a collection, you would be navigated to the next step wherein you can save the request under the collection, or you can select the folder/provide the name of the new folder as well to which the request needs to be saved. A new folder can be created with the help of the + Folder button.
-
Click the save button to save the request OR click Cancel to abort saving the API request.
-
To view the best practices for naming the API request, click on the “?” icon provided in the popup window.

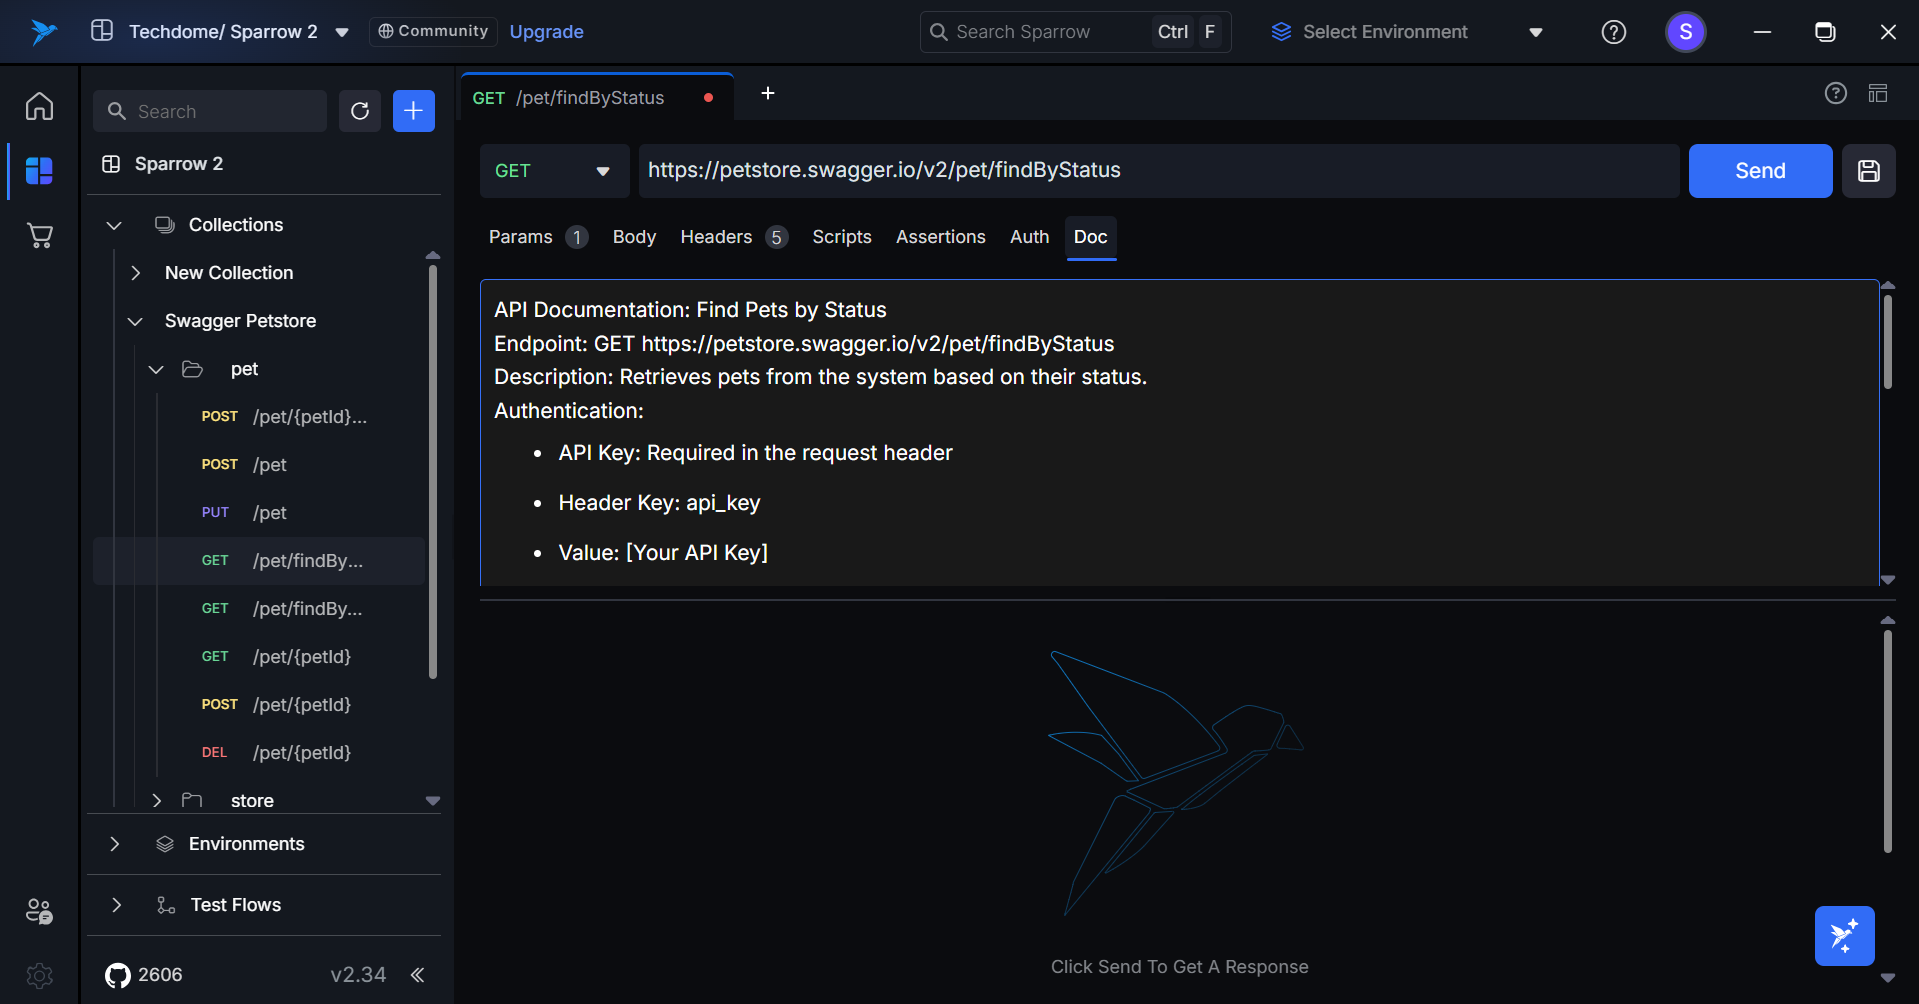
Documentation
You can provide a detailed description for the API in the documentation section, ensuring that anyone accessing the API will easily understand its functionality. By clicking on the Generate Documentation button, our Sparrow AI will automatically create comprehensive API documentation for you, saving time and effort while ensuring accuracy and clarity.