Hub Management
The Hubs Management section serves as the central administrative area for overseeing and managing all organizational units (Hubs) within your Sparrow instance. Hubs provide logical separation for projects, teams, or clients and are essential for controlling access and maintaining a scalable organizational structure.

Hub Overview and Analytics
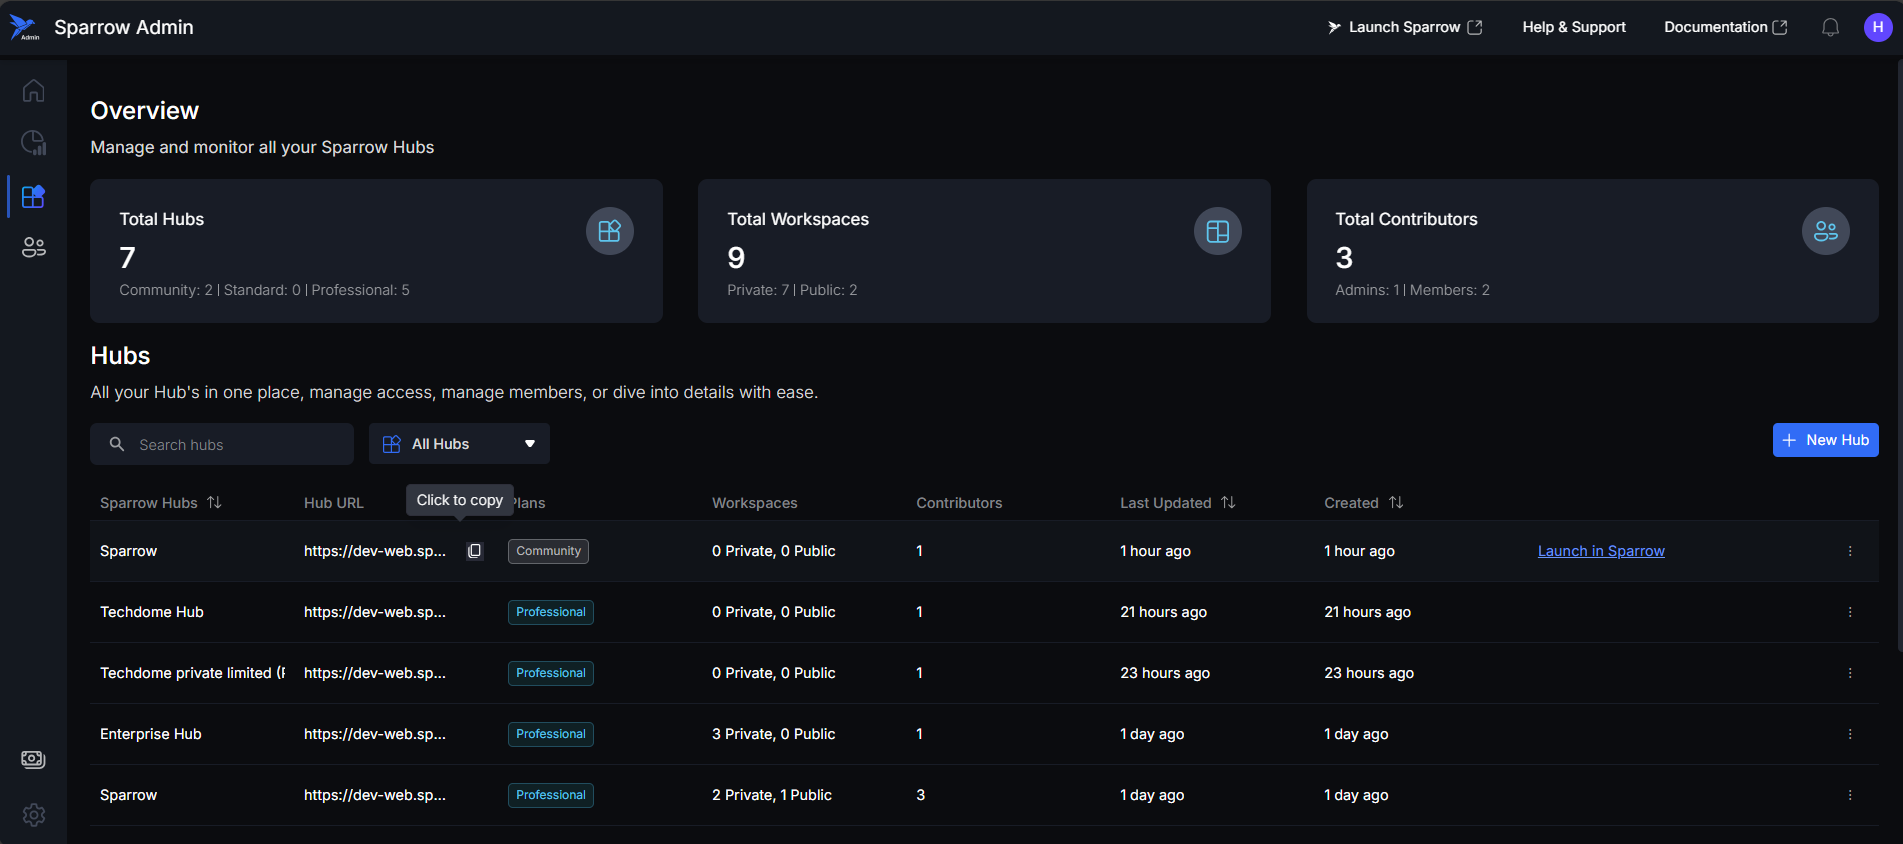
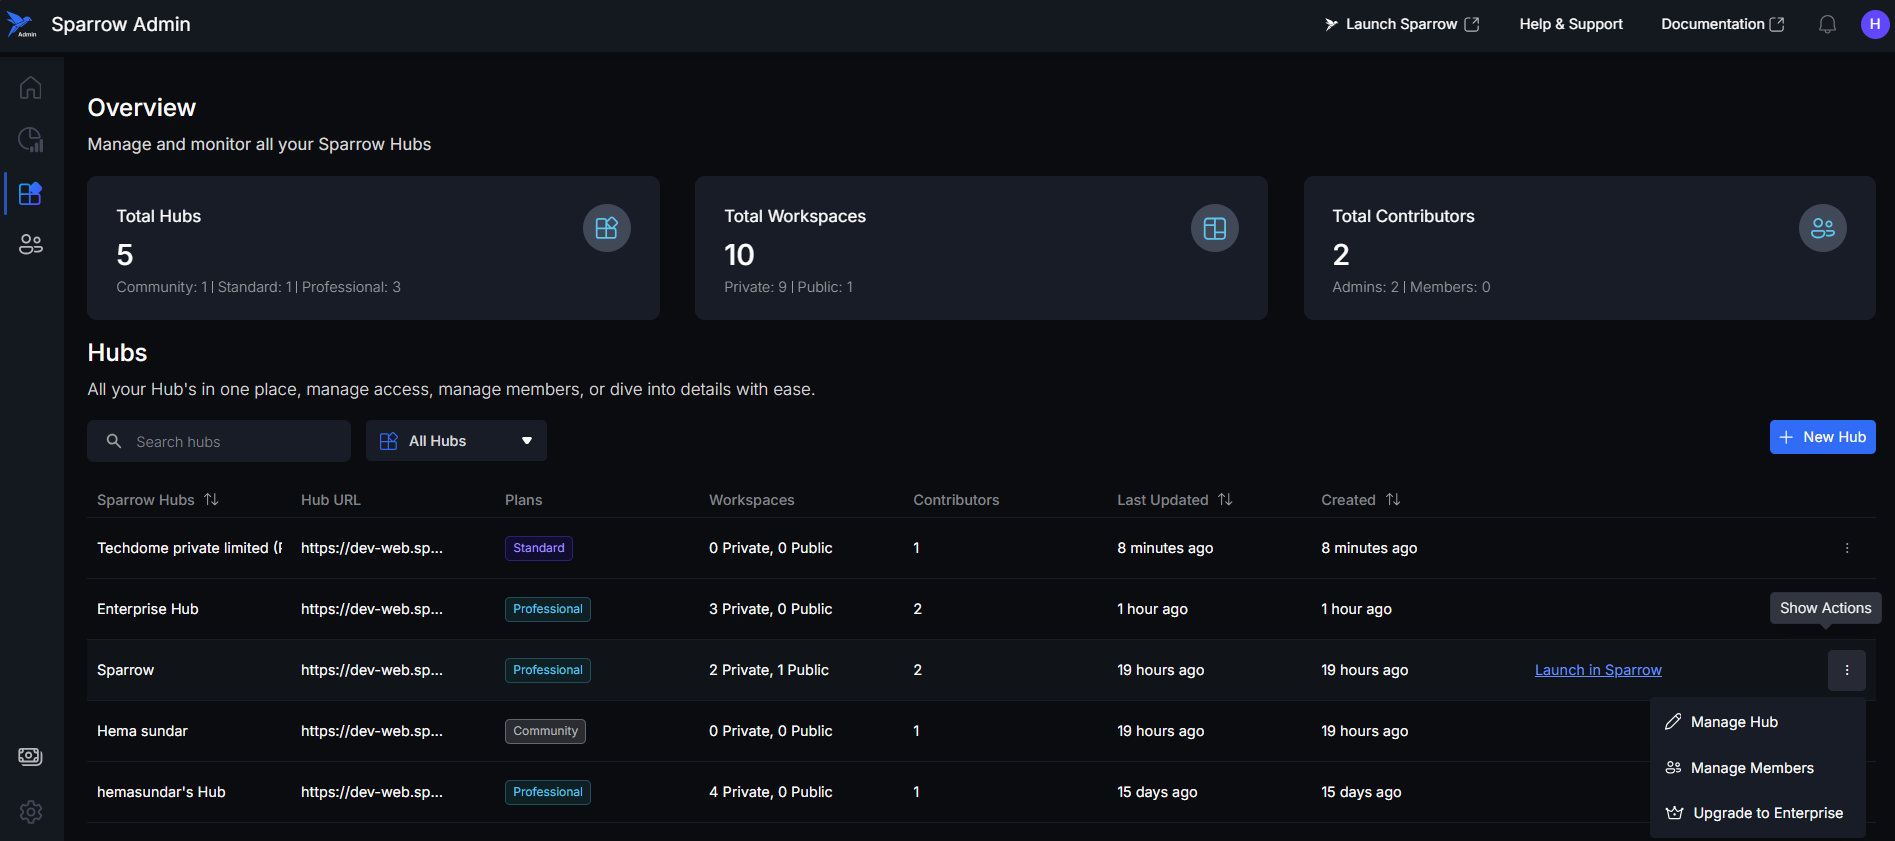
This dashboard provides a high-level summary of the organizational structure and activity across all Hubs.
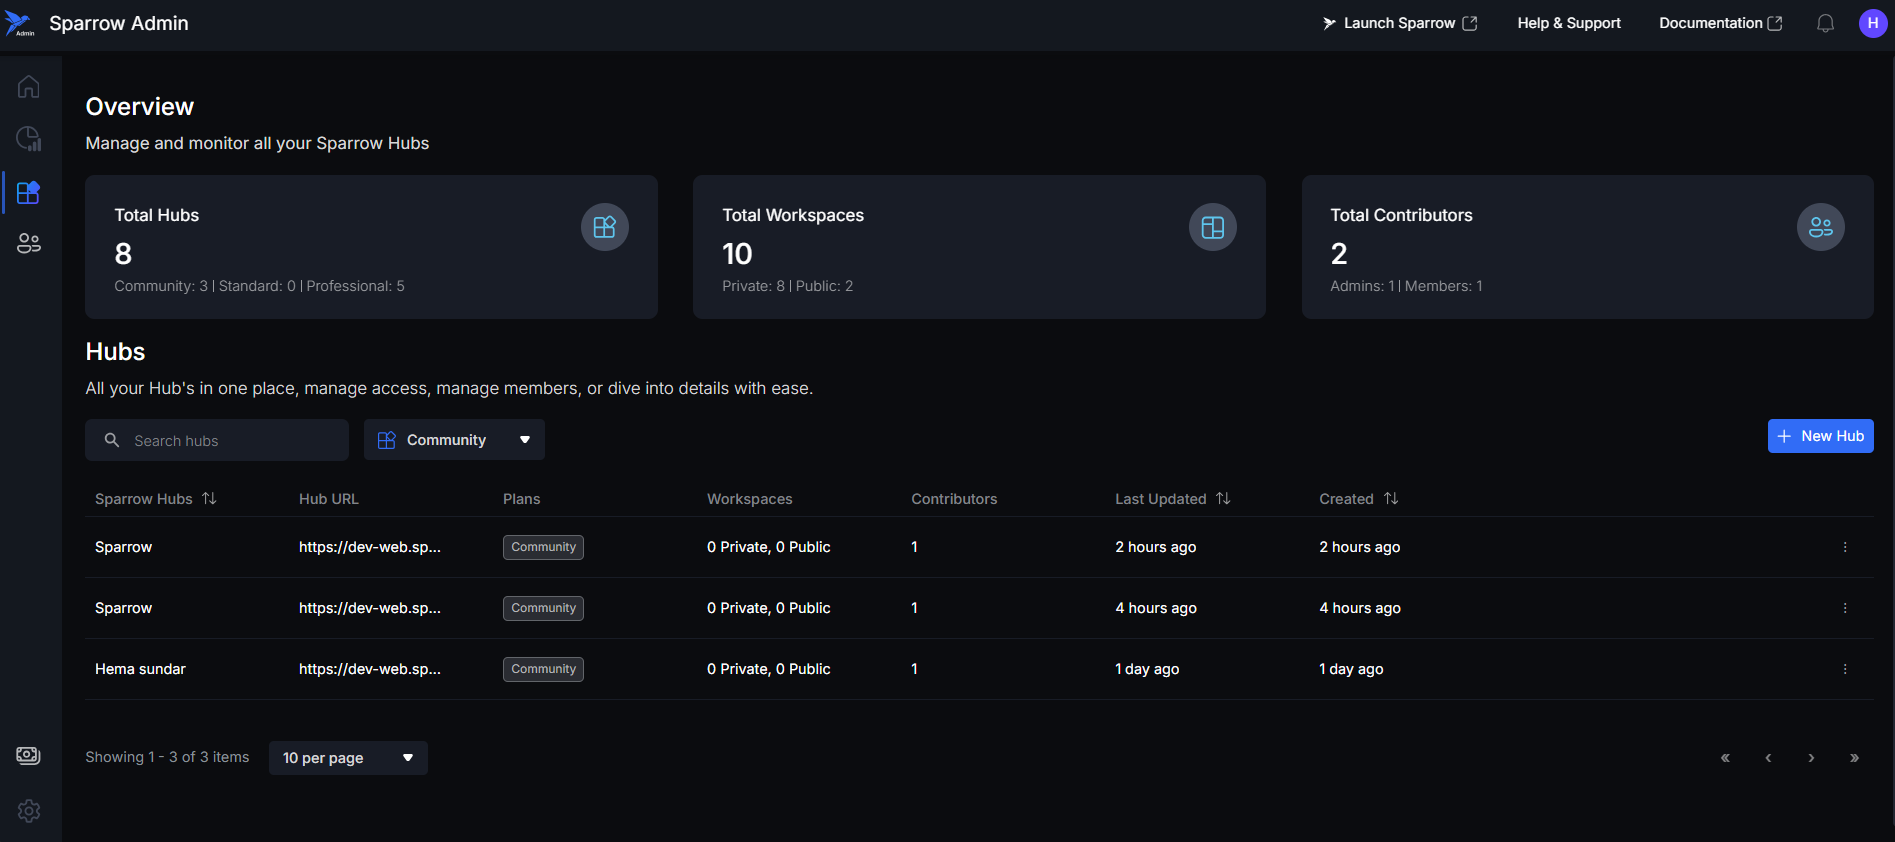
- Total Hubs: The Total Hubs metric shows the full quantity of organizational units currently set up on the platform. It is further categorized to display the distribution of Hubs by their assigned plans (e.g., Community, Standard, Professional).
- Total Workspaces: The Total Workspaces metric displays the accumulated count of all workspaces across every managed Hub. This total is sub-categorized to show the distribution between Public and Private workspaces.
- Total Contributors: The Total Contributors metric represents the overall count of unique people with access to the platform. This number is broken down into two categories: Admin and Member. A key calculation rule is that each person is counted only once: if a user holds both Admin and Member roles (in the same or different Hubs), they are still counted as a single contributor under their highest assigned role.
- Centralized Dashboard: Provides a centralized view for all workspace activities.
Key Functions
As an admin, you can:
- Create, update, or delete hubs
- View hub metadata (plans, creation date, activity)
- Manage hub-specific workspaces (private/public)
- Assign contributors to hubs
- Upgrade hub plans
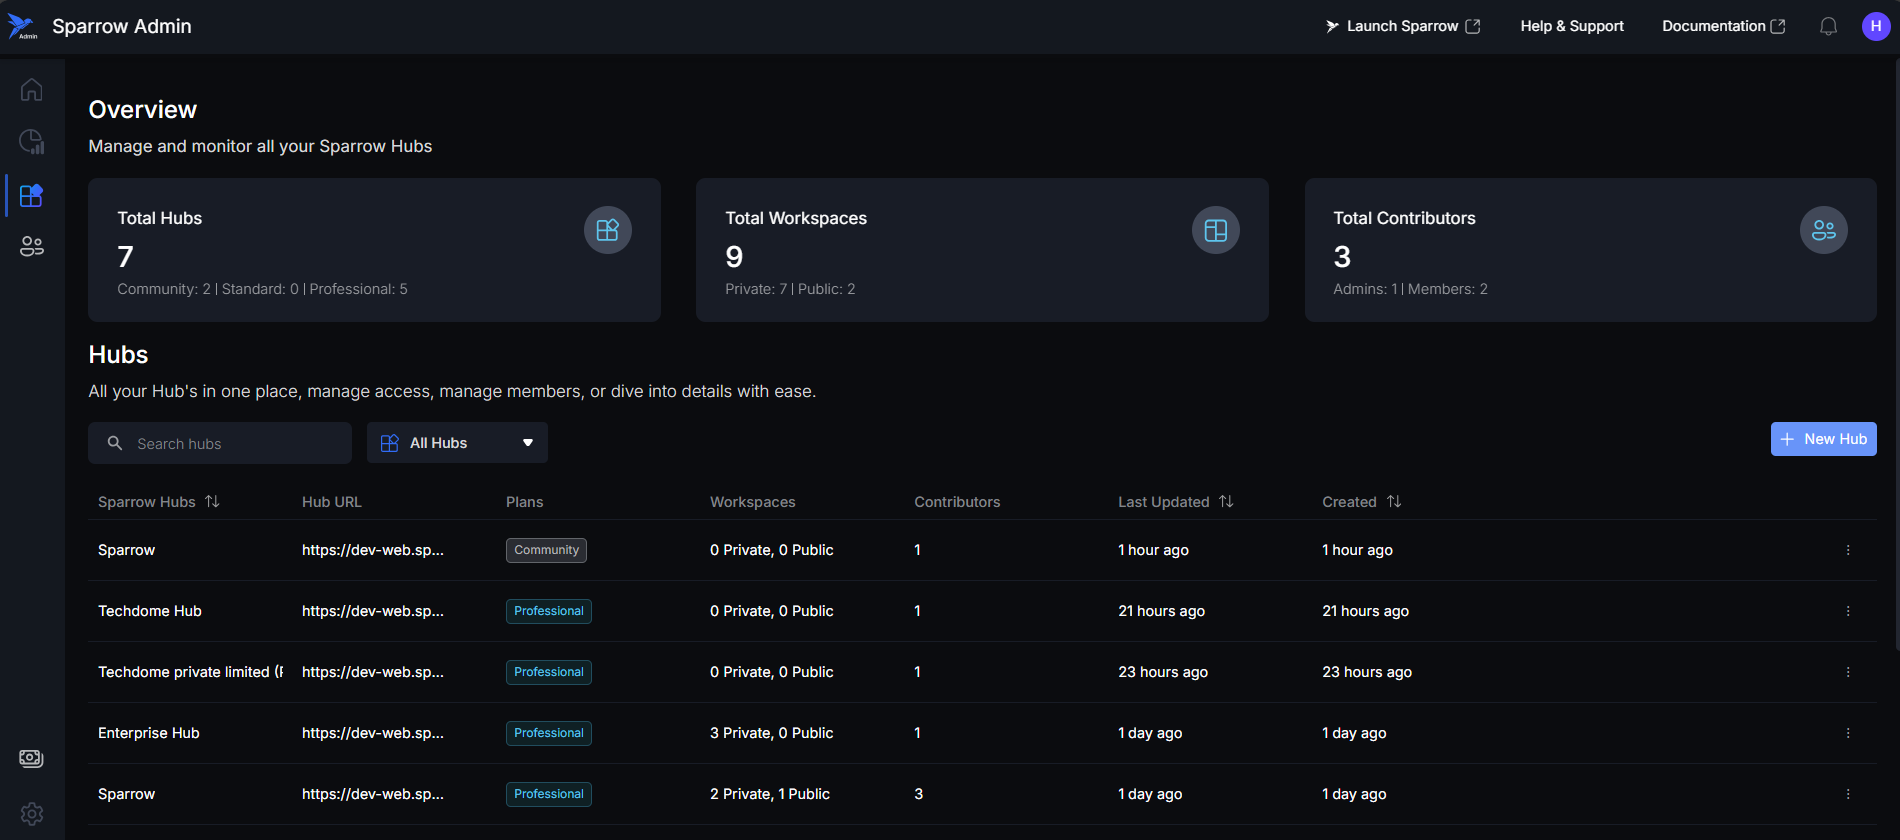
Hubs are previewed in List View where you can access to all the Hubs related to your Account. The following outlines the different types of organizational units (Hubs) that may be configured within the platform
Components of List View of Hubs
- Search bar: This element is used to Search Hubs by typing in the names assigned to them.
- Hub Filter: You can use the filtering options to view Hubs based on their current Subscription Plan.
- Sparrow Hub: This is the customizable name assigned to the organizational unit, typically reflecting a team, client, or project.
- Hub URL: This is the unique web address or identifier used to access that specific Hub on the platform. You can copy the URL using copy function available beside it.
- Plans: This indicates the subscription tier or access level assigned to the Hub (e.g., Community, Standard, Professional).
- Workspaces: This denotes the quantity of both Private and Public workspaces contained within the Hub.
- Contributors: This shows the total number of unique users who have access to this particular Hub.
- Last Updated: This timestamp indicates the most recent modification made to the Hub’s configuration or contents.
- Created: This is the original date the Hub was initially set up on the platform.
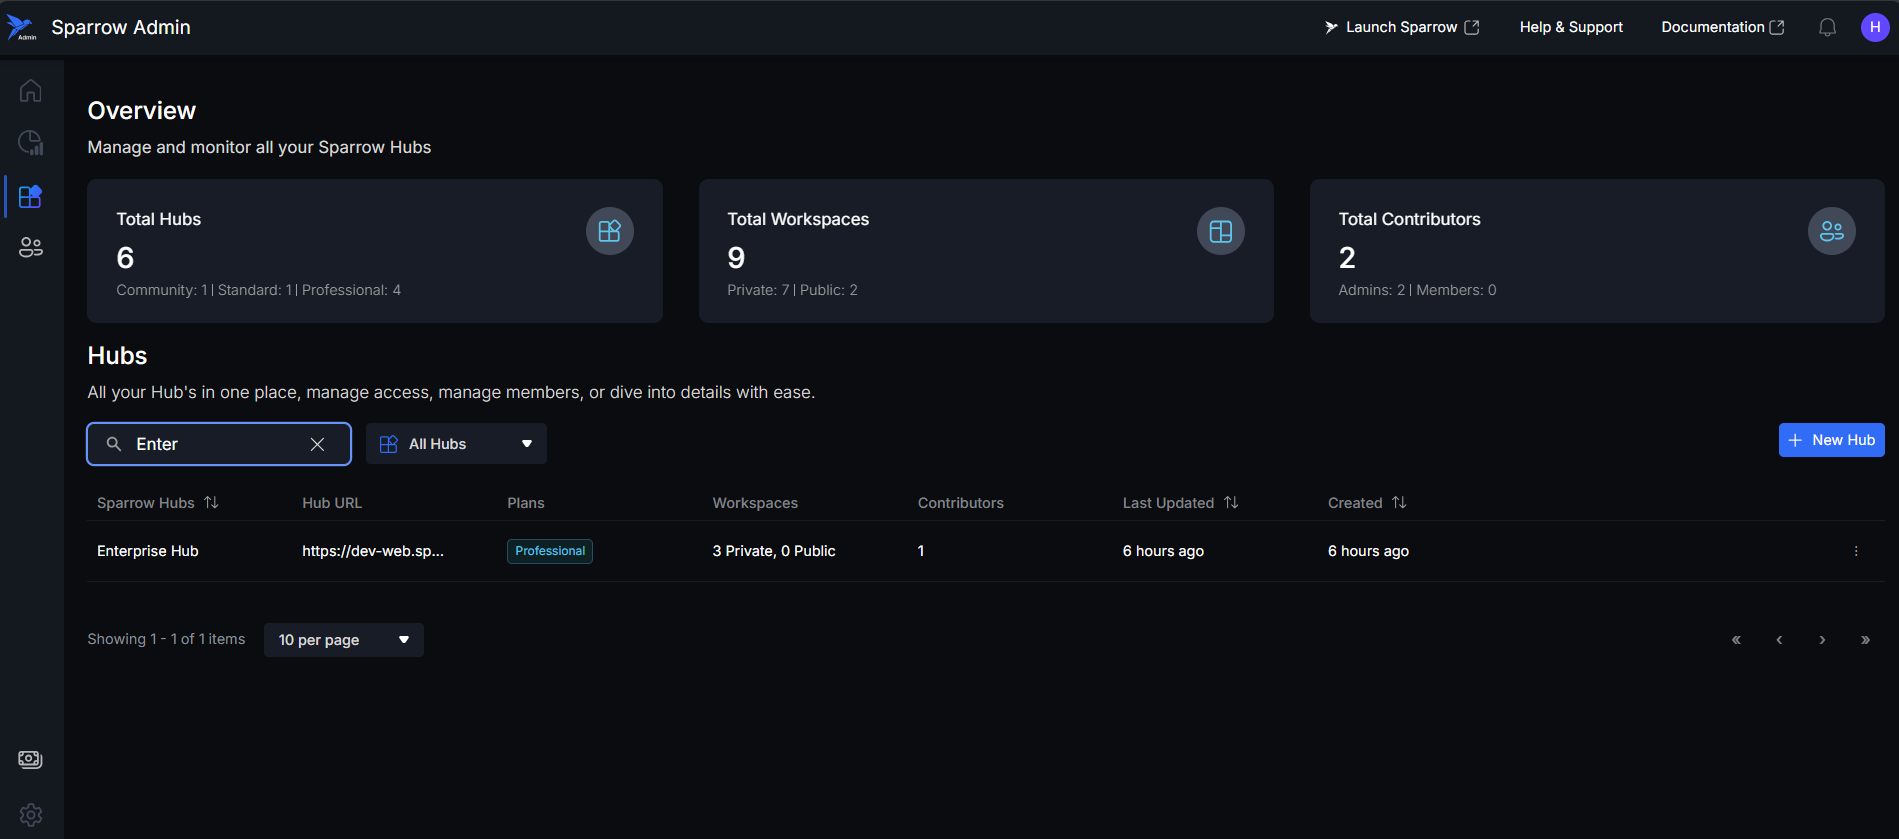
Search bar
It is located directly above the Hubs list. You can search the Hub by Name of the Hub.
Click the Search bar, then type the Hub's name to quickly find the required hub.
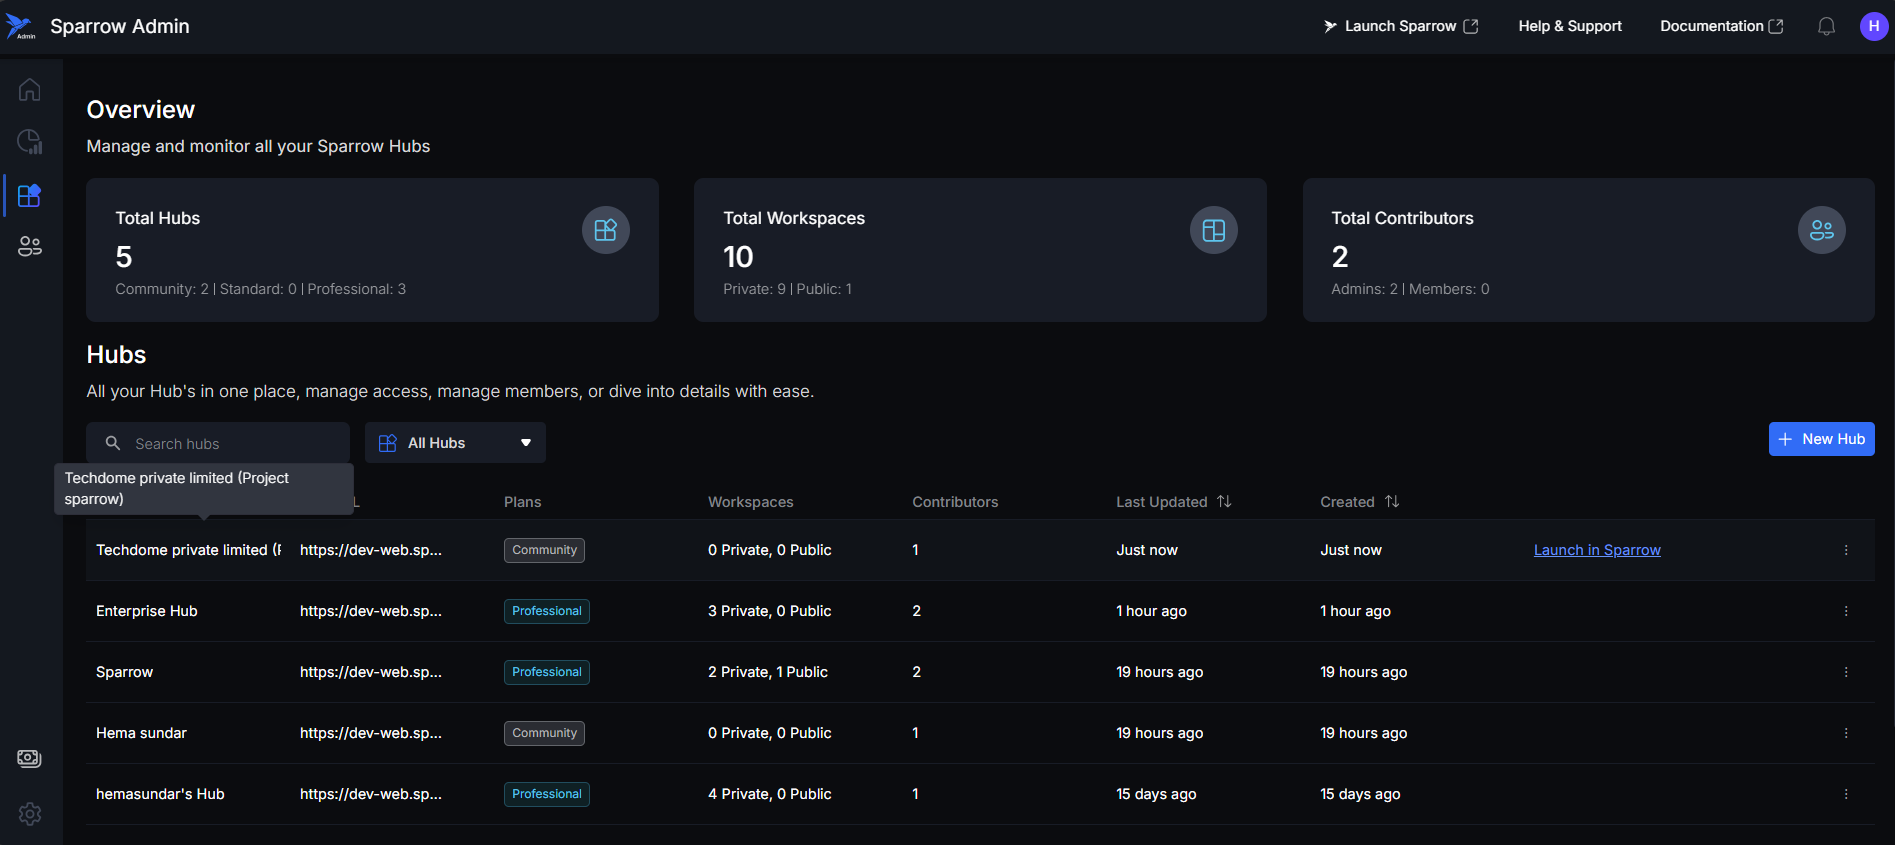
Truncated Name
You can see the Truncated Name of Hub if you hover your cursor over the Hub Name in the List. The Name is displayed in a Tool tip.
Copying a Hub URL
You can quickly copy the unique URL for any Hub directly from the Hubs list, allowing you to share or navigate to the Hub's home page in any browser. You can use it to open the Hub in the Sparrow Web and continue working on it.
Navigate to the desired Hub in the list and Click the Copy icon to copy the link.
Creating a New Hub
The "New Hub" feature allows administrators to create a new organizational unit on the platform. This process requires mandatory input and adheres to specific restrictions for optional elements.
Steps to create a new hub:
Step 1: Initiate Creation, Click the + New Hub button located on the right side of the Hubs list.
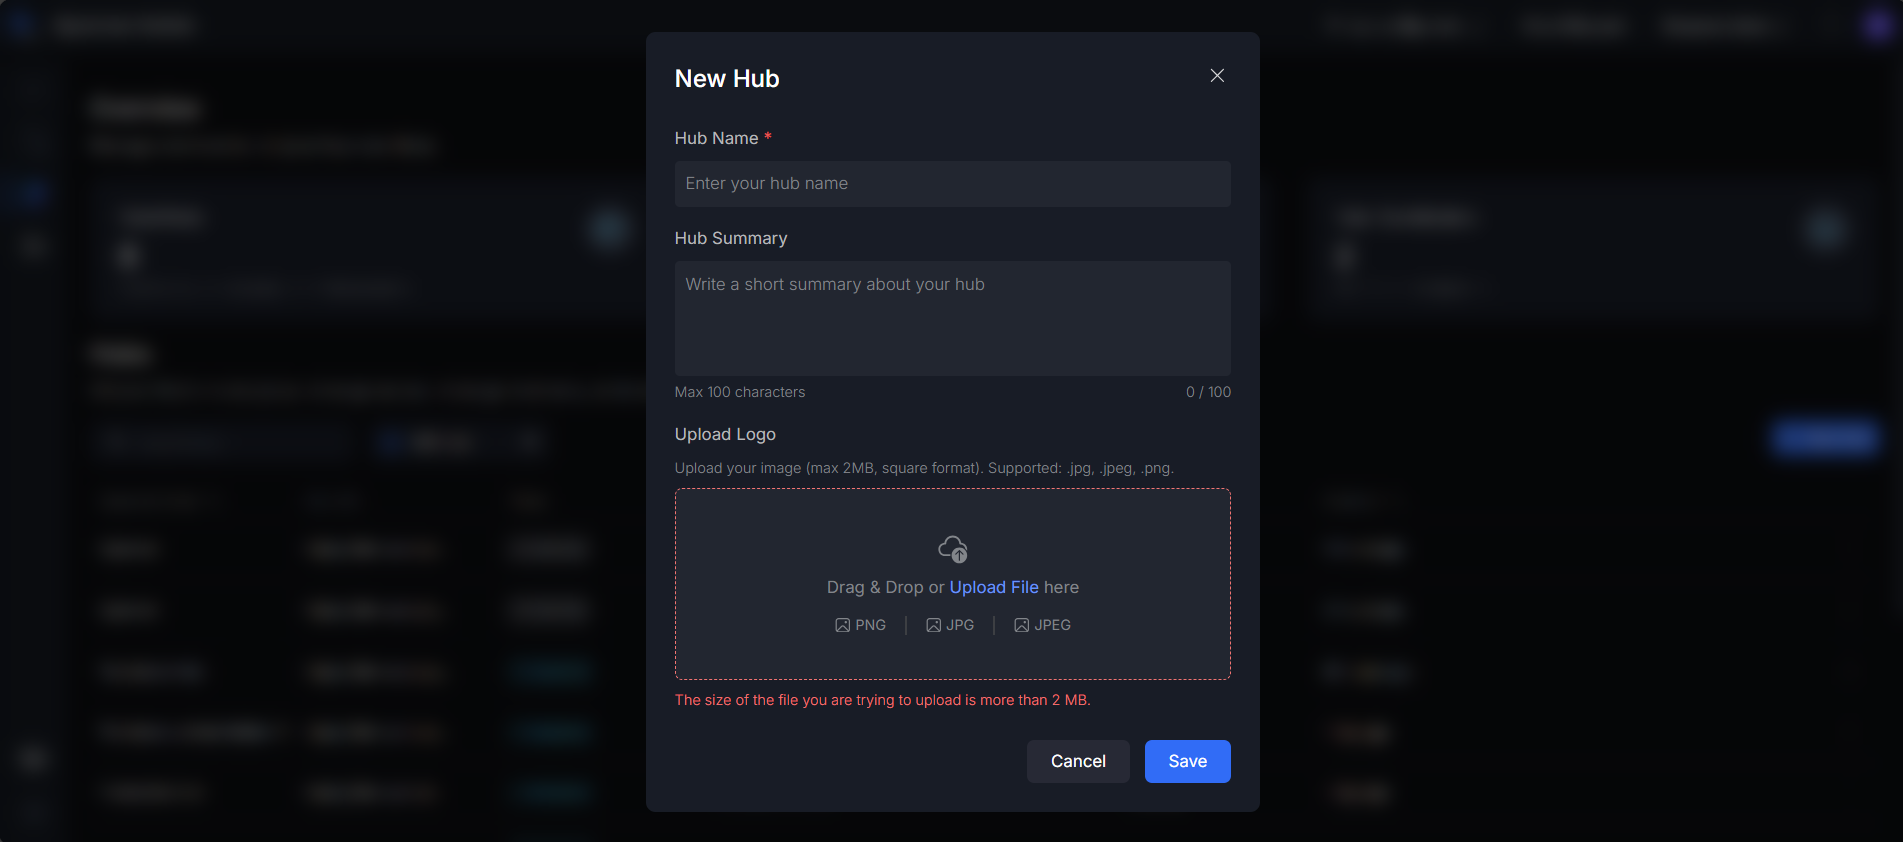
Step 2: A pop-up window will appear, prompting you to enter the necessary details for the new Hub. It shows Hub Name, Hub summary and Logo Option for the Hub.
- Hub Name: You have to type your Hub name.
- Hub Summary: You can add the Summary about your Hub. E.g.: Why you created the Hub for.
- Upload Logo: You can Drag and Drop the image, or you can upload the image from your device.
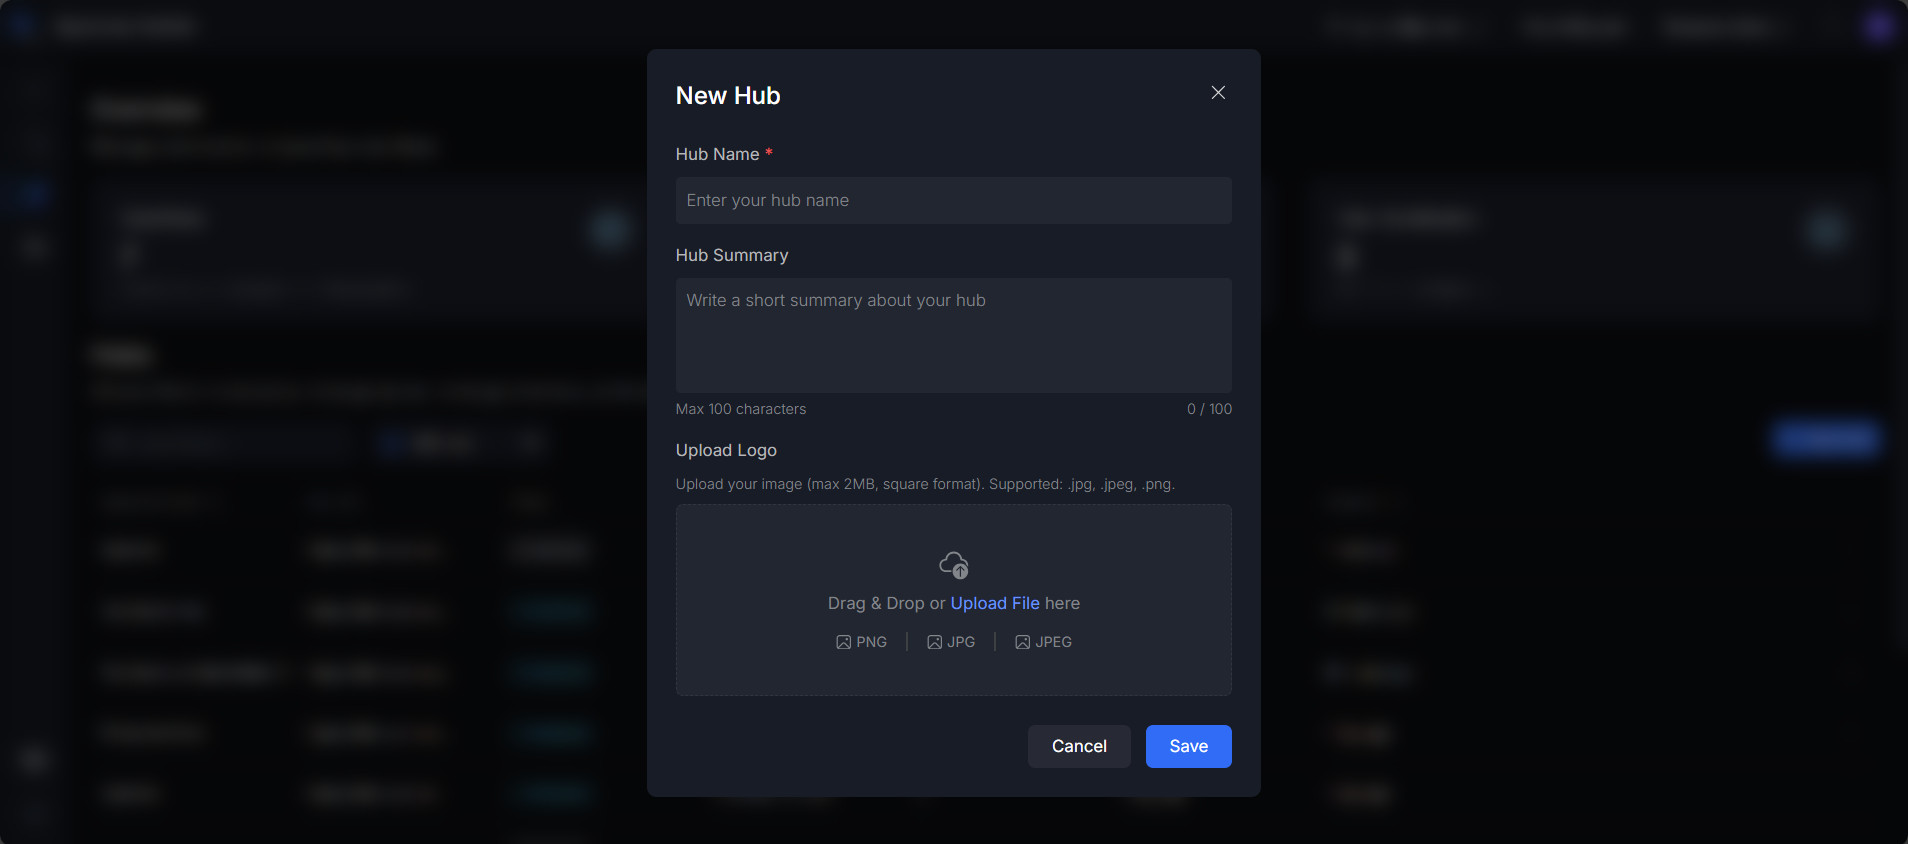
Step 3: Enter the Hub details.
- Hub Name (Mandatory): Enter a unique name for your Hub.
- Caution: You cannot save the Hub without providing a name, as this is a mandatory field.
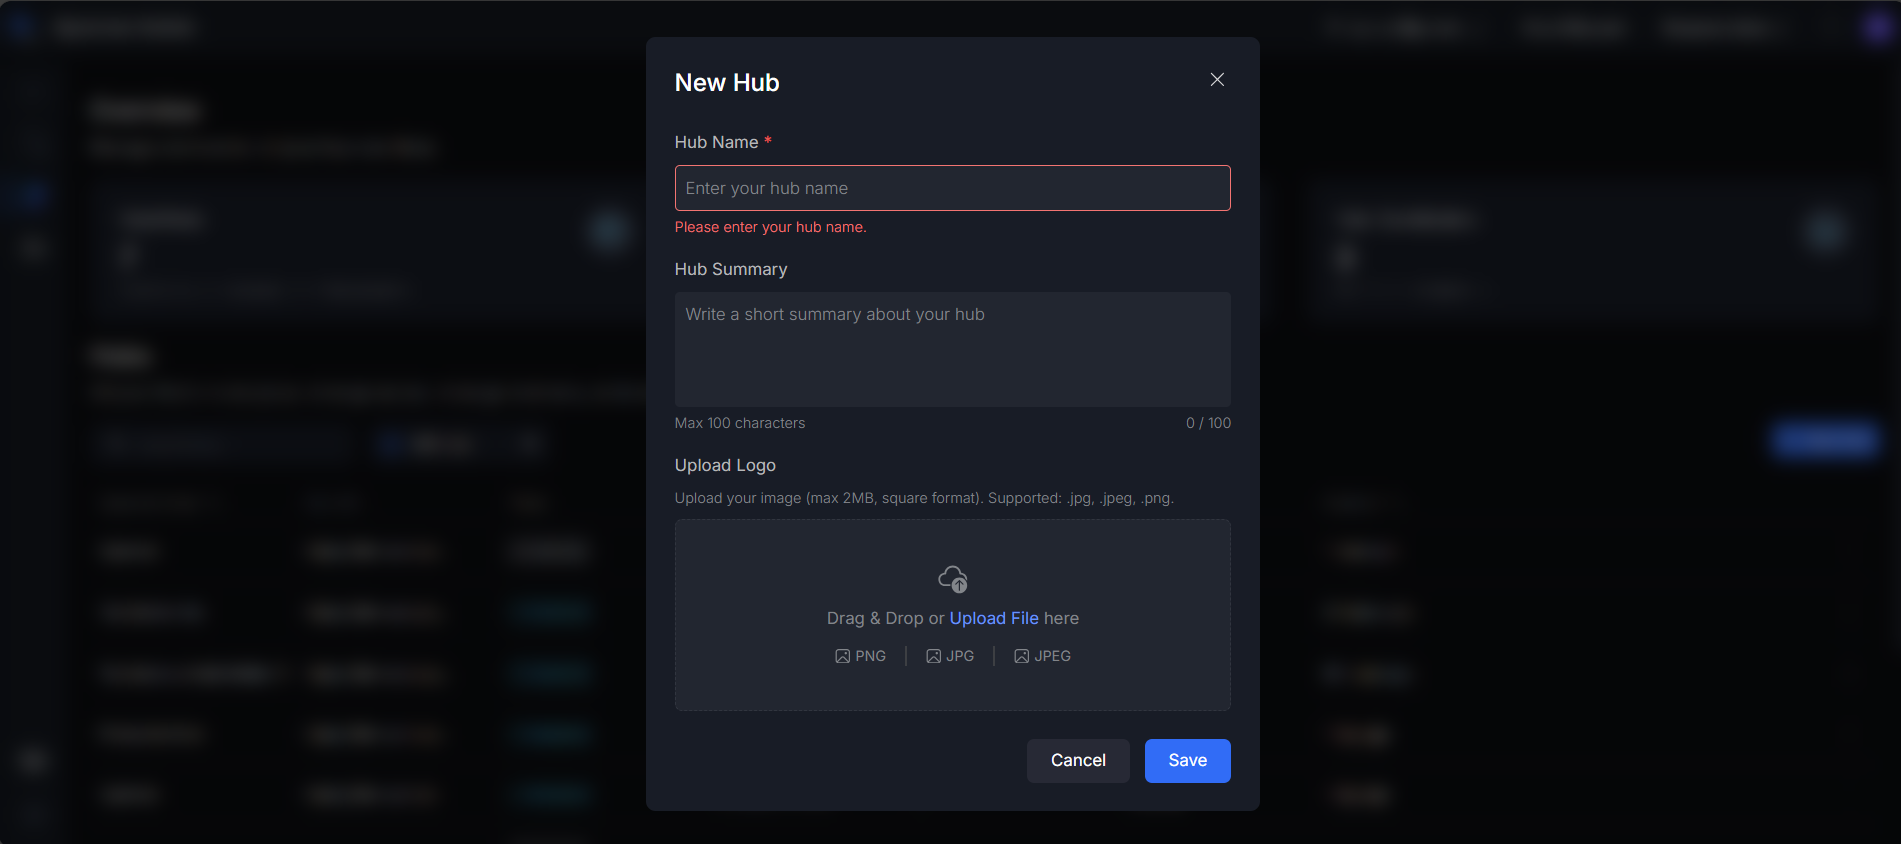
- Caution: You cannot save the Hub without providing a name, as this is a mandatory field.
- Hub Summary (Optional): You may enter the Summary of your Hub.
- Upload Logo (Optional): You may upload a logo file to represent the Hub.
- Restrictions for Logo Upload:
- The file size must be less than 2 MB.
- The file must be in one of the supported formats: .jpg, .jpeg, or .png.
- Restrictions for Logo Upload:
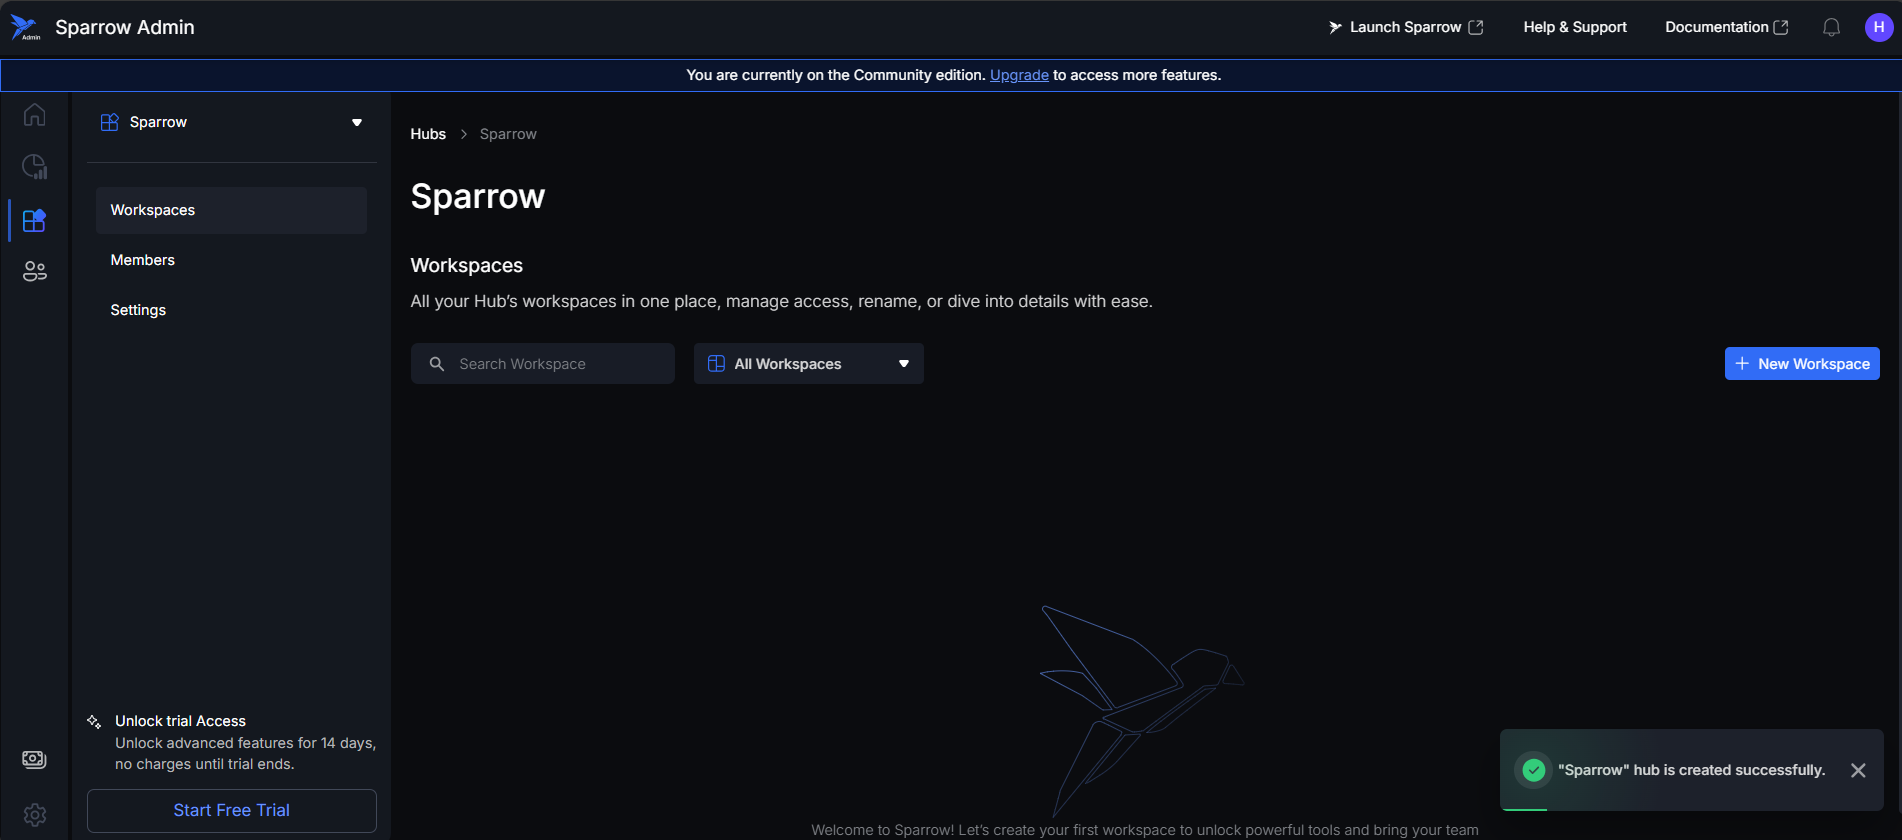
Step 4: Click on the Save button, to save and create a New Hub successfully.
You can see the Toast message as an indication that your Hub has been created successfully. You will be taken to the Hub page of your newly created Hub.
Please try again in case of failure.
E.g.: Sparrow
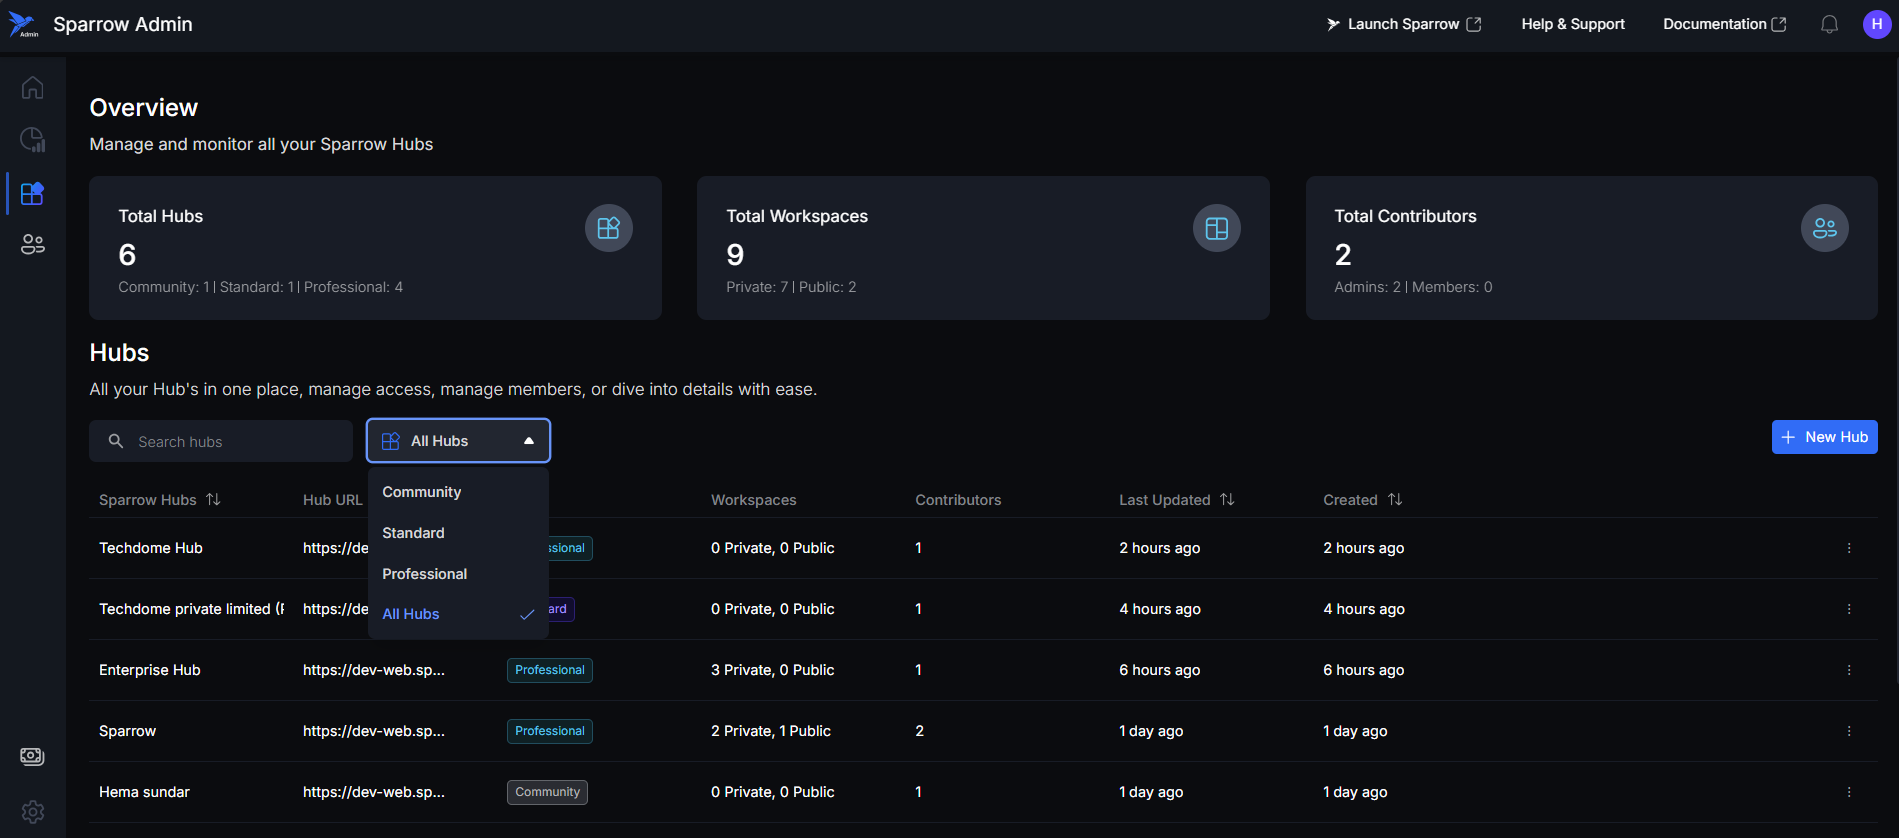
Hubs filter
There is a Dropdown menu over the list view of all the Hubs. This function allows administrators to filter the Hubs list based on the subscription tier assigned to each Hub.
Steps for Filtering
Step 1: Access Filter, Click the filter dropdown (labeled "All Hubs") located above the Hubs table.
A dropdown menu will appear showing the available Subscription Plans, such as: Community, Standard, and Professional.
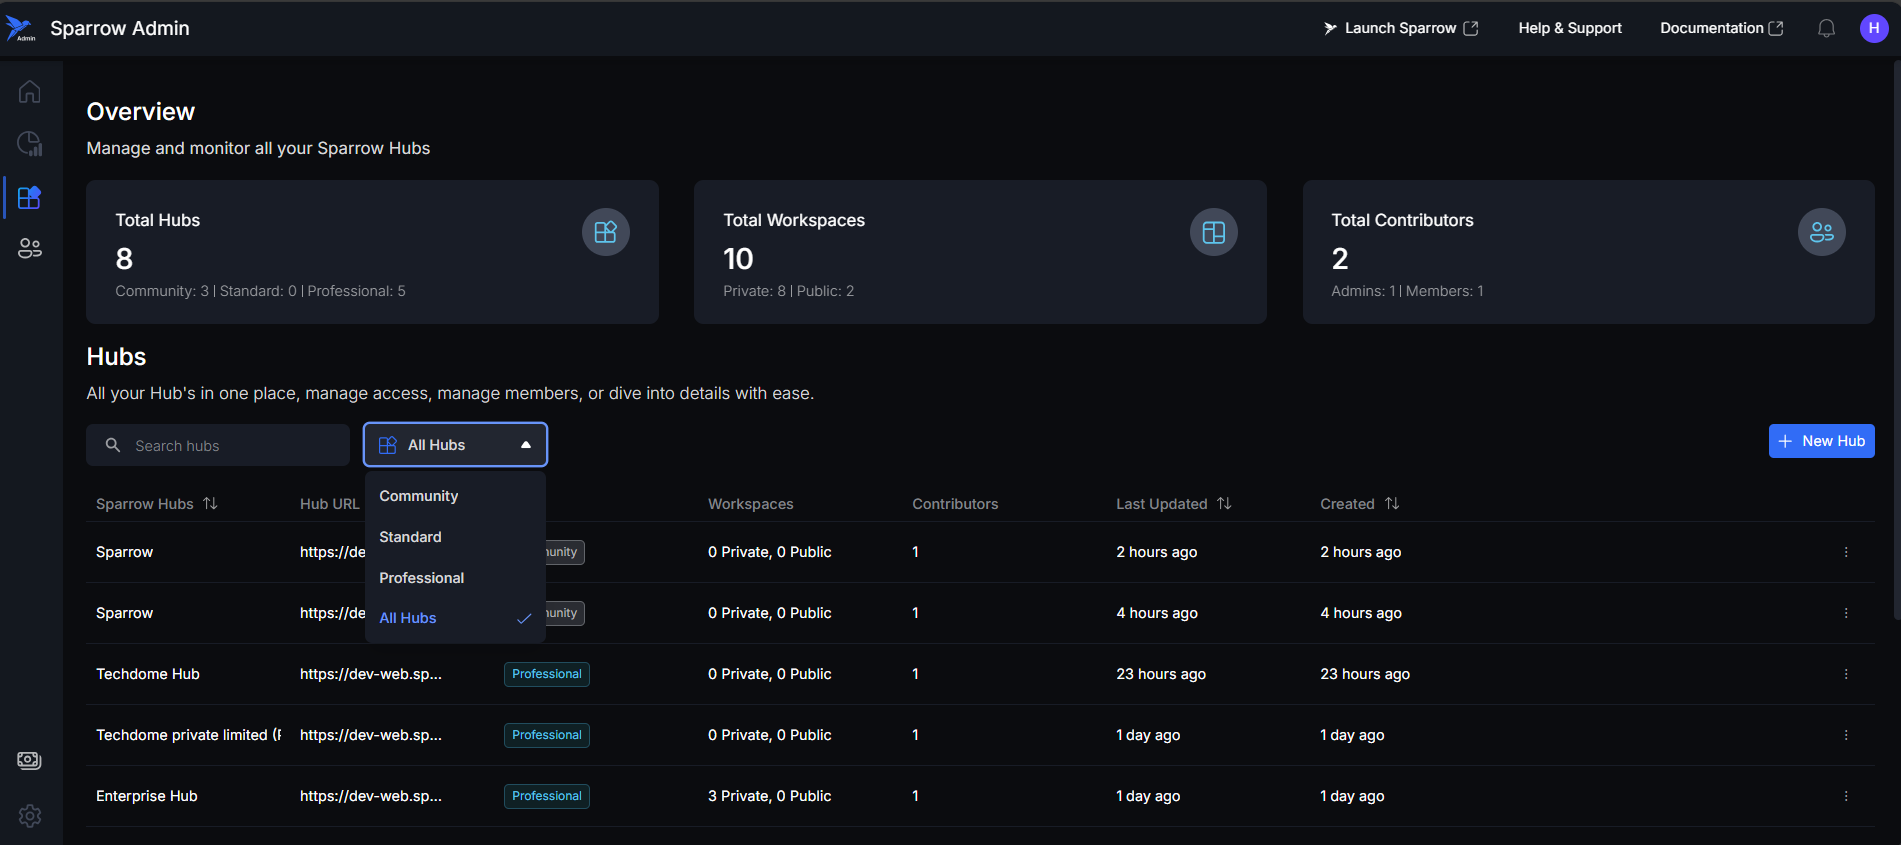
Step 2: Hover over the menu options and click on the desired Subscription Plan (e.g., "Standard"). The Hubs list will immediately update to display only the Hubs related to the selected plan.
Hub management
The three dots menu at the end of each Hub's row allows administrators to access specific management options for that Hub.
Steps:
Step 1: Click the three dots menu icon located on the far right of its row in the Hubs list of the desired Hub. A dropdown menu will appear with the following options: Manage Hub, Manage Members, and potentially an Upgrade option.
Step 2: You can access to different functions in this menu.
-
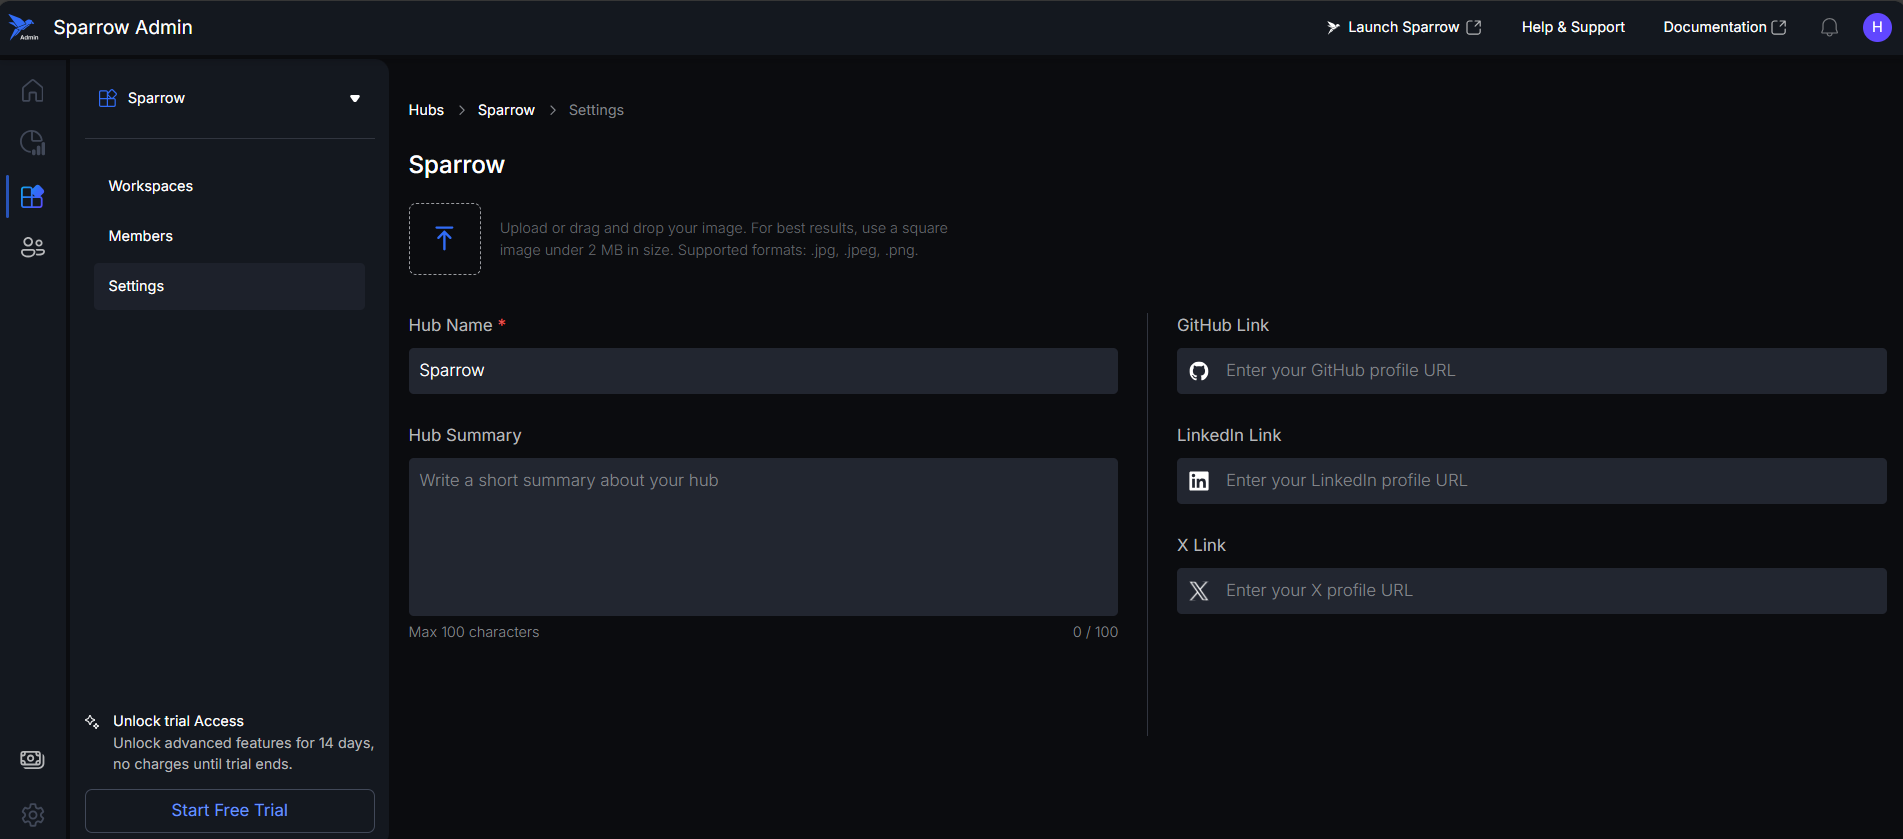
Manage Hub
- Purpose: This option allows you to access and modify the foundational settings and configuration details of the selected Hub.
- Action: Click Manage Hub to be redirected to the dedicated Hub Settings page.
-
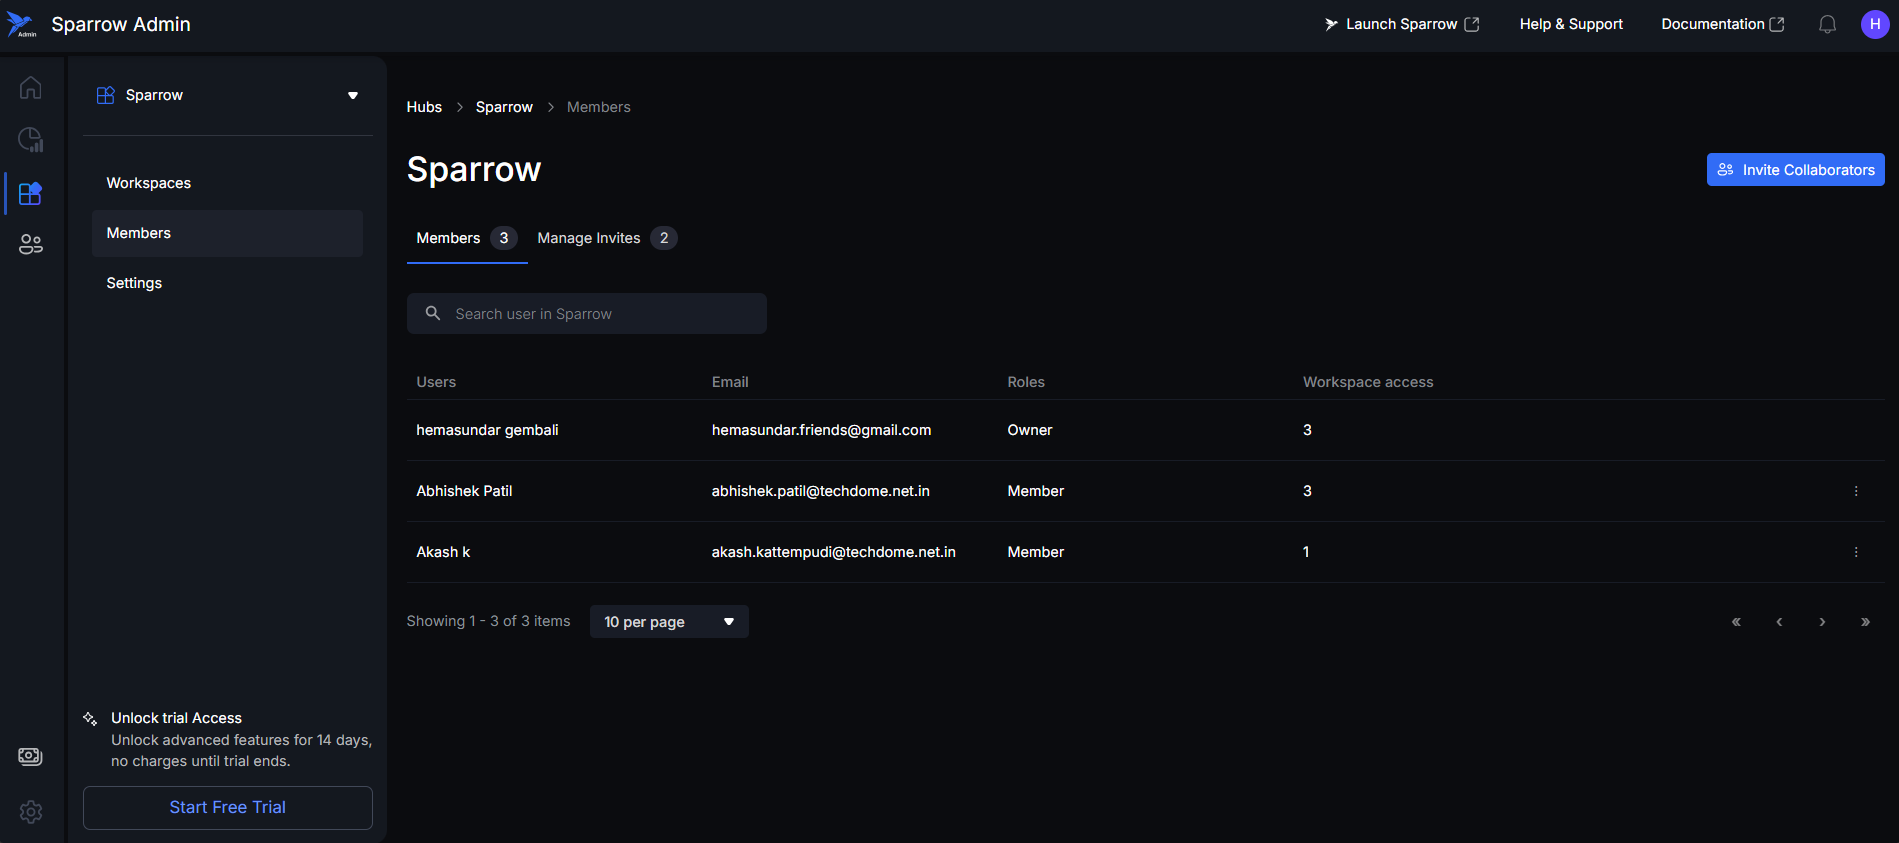
Manage Members
- Purpose: This provides an administrative view of all users and collaborators associated with the specific Hub.
- Action: Click Manage Members to navigate to the Members Overview page, where you can see a list and details of all related Hub members.
-
Upgrade Option (Conditional Visibility)
- The visibility of the Upgrade option is dynamically determined by the current plan tier of the selected Hub.
- Professional Plan Holders: If the Hub is currently on the Professional plan, the upgrade option will not be displayed, as it is the highest tier.
- Standard Plan Holders: If the Hub is on the Standard plan, the option to upgrade to the Professional plan will be available.
- Community Plan Holders: If the Hub is on the Community plan, the option to upgrade to the Standard plan will be available.
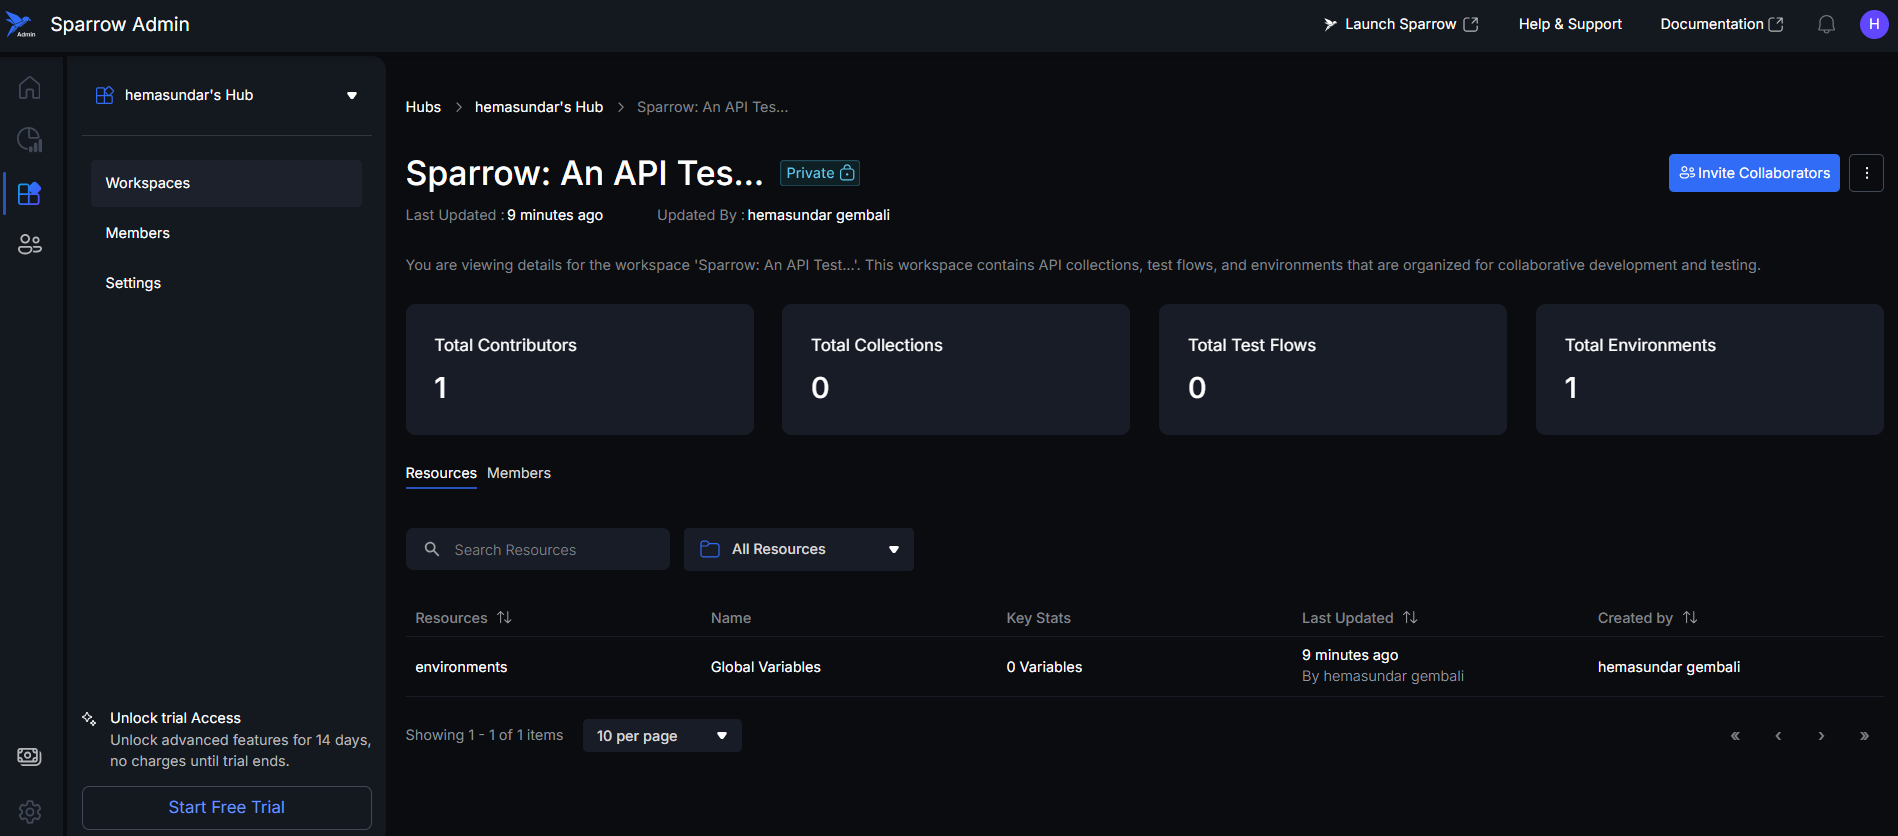
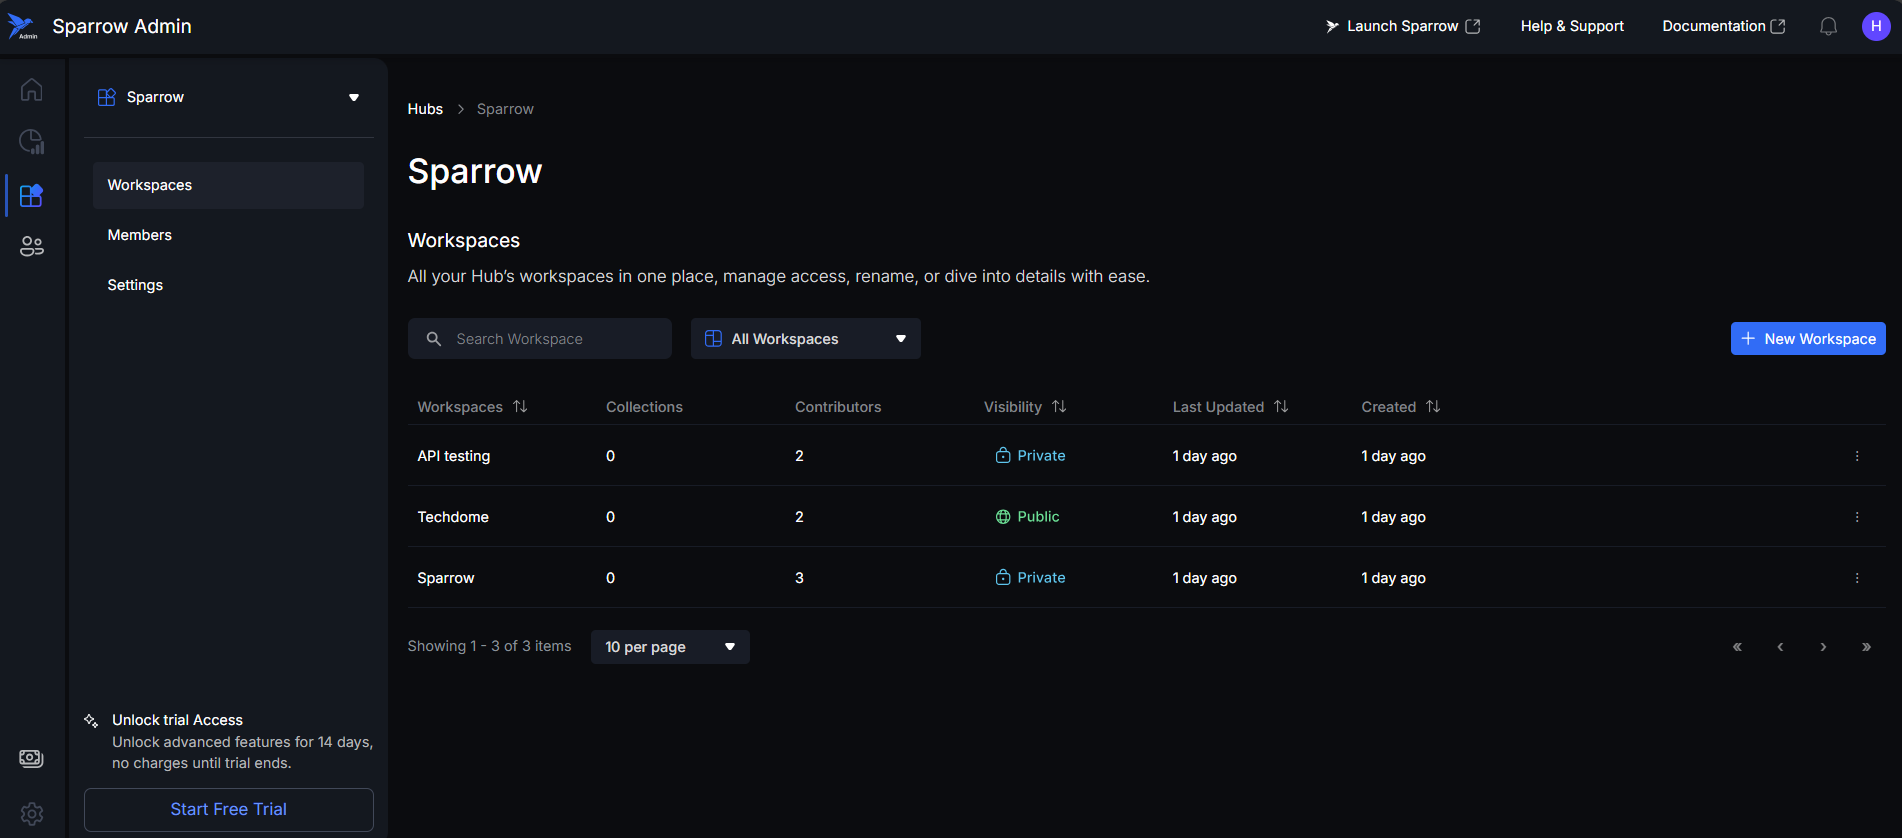
Viewing Hub Details and Workspaces
This section explains how to view the internal details of a specific Hub, focusing on the Workspaces contained within it.
Select a Hub, Click on a particular Hub's name in the Hubs List view. This action opens the dedicated detail page for that Hub. E.g.: Enterprise Hub
Upon entering the individual Hub's detail page, the display of workspaces will vary:
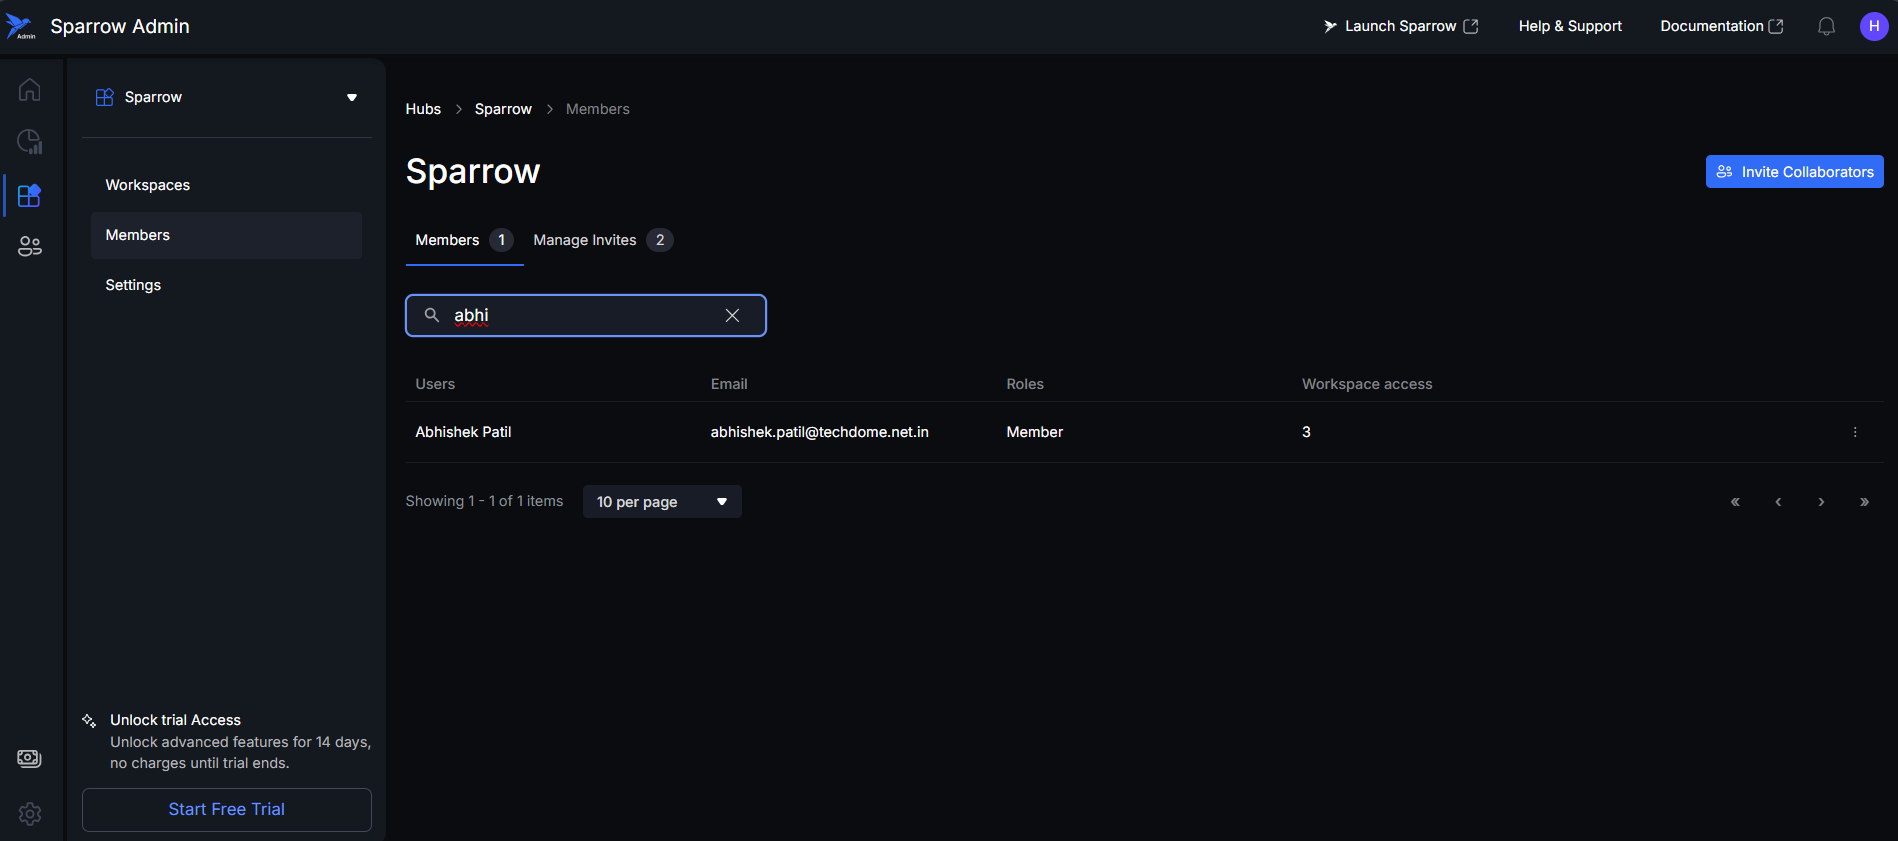
Searching for Workspaces
- If you search for a workspace name that matches existing records, the Hub details page will show the relevant workspace data in a list format.
- If a user types a workspace name that does not exist or does not match any available records, the screen will display a message stating "No results found".
Creating a New Workspace
This process outlines the steps to create a new workspace within your current Hub.
Step 1: Initiate Creation: Click on the "+ New Workspace" option.
Step 2: This action will open a creation modal. Within the modal, it asks for Workspace name which is mandatory and Workspace summary (Optional).
- Fill in Details: Within the modal, provide the following information:
- Workspace Name: This is a required field. Enter a unique and descriptive name for the workspace.
- Workspace Summary: This is an optional field. You may provide a brief summary or description of the workspace's purpose.
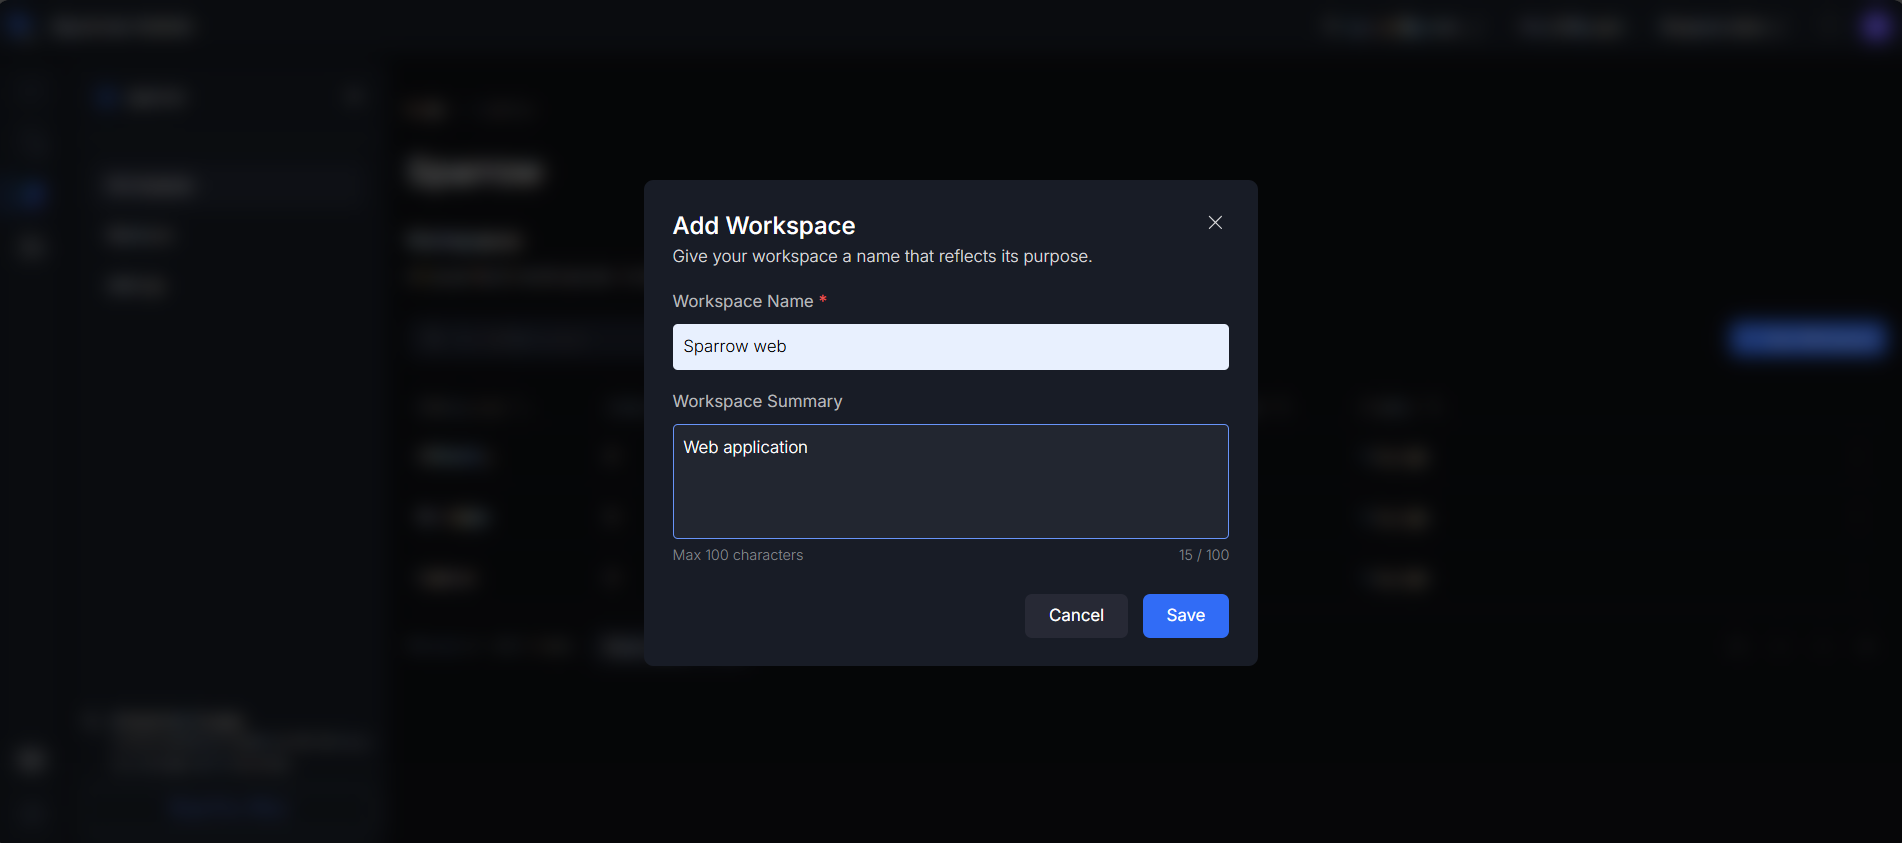
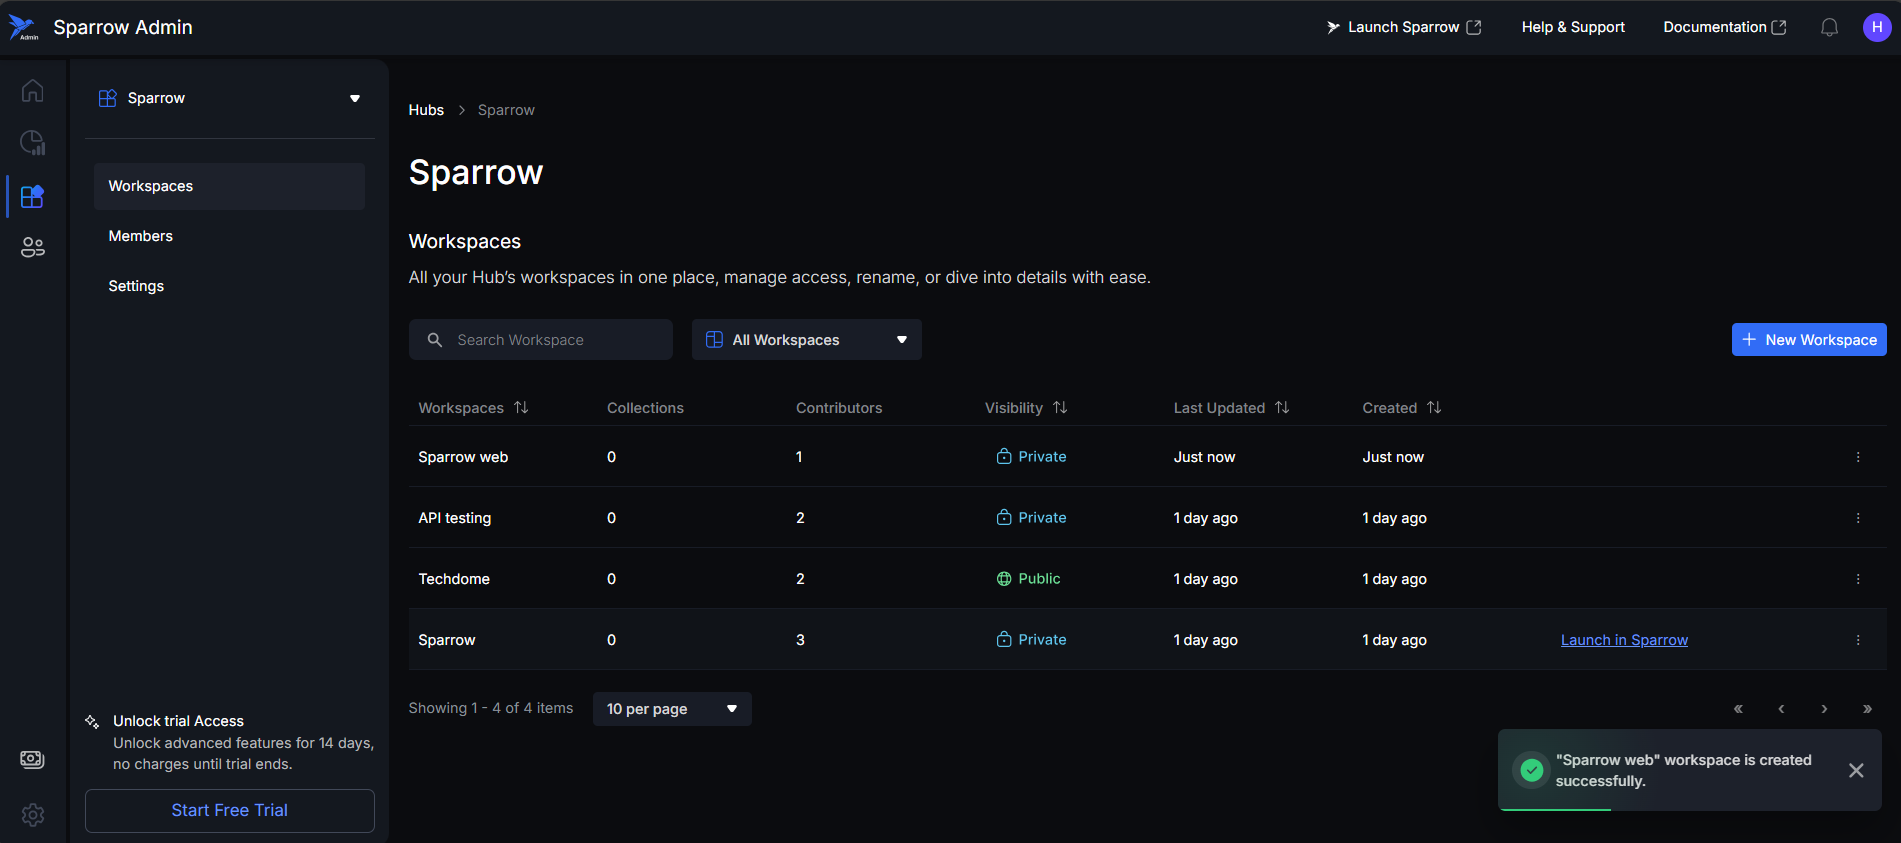
Step 3: Save the Workspace, Once the details are entered, click the Save button.
- Confirmation: After clicking Save, the system will keep you on the workspace list page. A confirmation toast message will appear in the bottom right corner of the screen, indicating whether the workspace was created successfully.
- In case you Failed to create a new workspace. Please try again. Enter the correct details and try again.
Searching and Filtering Workspaces
You can locate a desired Workspace by using the Search Workspace bar and typing in the Workspace's name.
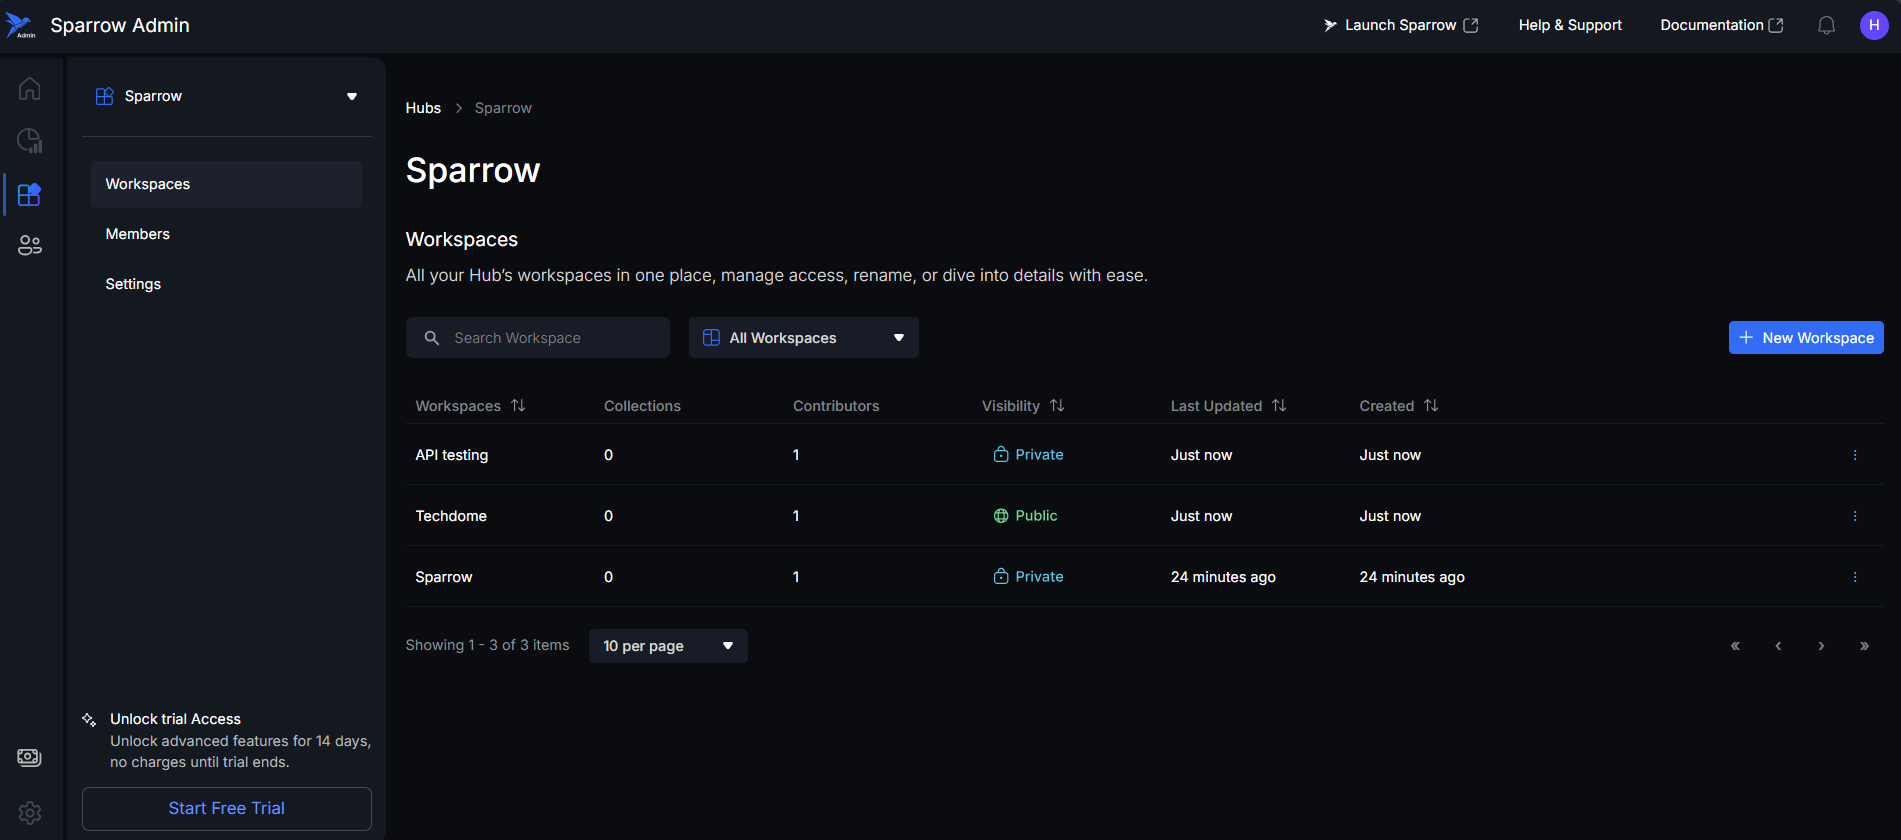
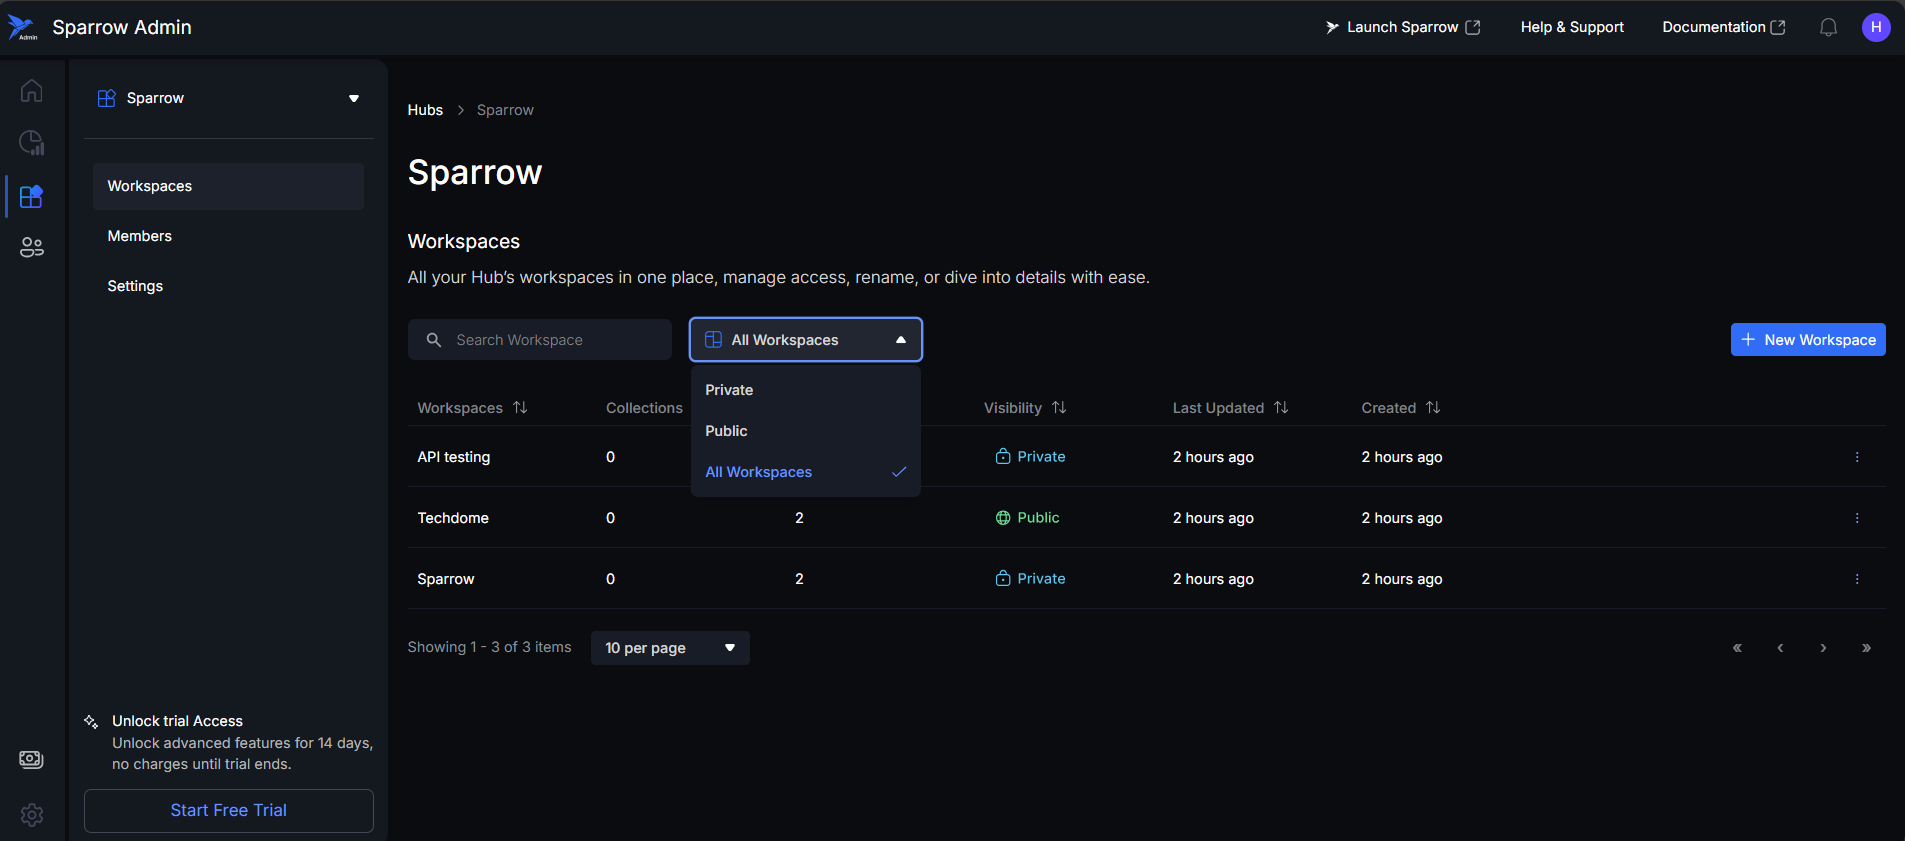
Workspace Visibility Filter
This filter allows users to quickly organize the Workspace list based on its access setting (visibility).
- Function: By clicking the filter dropdown (labeled "All Workspaces"), users can choose to display only Public workspaces or only Private workspaces.
- Result: Selecting an option filters the table to show only the workspaces matching the selected visibility.
Workspace Actions Menu
This section details the actions available for each workspace, accessible by hovering over the row or clicking the action menu.
Steps for Workspace Actions menu:
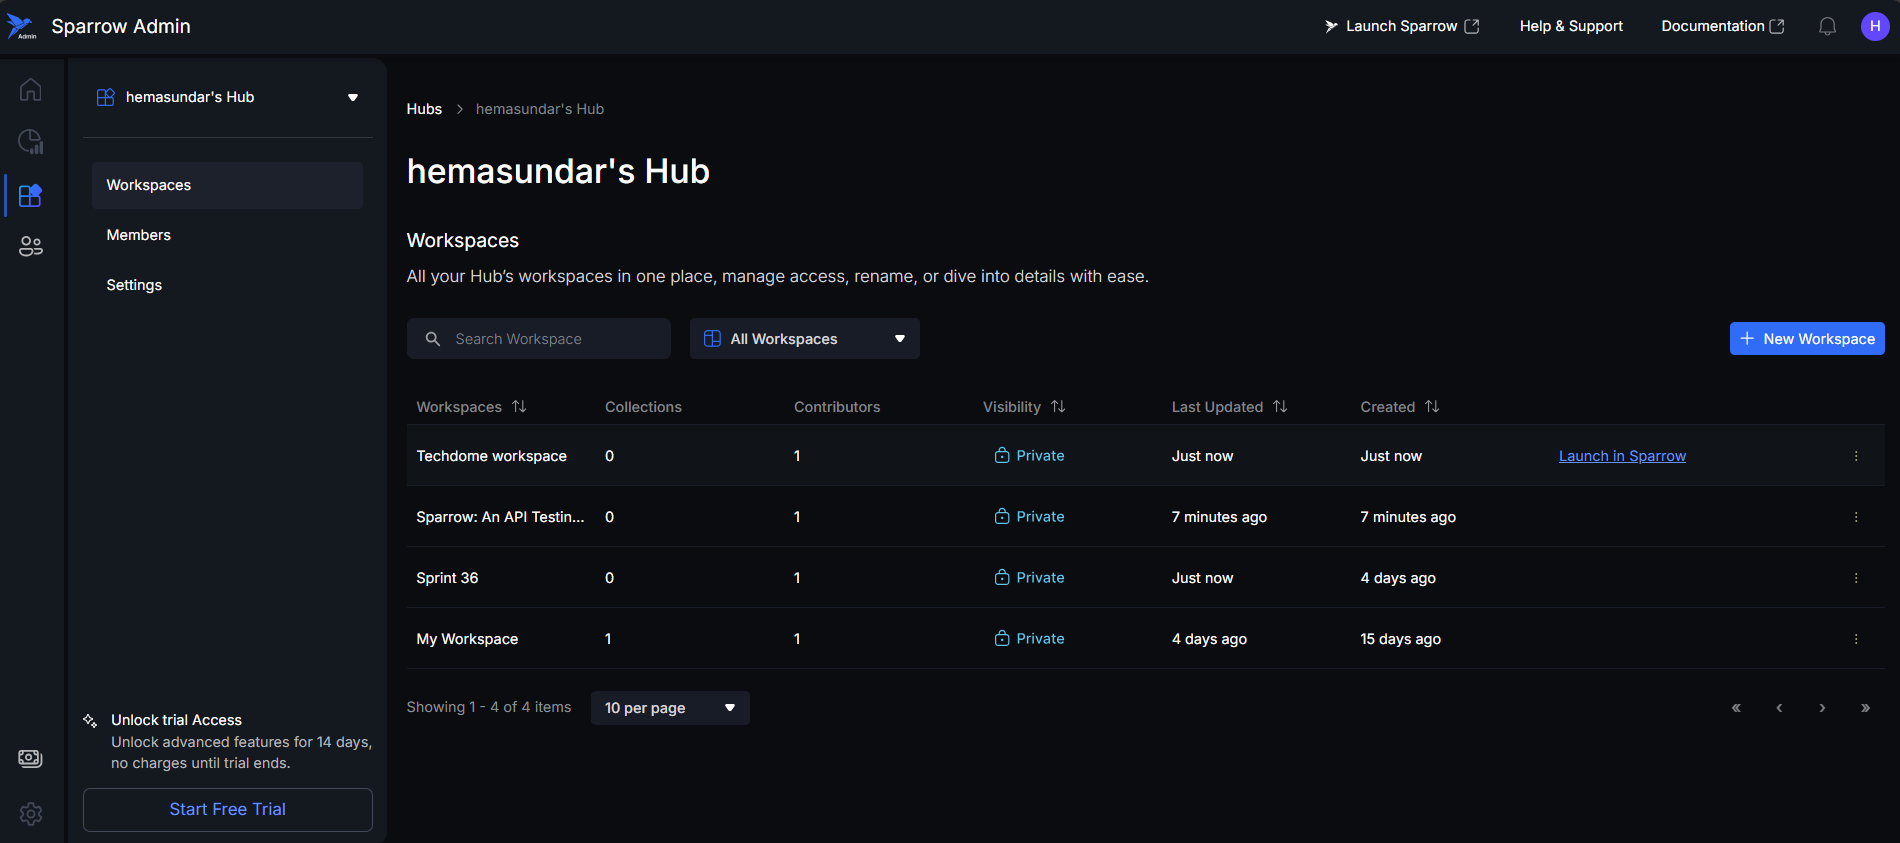
Step 1: Launching the Workspace in the Web App.
- Hover to See Link: When you hover over any row in the Workspace list, a hover effect will appear, displaying the link text "Launch in Sparrow".
Step 2: Clicking on the "Launch in Sparrow" link will navigate you directly to the selected Workspace page in the Sparrow web application.
Accessing Management Options
Step 1: When you hover over the action button (represented by three vertical dots) at the end of the workspace row, a hover effect will be displayed. Clicking the action button will display a dropdown menu with management options: Manage Workspaces and Manage Members.

Step 2:
- Clicking “Manage Workspace” takes you to the My Workspace page, which includes details like contributors, update history, usage statistics, and resources (collections, environments, test flows). Provides a comprehensive overview of the workspace's entire content and resources.
- Clicking on the “Manage Members” will open the Workspace details page where we manage members for the particular Workspace. Used to control the access and roles of users within this specific workspace.